
Hello everyone! Hope you’re having a great week so far!
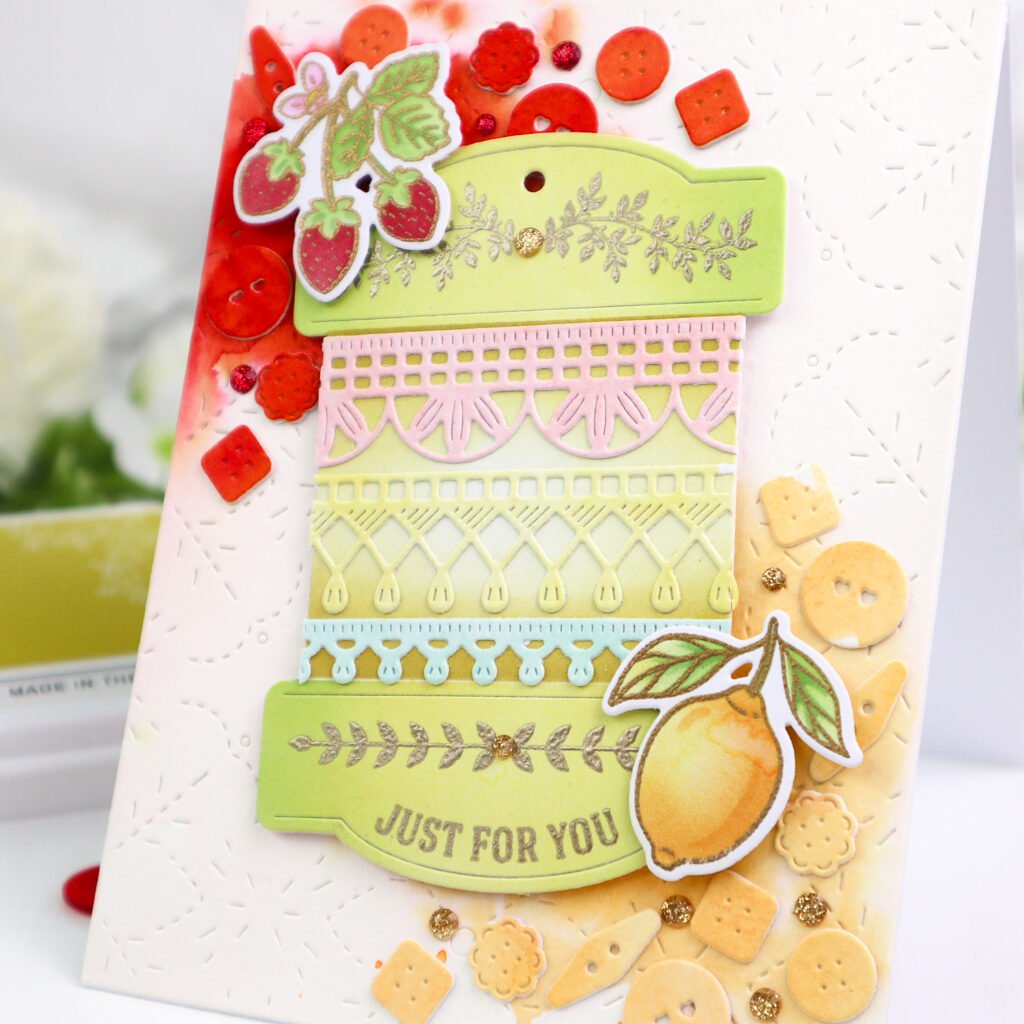
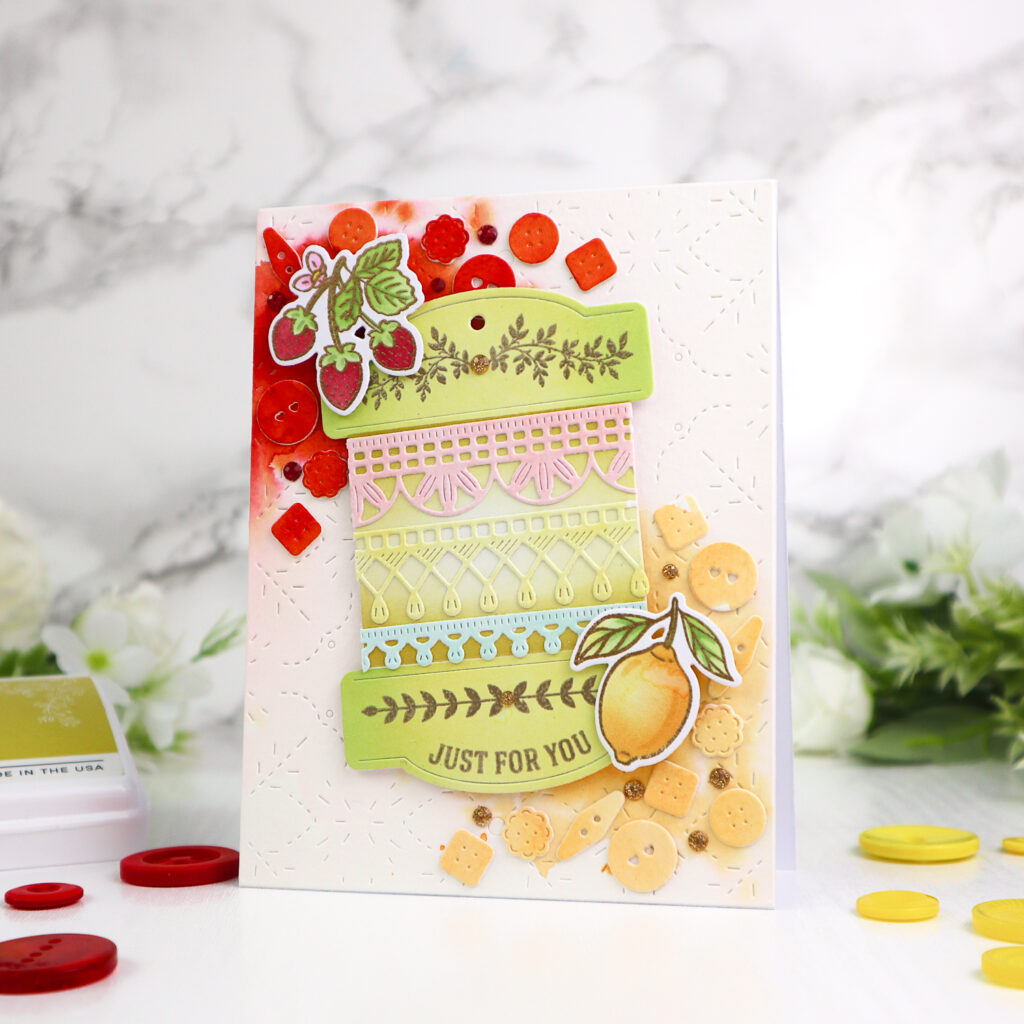
I’m on Pinkfresh Studio blog today with a fun and colorful card for the sewing lover in your life, featuring some unique items from the “Homespun with Heart” Release. I decorated The Stitch Edit: Large Spool with delicate lace trims from the Heritage Lace set and sweet accents from the Freshly Picked suite to give it a charming feel.
By adding the tiny buttons from The Stitch Edit: Notion Story die set to the watercolored background, I was able to bring everything together and create a cohesive sewing-inspired design that feels extra special!
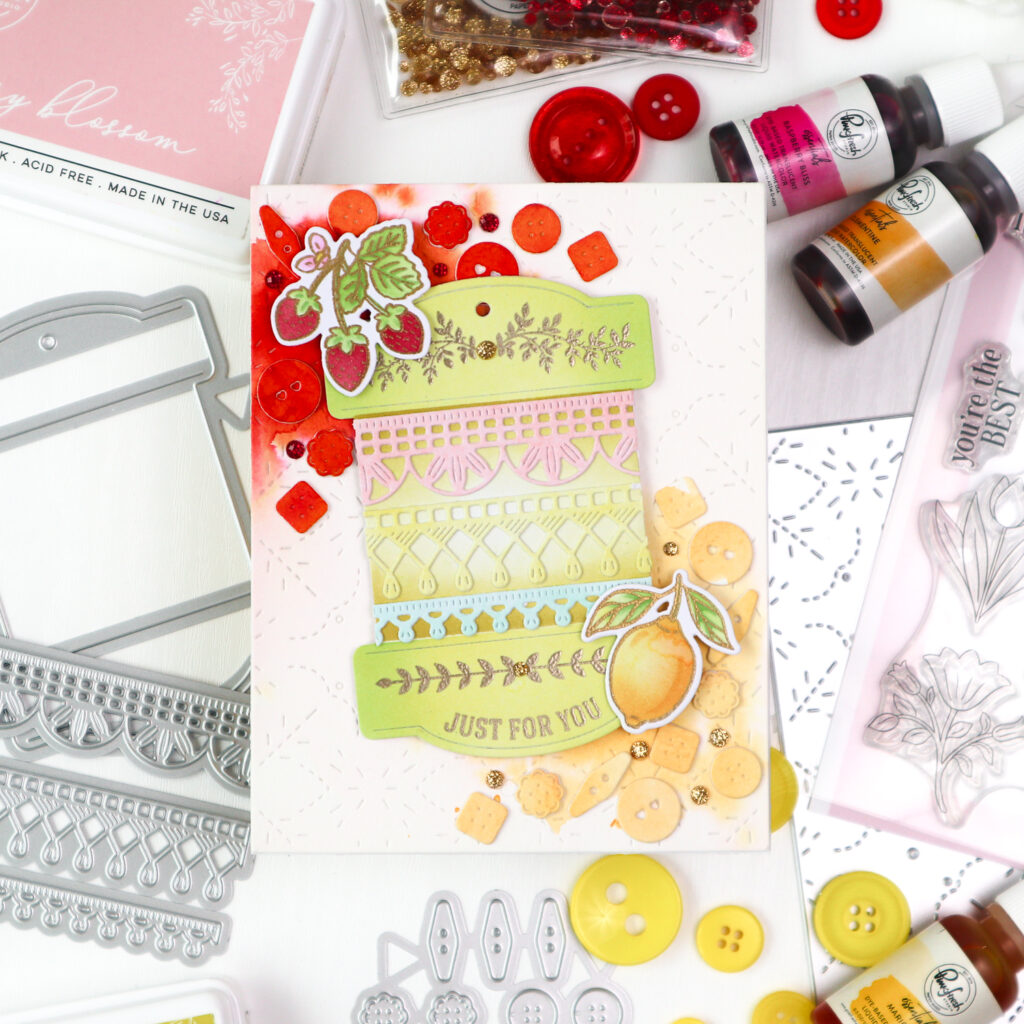
I started by stenciling The Stitch Edit: Large Spool.
- The top and bottom sections were blended in Citron, with a touch of Grassy Knoll on both sides
- The center section was ink blended in Bay Leaf .and Spanish Moss.
After die cutting the large spool with the coordinating die, I heat embossed the decorative patterns and sentiment from The Stitch Edit: Heartmade Details stamp set in gold on the top and bottom sections.
For the lace trims, I ink blended three pieces of white cardstock in Cherry Blossom, Lemon Whip, and Mint, then die cut them using The Stitch Edit: Heritage Lace dies. I adhered the laces across the spool and trimmed the excess for a clean finish.
The sweet fruit elements come from the Freshly Picked stamp set. I heat embossed the images in gold before stenciling them using coordinating stencils in following colors:
- Leaves: Citron, Grassy Knoll
- Strawberries: Berrylicious
- Flowers: Sparkling Rose, Bubble Gum
- Lemon: Sweet Mustard, Marigold
After die cutting with the coordinating die, these cheerful accents were ready to embellish the spool.
For the background, I worked on an A2 panel of Premium Watercolor Paper.
First, I applied clean water to the panel and then added Premium Liquid Watercolor to two corners:
- Top left: a blend of Raspberry Bliss and Clementine
- Bottom right: Marigold
Once dry, I die cut the panel using the Petal Mosaic die to add subtle stitched texture.
I also watercolored scrap pieces in the same shades and die cut buttons using The Stitch Edit: Notion Story die.
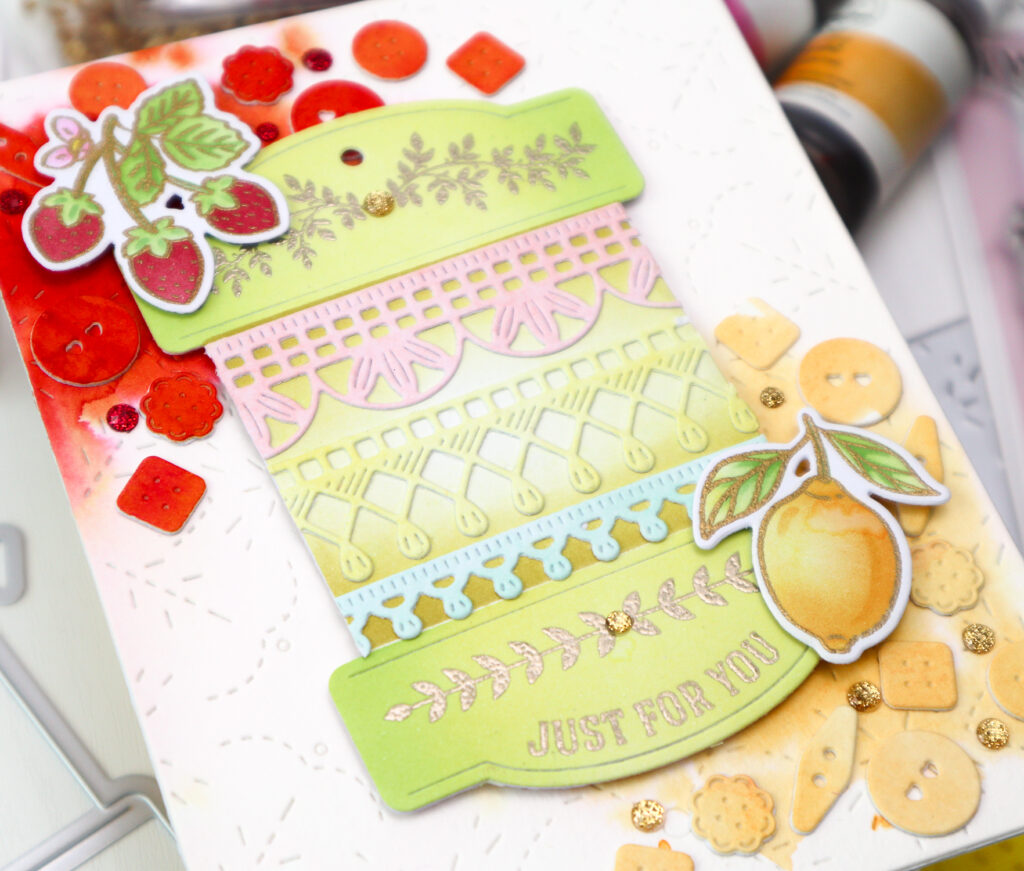
Next I started assembling the card. First I adhered the finished background to a white card base and foam mounted the Large Spool in the center. The strawberry and lemon images were added to decorate the spool, and I scattered the red buttons into the red area of the background and the yellow buttons into the yellow area for a balanced look.
To finish the card, I added a few Ruby and Gold Glitter Drops for sparkle and shine.
If you want a smooth, seamless blend in your watercolor background, the wet-on-wet technique is the perfect choice. Start by applying an even layer of clean water to your watercolor paper. Then, while the surface is still wet, add your chosen watercolor shades and let them softly flow and blend together before the paper begins to dry.
You can easily mix and match the items from The Stitch Edit collection — they are beautifully designed to coordinate with each other. The sky’s the limit when it comes to layering, combining colors, and creating your own unique sewing-inspired designs!
I hope you’ll have lots of fun creating with this release — just like I did !
Thank you so much for stopping by today!
Wishing you a crafty day!
TaeEun
I participate in the affiliate program of Pinkfresh Studio. It means I earn a small commission at no additional cost to you each time you click through and purchase the product(s) shared here. Thank you for your support 🙂 !
What a fabulous card with the large die cut embellished spool which looks great over the very cleverly designed background with the super pierced coverplate and added smoshing, and then the die cut buttons coloured to match which look great, and the added bunch of strawberries and the lemon add some prettiness to the top and bottom corner too..the sewing theme is a great addition to the Pink Fresh designs. x