
Hello everyone! I hope your week is off to a great start!
I’m on the Pinkfresh Studio blog today, sharing a fun interactive slider card featuring the Darling District and Fragrance Notes product suites.
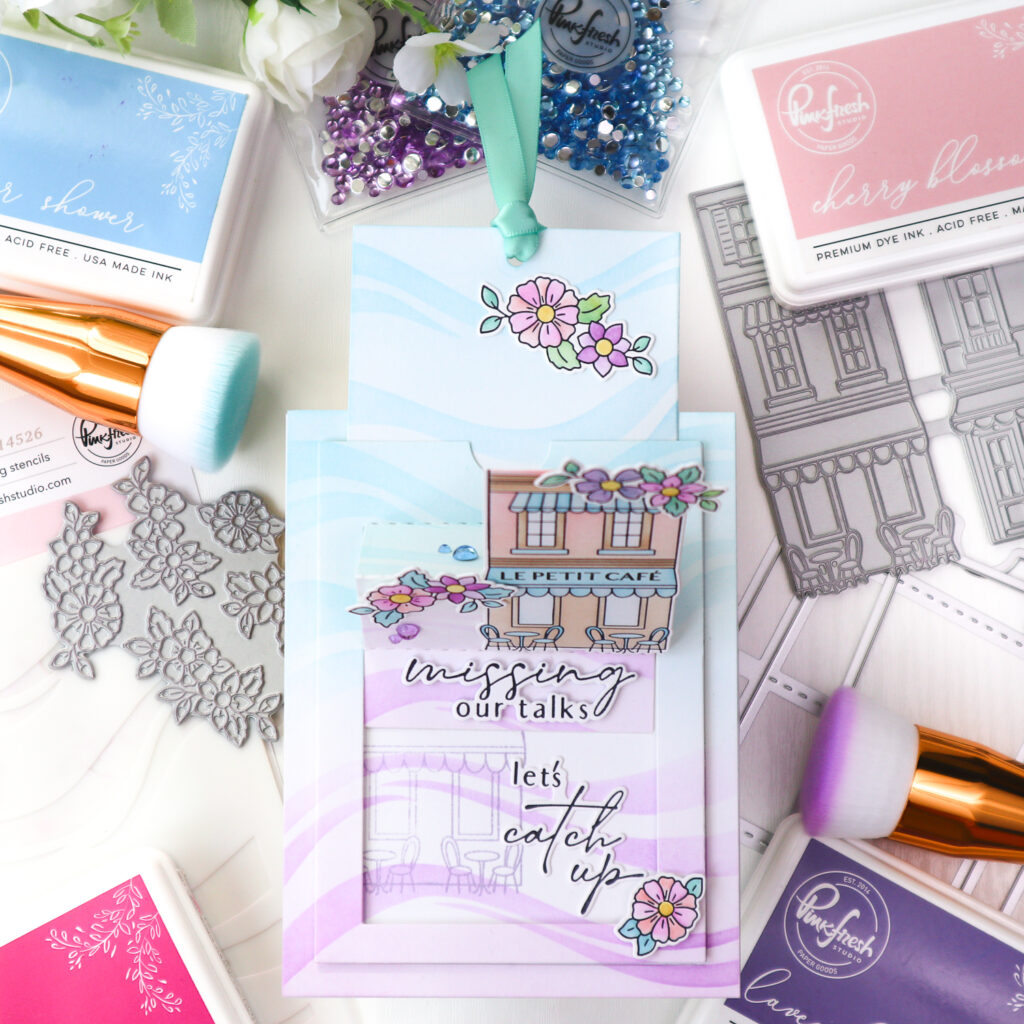
For this card, I used again one of my favorite color palettes – blue and purple to create a fresh and delicate café scene. The interactive slider element adds a playful touch to my card. As the slider is pulled, the building gently rises to reveal a cozy space that feels like a place where you can sit back, relax, and enjoy a heartfelt conversation with your friends. The Darling District suite also includes a variety of sentiments that perfectly complement this warm and welcoming atmosphere.
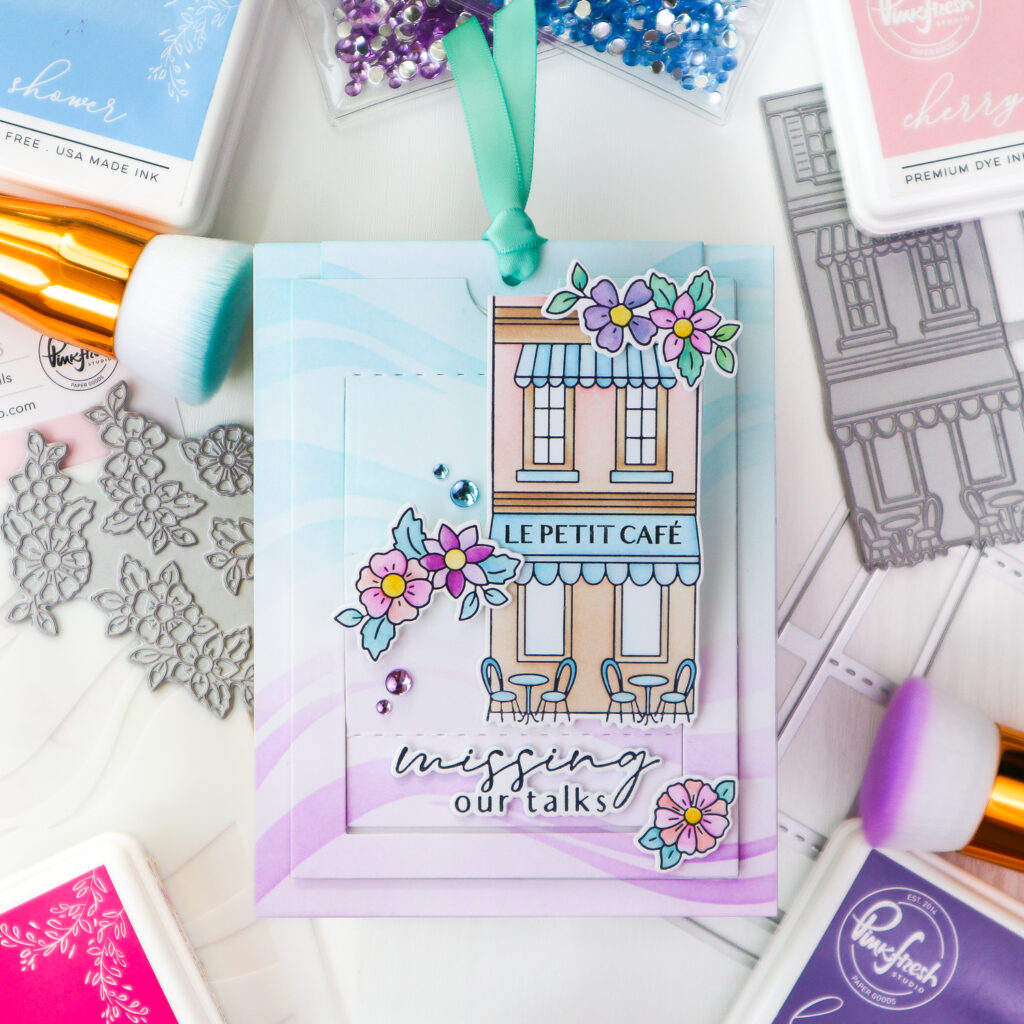
I began by pressing the building image from the Darling District Press Plate and the floral images from the Fragrance Notes Press Plate sets in black onto white cardstock.
Next, I colored all the images using the coordinating stencil sets in following colors.
- Darling District:
- Facade: top with Cherry Blossom, bottom with Warm Buff
- Awning, tables, and chairs: Sky Blue, Summer Shower
- Fragrance Notes:
- Petals: Cherry Blossom, Bubble Gum, Soft Lilac, and Lavender, with a hint of Summer Shower on some purple flowers
- Flower centers: Marigold
- Leaves: Summer Shower, partially mixed with Marigold
I then stamped “Le Petit Café” onto the awning in Detail Black and die cut all the images using the coordinating dies.

To create the background, I started with a white A2 panel and lightly ink blended Soft Lilac at the bottom and Sky Blue at the top. Over this, I stenciled the wavy pattern with Lavender and Summer Shower using the stencil from the Fragrance Notes stencil set, matching the blended areas for a soft, layered effect. The panel was then die cut using the A2 Slider Die.
I also created a second background panel with the same wavy pattern, this time using Lavender only, and stamped the building image on the left side in Wisteria so it would appear when the slider is opened.
After adhering the base background panel to a white card base, I prepared the pull tag by stenciling the same wavy pattern in blue tones and die cutting it.

For the assembly, I attached the outer frame of the slider flat to the card. I folded the slider piece along the crease lines and adhered the bottom of the tag to the back of the slider so it moves upward when the tag is pulled. Foam adhesive was added along the outer edges before securing the slider to the card.
I foam mounted the building onto the front of the folded slider after trimming off the third floor so it fits the card. I then arranged and adhered the floral elements around the design, on top of the building, on the side of the slider, on the tag, and in the lower corner, to frame the scene beautifully.
Next, I pressed the sentiments from the Darling District Press Plate set in Detail Black, die cut with the coordinating dies and added them to the card as shown. Finally I tied an aqua ribbon to the tag, and finished the design with Sky Blue and Lilac Clear Drops for a soft, sparkling touch.
When creating an interactive card, I like to plan the mechanism first so everything has its place and nothing blocks the movement. It’s also a good idea to test the slider before final assembly to make sure it moves smoothly.
I hope you feel inspired to give this slider design a try! It’s so much fun and adds a special touch to your projects!
Thanks so much for stopping by, and happy crafting!
TaeEun
I participate in the affiliate program of Pinkfresh Studio. It means I earn a small commission at no additional cost to you each time you click through and purchase the product(s) shared here. Thank you for your support 🙂 !
This card is amazing. I already expect the next one
This interactive card looks terrific TaeEun and I love the background in the pink and blue with the added wavy stencilling which looks brilliant, and the popped up building and added flowers finish it beautifully…a gorgeous card. x