
Hello! I hope you are all having a restful weekend!
Today I’m sharing some cards I made during practicing coloring with copic markers and colored pencils.
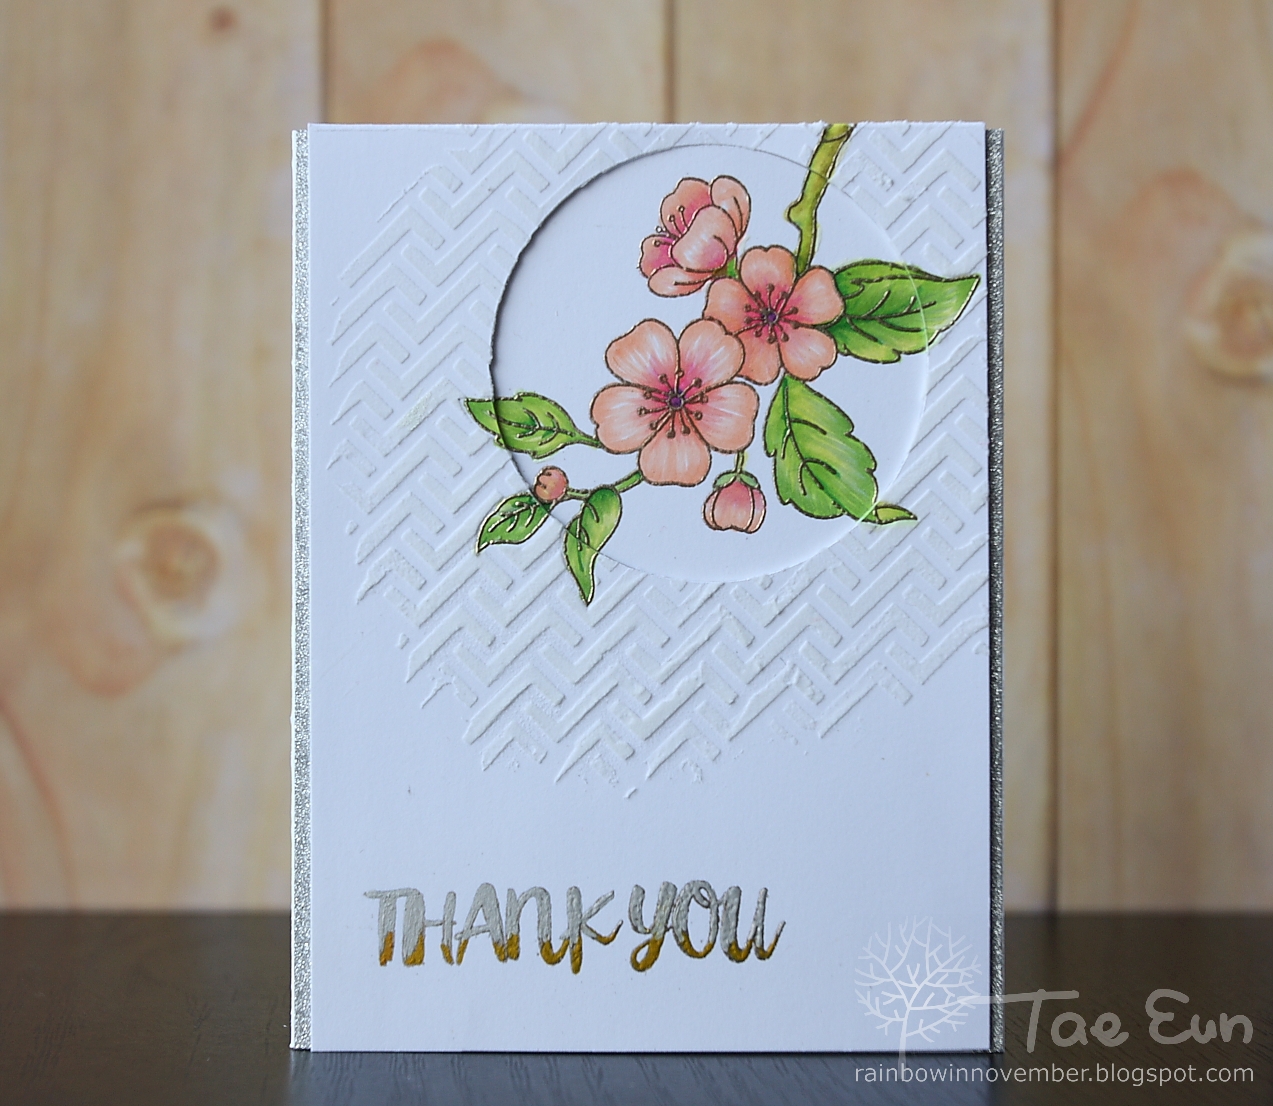
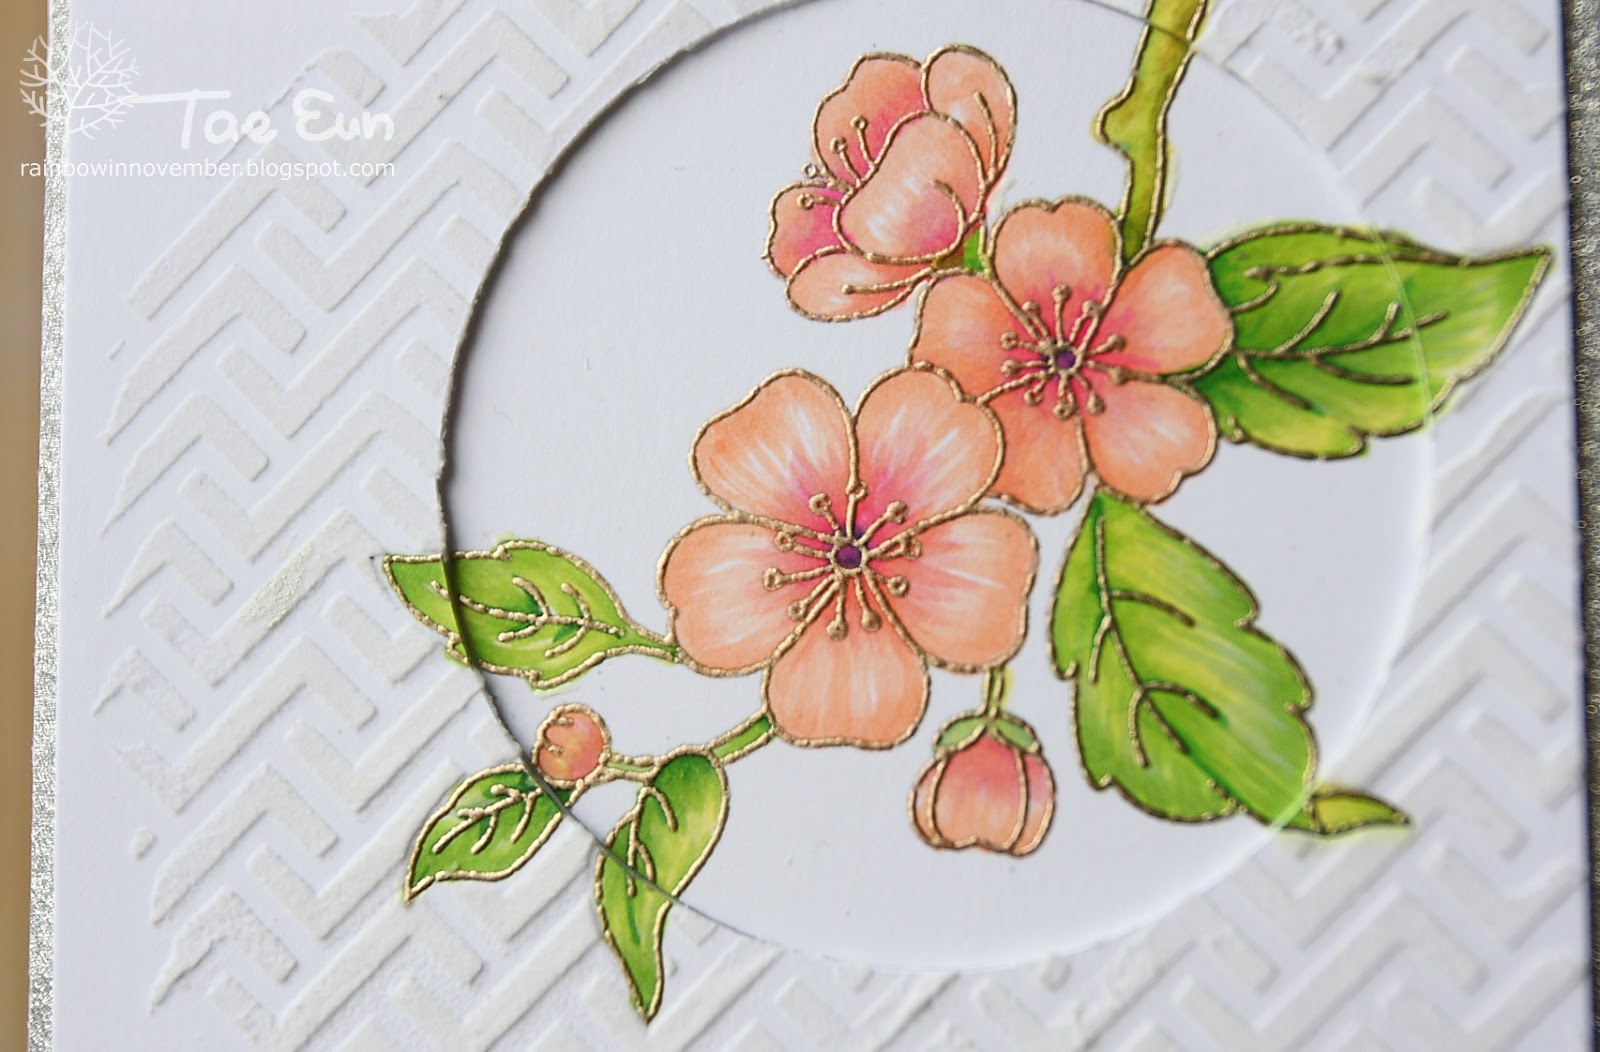
I used the blossom from the Beautiful Friend stamp set by Clearly Besotted. This image was stamped using Angel Pink and Bamboo Leaves Memento inks first, before I colored them. After finishing with coloring, I heat embossed the image using Liquid Platinum EP with the help of the Misti Tool.
Sentiments are from Altenew, Cricut store and Hero Arts.
1. Copic coloring

Here I colored the image using Copic markers. I then cut the circle with my Cricut. The circle was glued flat on the card base. I stenciled some white Embossing paste on the negative panel for more interest. I traced the sentiment with silver and gold gel pen after I stamped it. I added thin strips of silver glitter CS on both sides and mounted the negative panel using foam tape on the card base.


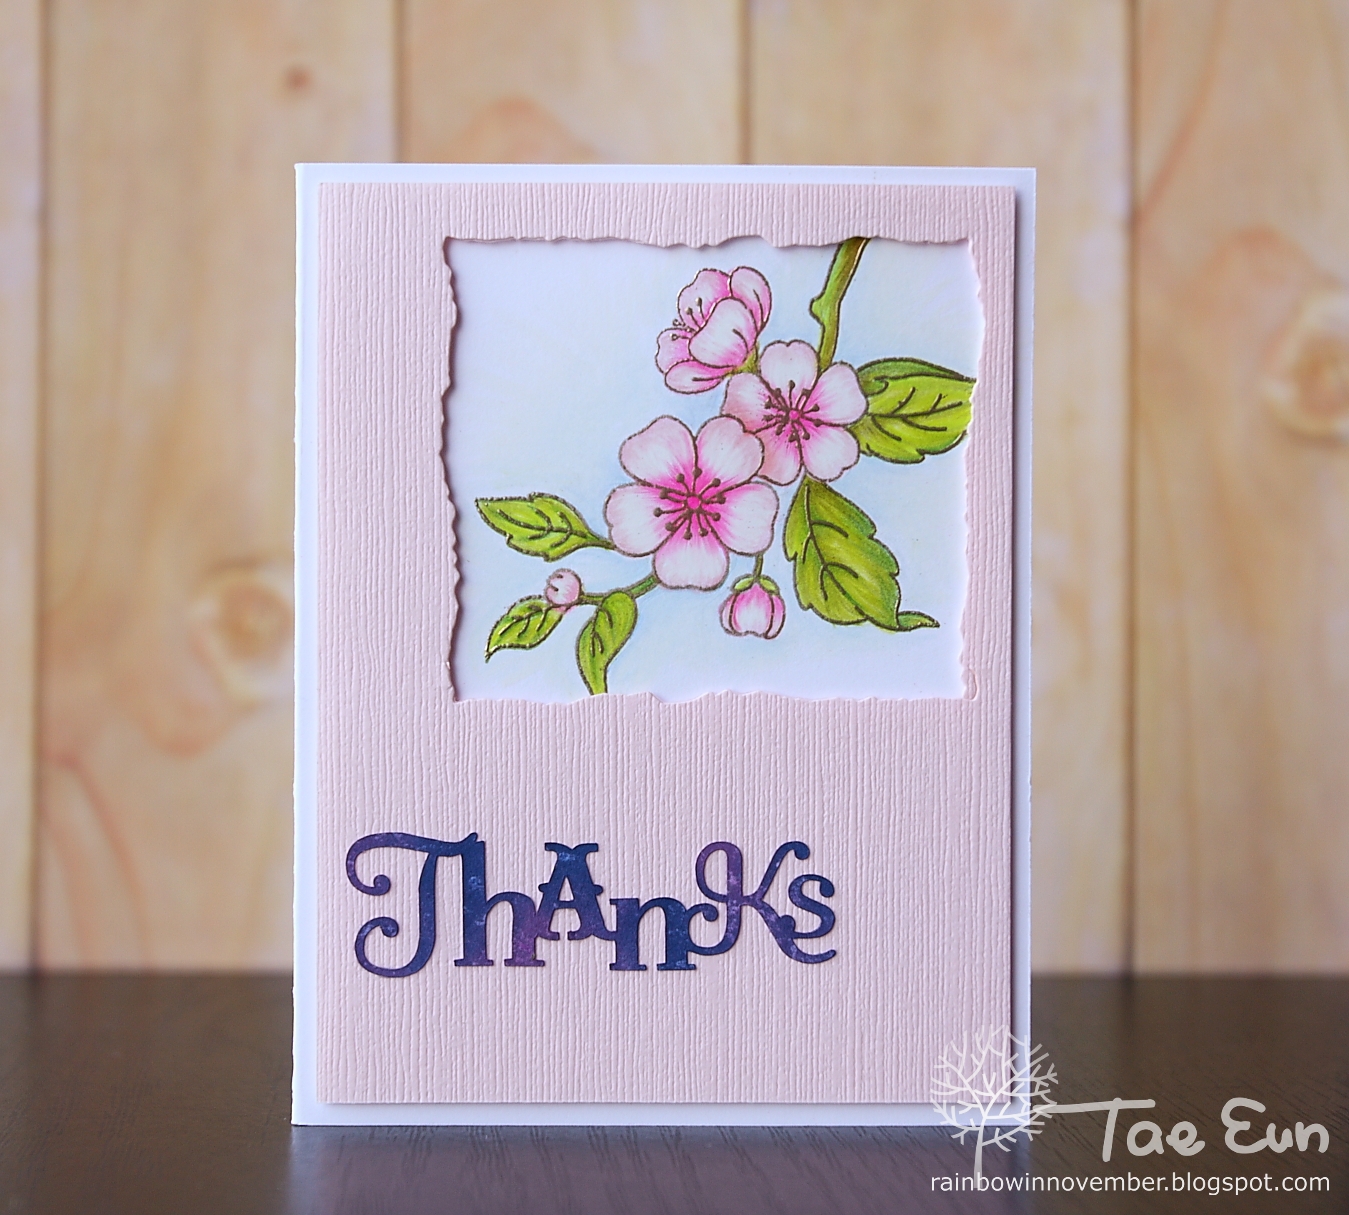
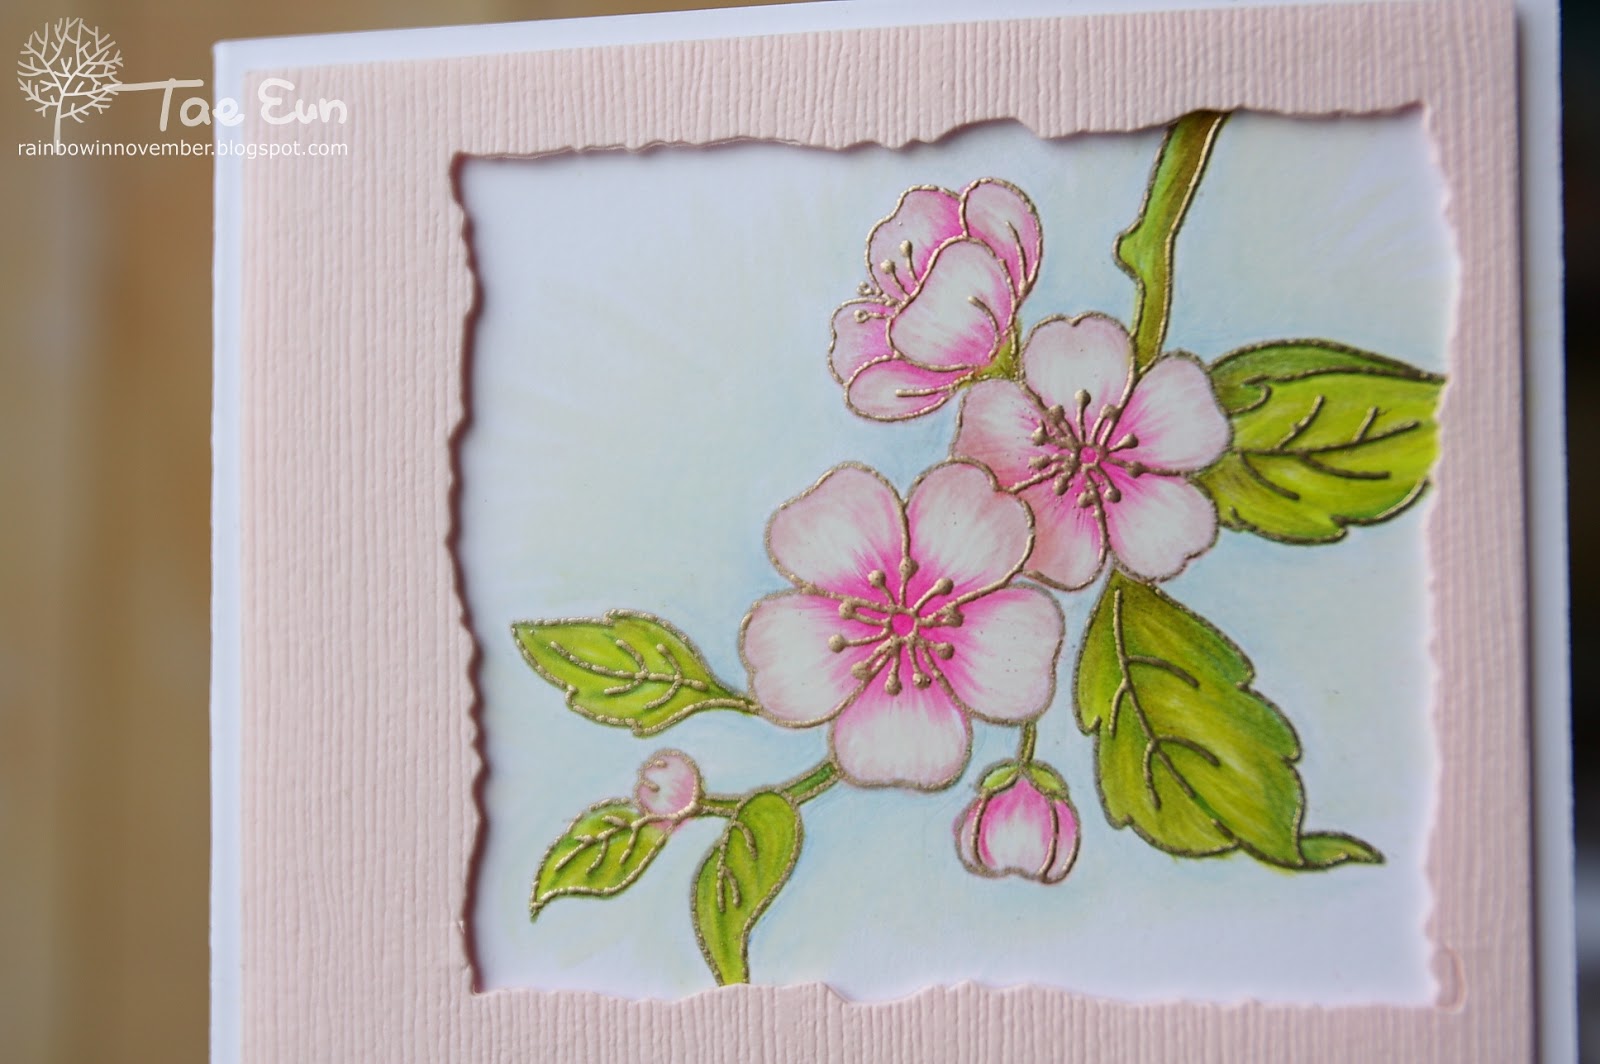
Here I used only Prismacolor pencils to color the image. The front panel was cut from a Tutu pink CS. I cut the window using Distressed Edges die and mounted the front panel using foam tape on the card base.
The sentiment from Cricut store was cut with my Cricut from a piece of CS which was blended in purple and pink and splattered with water.

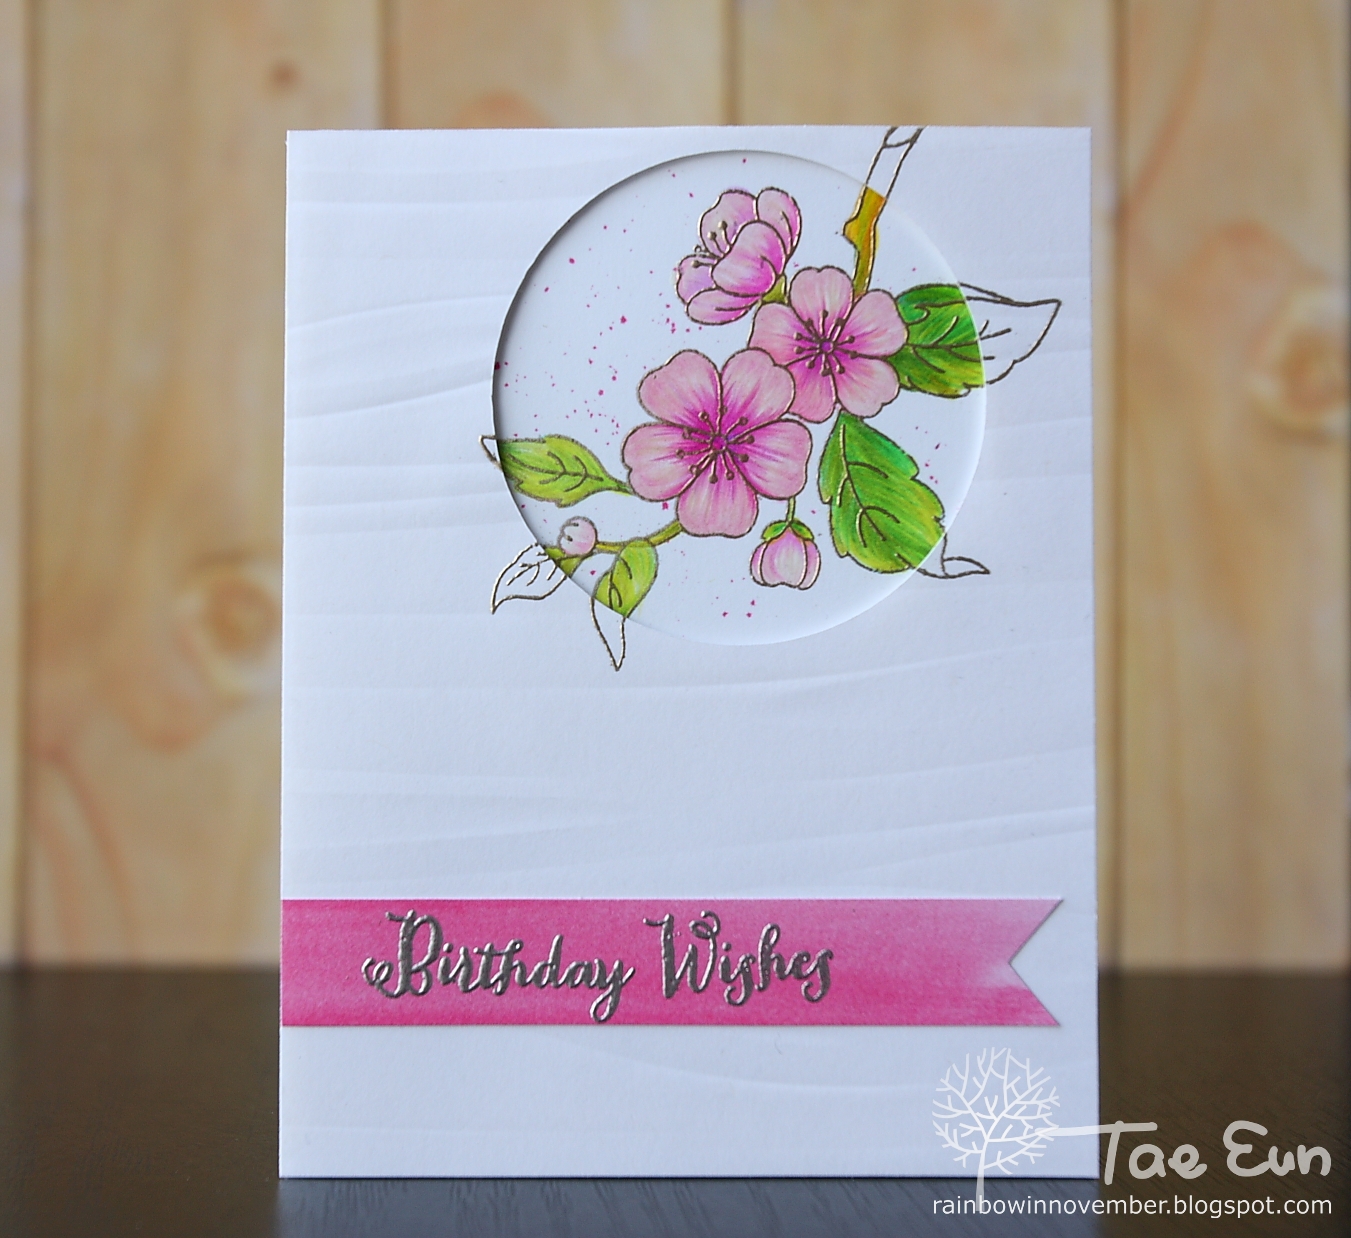
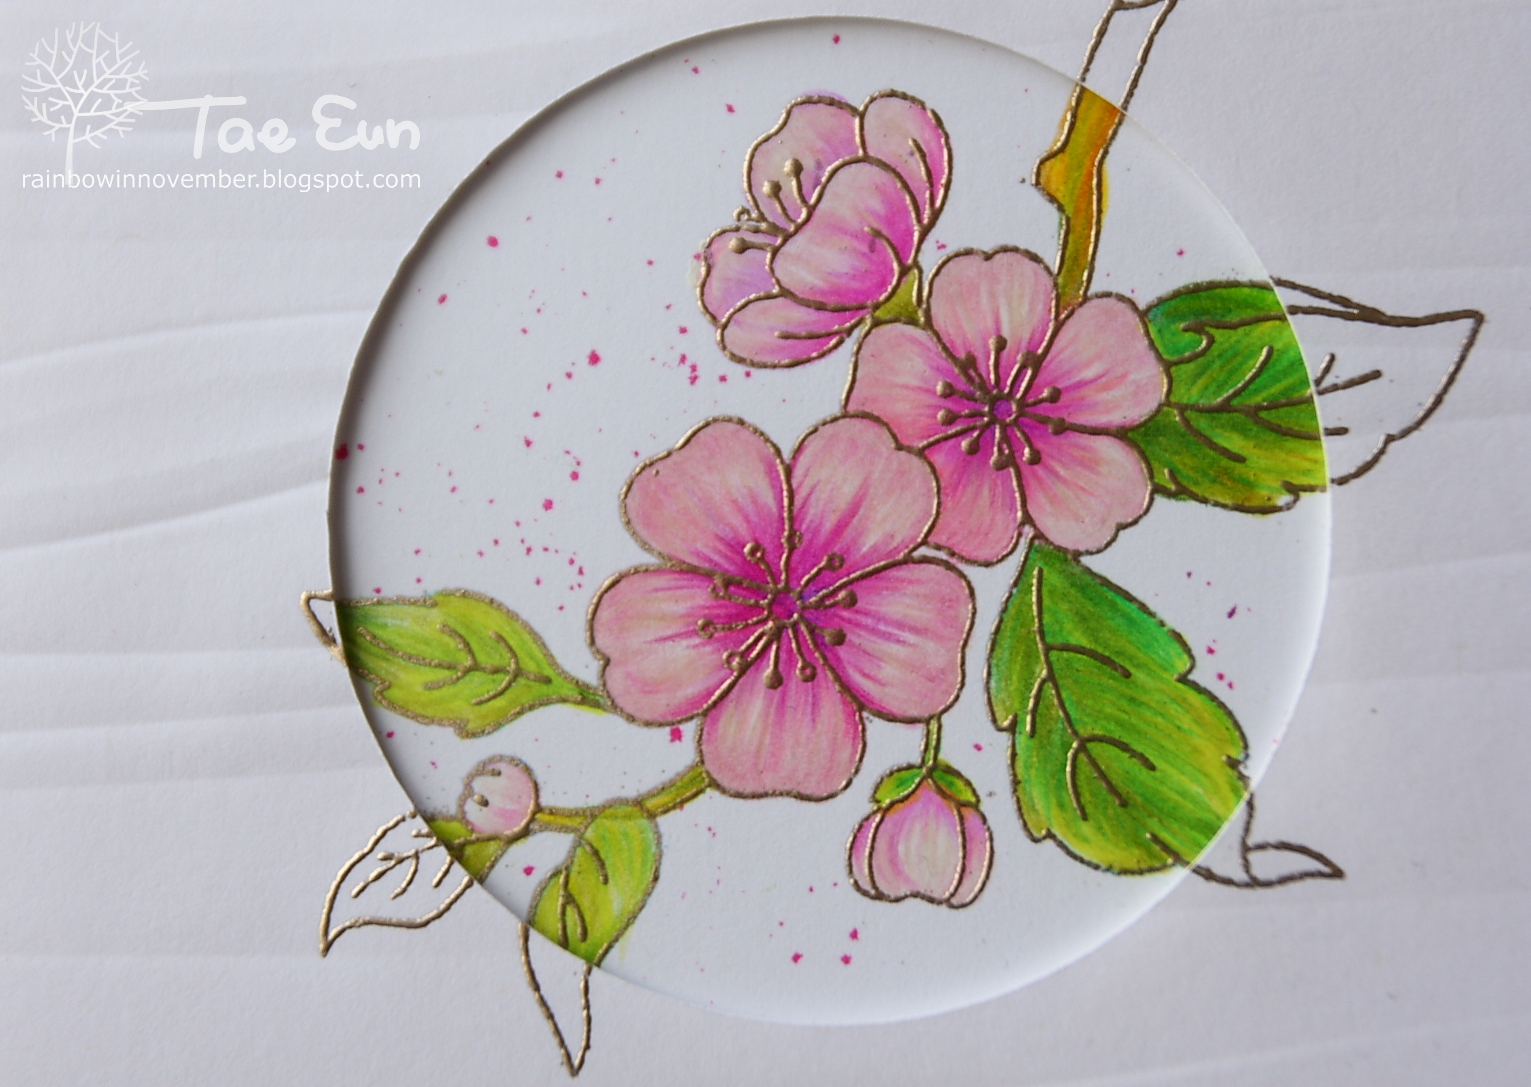
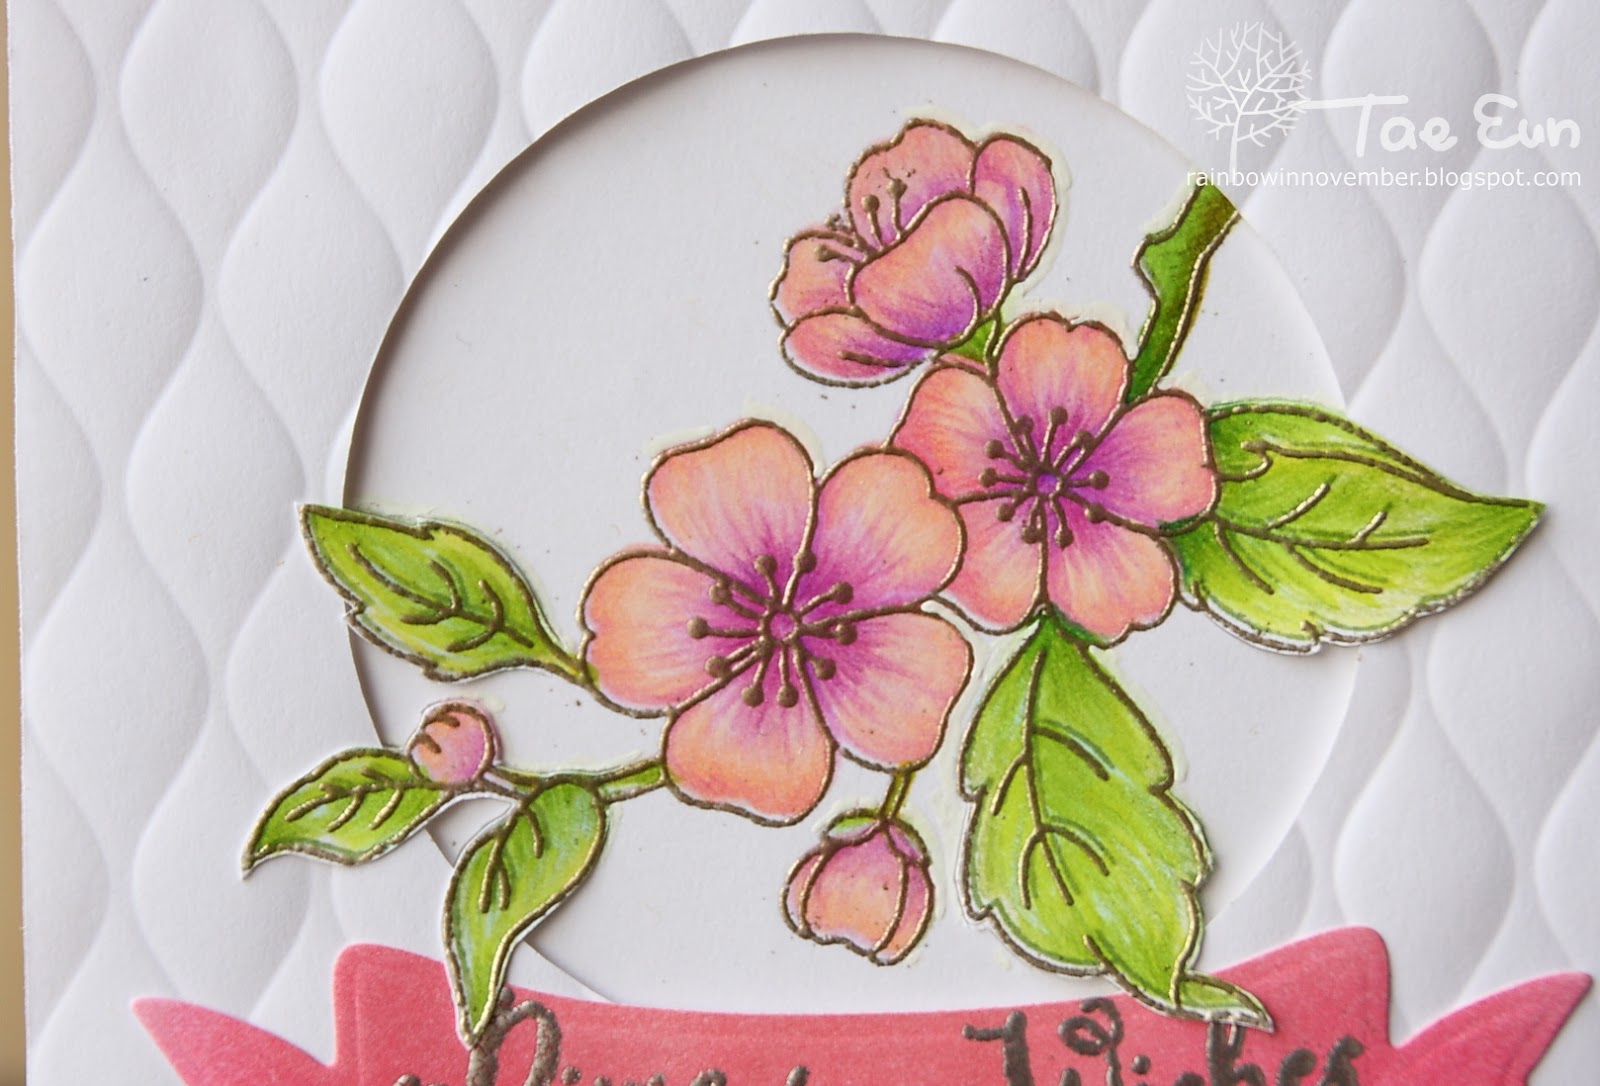
Here I colored the image on the card base. After coloring I splattered some pink ink while I coverd the image with a mask. The front panel with circle window was cut with my Cricut. I then stamped the image on the same place with the help of the Misti and heat embossed it with Liquid Platinum without coloring. The panel was dry embossed using Wave EF from We R Memory Keepers and mounted on the card base using foam tape.
The sentiment was stamped, heat embossed in silver on a pink pattern paper and mounted flat on the card.


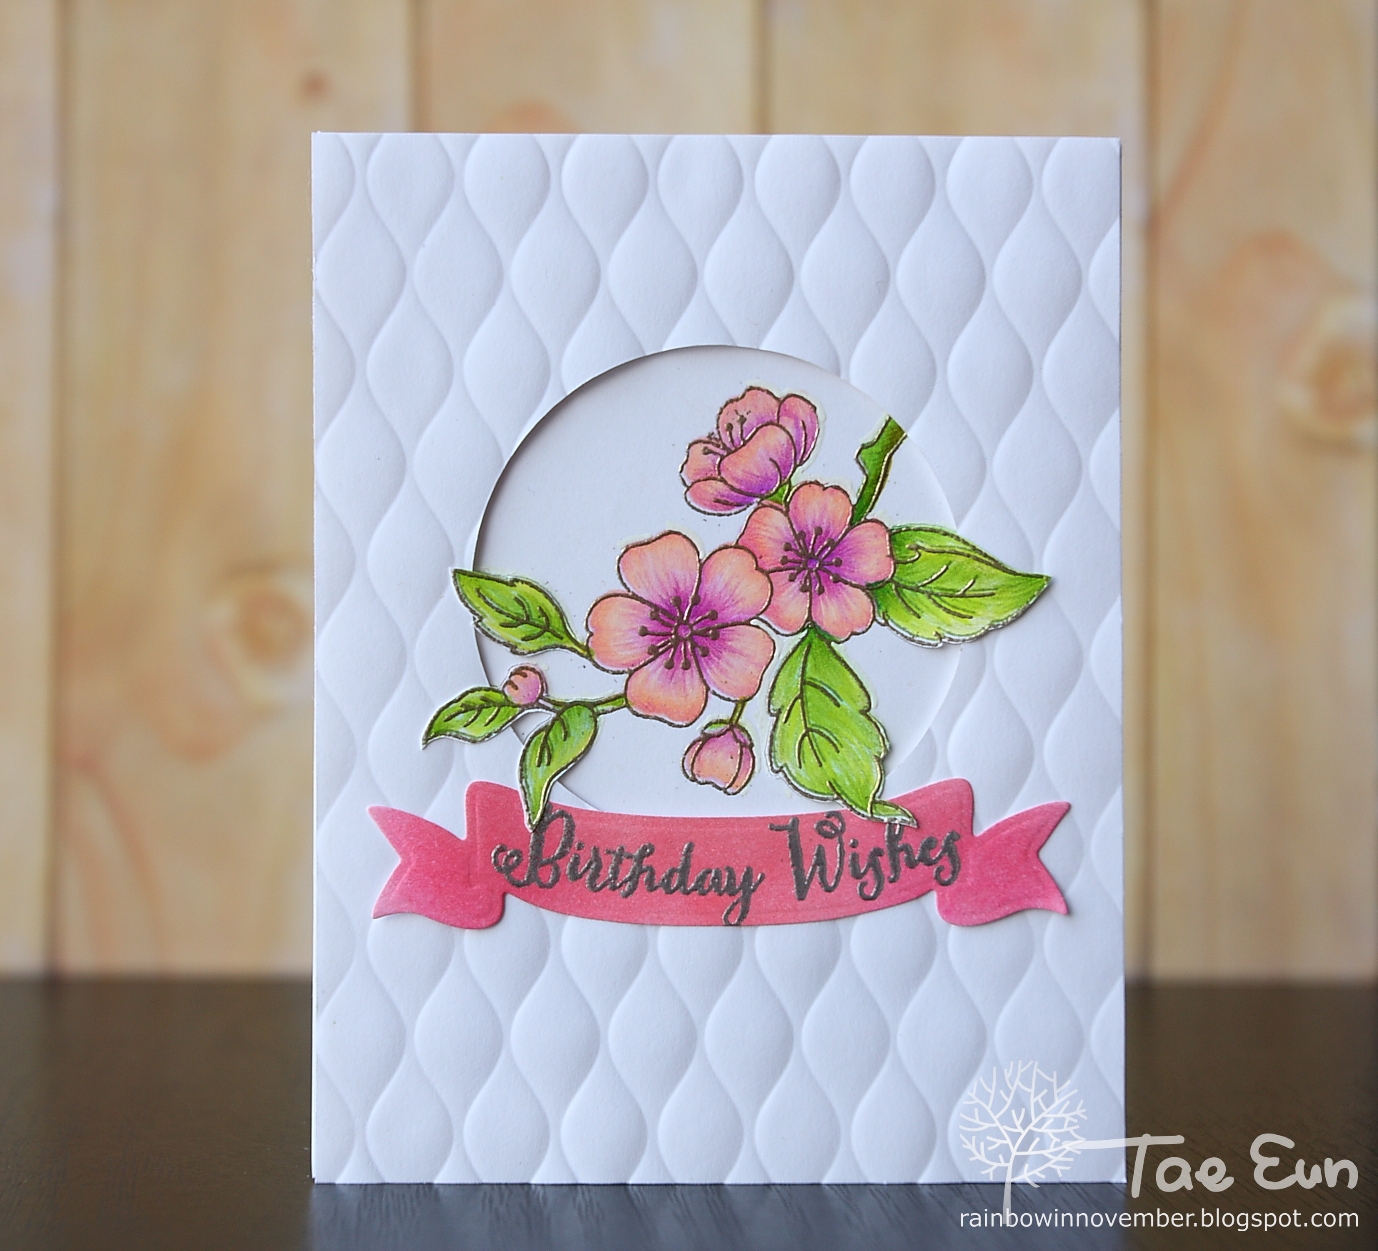
I colored the image with Copics first and added details using colored pencils. Unfortunately the heat embossed image was not exactly on the first stamped image, as I failed to place the paper correctly on my Misti. I cut the leaves partly before I glued the piece of CS with the image on the card base, so they could placed over the front panel. Here I made the circle window of the front panel more central. The front panel was dry embossed using another EF from the Wave EF set and mounted using foam tape. For the banner I blended a piece of white CS with Tattered rose and Picked raspberry DIs, stamped and silver heat embossed the sentiment and cut it using a banner die from Spellbinders.


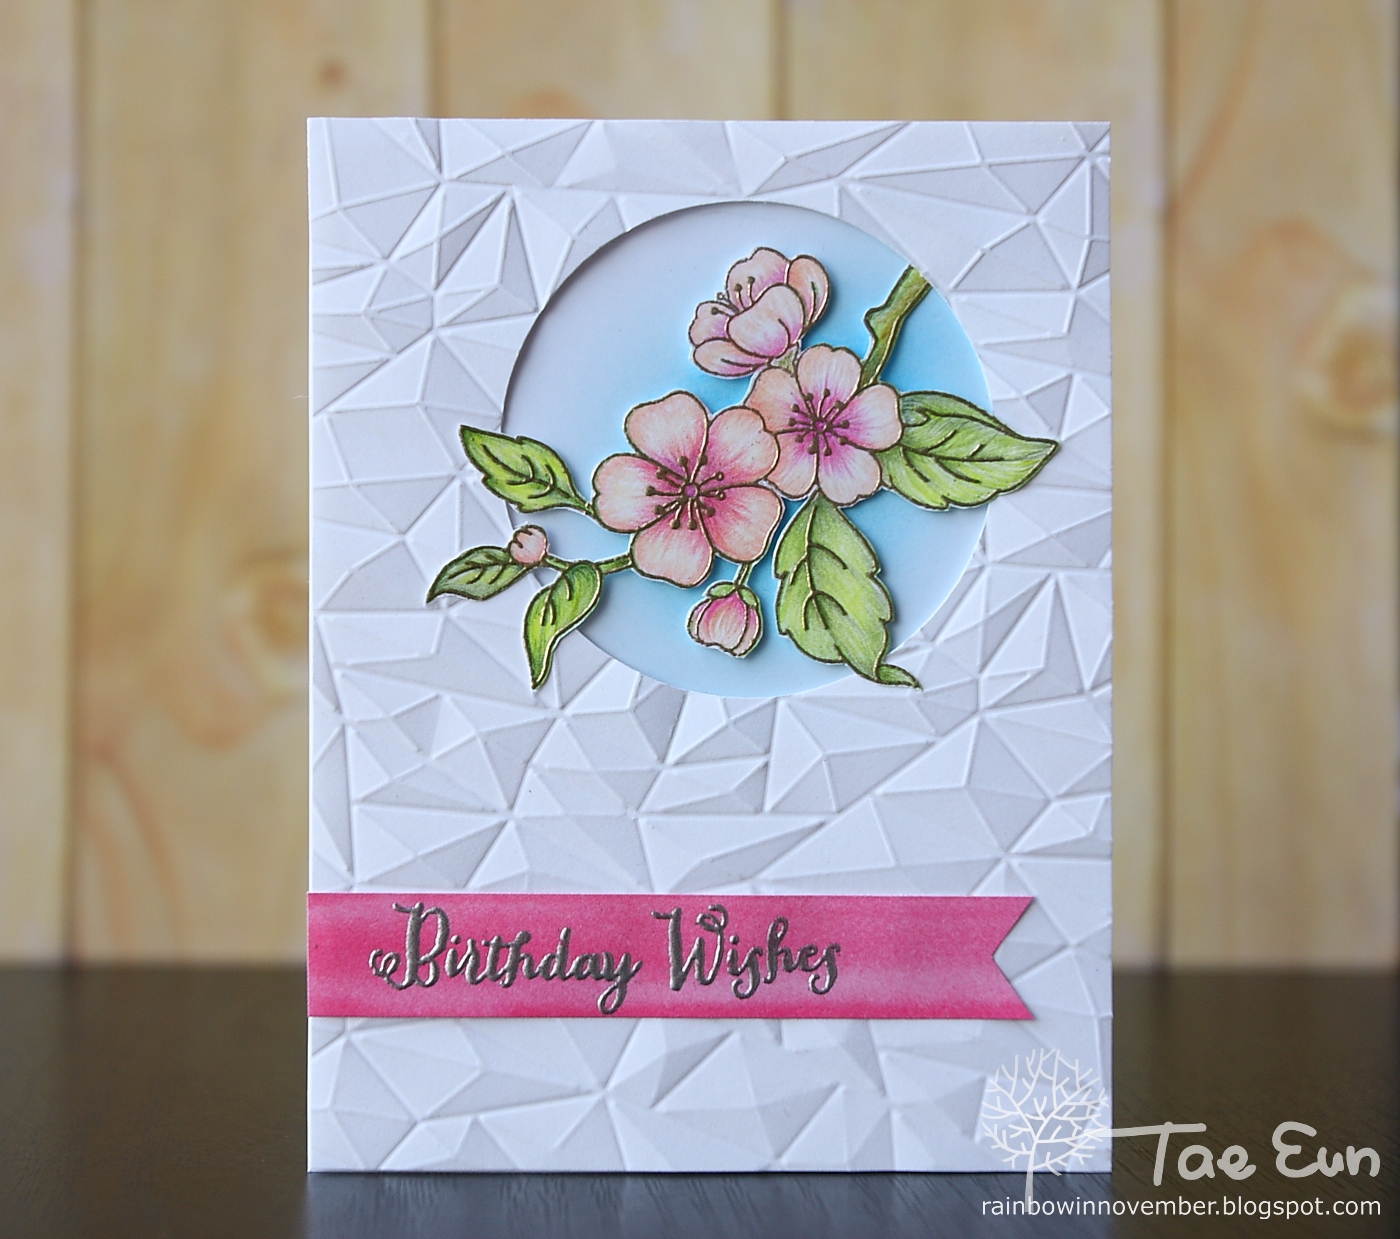
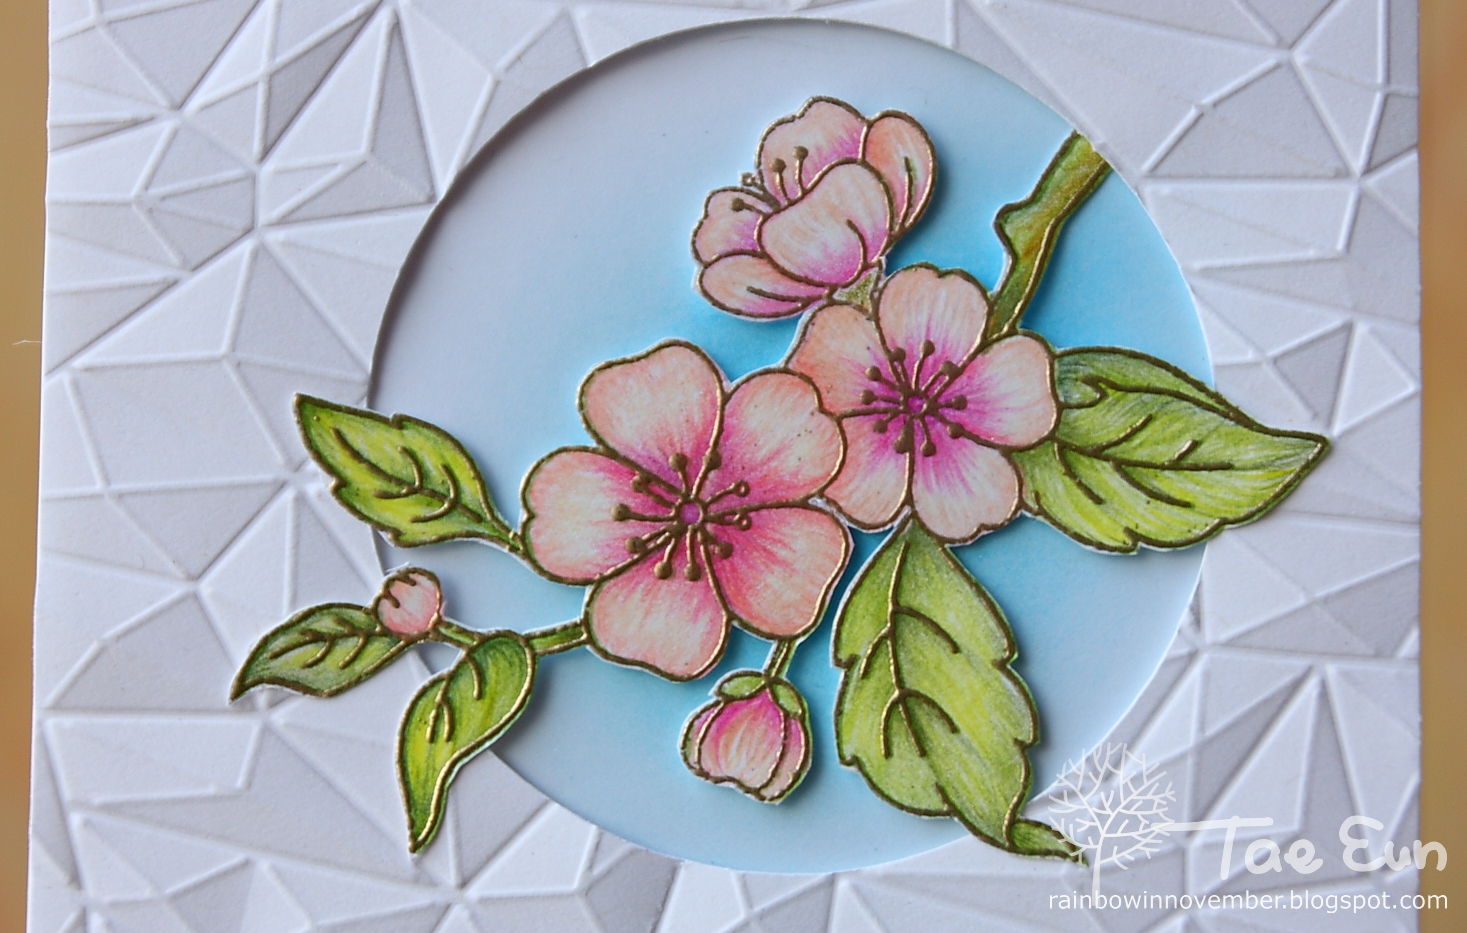
This time I fussy cut the colored image by hand. I blended some blue DIs on the card base. I then cut the front panel with a circle window with my Cricut, dry embossed it using Gemstone EF and mounted it on the card base using foam tape. I placed the fussy cut image as shown in the picture.
After all the coloring practice, I couldn’t see any considerable difference between the coloring methods :).
Maybe it’s not the medium… but the skill that makes difference.
So eventually it was not a significant comparison because of lack of my skill 🙂
I want to enter my second card into the Muse Challenge: This week’s Muse is Jenni Murray and here is her beautiful card!
CASology #182: ADORE (I adore all things that can make colors :))
and also into SimonSaysStamp Wednesday Challenge: Anything Goes.
Thank you for stopping by!
Have a great start into the new Week!
Today I’m sharing some cards I made during practicing coloring with copic markers and colored pencils.
I used the blossom from the Beautiful Friend stamp set by Clearly Besotted. This image was stamped using Angel Pink and Bamboo Leaves Memento inks first, before I colored them. After finishing with coloring, I heat embossed the image using Liquid Platinum EP with the help of the Misti Tool.
Sentiments are from Altenew, Cricut store and Hero Arts.
1. Copic coloring
Here I colored the image using Copic markers. I then cut the circle with my Cricut. The circle was glued flat on the card base. I stenciled some white Embossing paste on the negative panel for more interest. I traced the sentiment with silver and gold gel pen after I stamped it. I added thin strips of silver glitter CS on both sides and mounted the negative panel using foam tape on the card base.
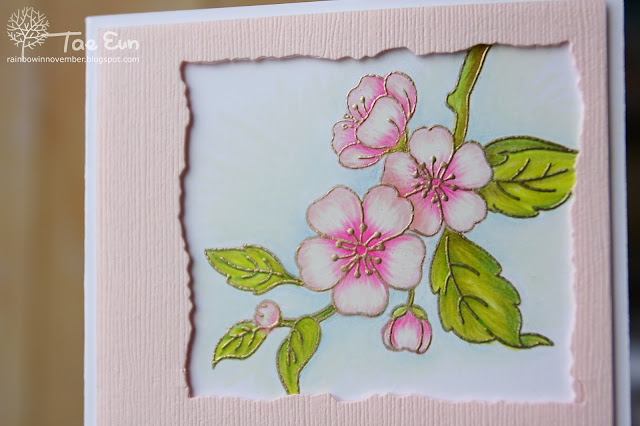
2. Prismacolor Colored Pencils
Here I used only Prismacolor pencils to color the image. The front panel was cut from a Tutu pink CS. I cut the window using Distressed Edges die and mounted the front panel using foam tape on the card base.
The sentiment from Cricut store was cut with my Cricut from a piece of CS which was blended in purple and pink and splattered with water.
3. Polychromos colored pencils
For this and the 5.th card I used only Polychromos pencils.
Here I colored the image on the card base. After coloring I splattered some pink ink while I coverd the image with a mask. The front panel with circle window was cut with my Cricut. I then stamped the image on the same place with the help of the Misti and heat embossed it with Liquid Platinum without coloring. The panel was dry embossed using Wave EF from We R Memory Keepers and mounted on the card base using foam tape.
The sentiment was stamped, heat embossed in silver on a pink pattern paper and mounted flat on the card.
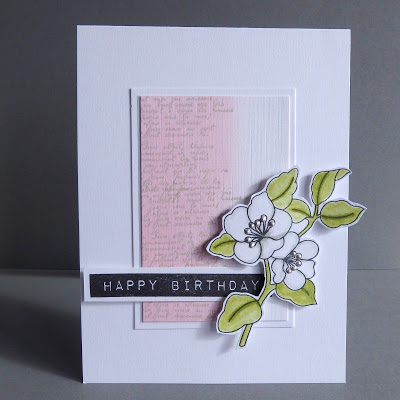
4. Copic + Polychromos pencils
I colored the image with Copics first and added details using colored pencils. Unfortunately the heat embossed image was not exactly on the first stamped image, as I failed to place the paper correctly on my Misti. I cut the leaves partly before I glued the piece of CS with the image on the card base, so they could placed over the front panel. Here I made the circle window of the front panel more central. The front panel was dry embossed using another EF from the Wave EF set and mounted using foam tape. For the banner I blended a piece of white CS with Tattered rose and Picked raspberry DIs, stamped and silver heat embossed the sentiment and cut it using a banner die from Spellbinders.
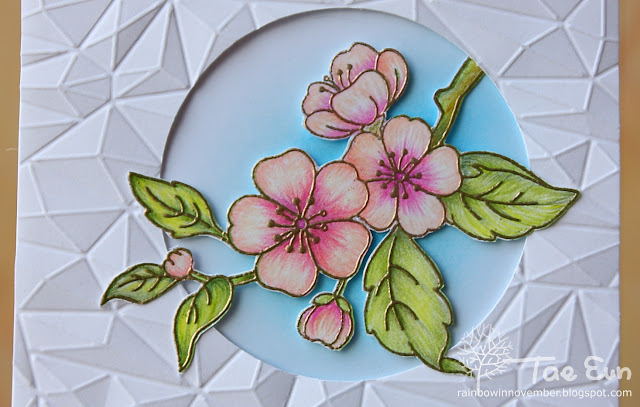
5. Polychromos colored pencils
This time I fussy cut the colored image by hand. I blended some blue DIs on the card base. I then cut the front panel with a circle window with my Cricut, dry embossed it using Gemstone EF and mounted it on the card base using foam tape. I placed the fussy cut image as shown in the picture.
After all the coloring practice, I couldn’t see any considerable difference between the coloring methods :).
Maybe it’s not the medium… but the skill that makes difference.
So eventually it was not a significant comparison because of lack of my skill 🙂
I want to enter my second card into the Muse Challenge: This week’s Muse is Jenni Murray and here is her beautiful card!
CASology #182: ADORE (I adore all things that can make colors :))
and also into SimonSaysStamp Wednesday Challenge: Anything Goes.
Thank you for stopping by!
Have a great start into the new Week!