

Hello and welcome to my blog!
Today I’m participating in a special Blog Hop celebrating Altenew’s May 2017 Release!
If you arrived here from amazing Lydia Evans’ blog, you are right on track. If you lost on the way or want to start from the beginning, please head on over to the Altenew blog!
I was thrilled when I’ve gotten the invitation for this fabulous Blog Hop from May Park and couldn’t wait to play with these new goodies by Altenew! My choice was three bright and cheerful mini stamps along with the cool watercolor frames stamp, and of course some gorgeous floral designs by Altenew. Altenew releases 6 new embossing powders along with stamp and die sets.
These are the new stamp sets I used for my cards.


On my first three cards I used the Watercolor Frames as background for Latte, Strawberry and Ice Cream sets.
Without further ado, let’s get started with my first card.

I chose the splashed rectangle frame from Watercolor Frames stamp set and stamped it on a piece of Canson Bristol paper using Vintage Photo, Antique Linen Distress ink and FineTec gold watercolor. I added the same gold color on the part in Antique Linen and splattered it on the entire panel. After the panel was dry I stamped Latte on it in an embossing ink and heat embossed it in white using Altenew’s new Pure White Crisp Embossing powder. I heat embossed it twice with the help of Misti tool for a dimemsional look. I then die cut it with Coordinating die and from some soft pink foam as well. I rounded all corners of my kraft base and the front panel, which I trimmed into a smaller size. I adhered the front panel flat on the base and added the die cut pink foam into the positive die cut space and adhered the white heat embossed image slightly offset on it.
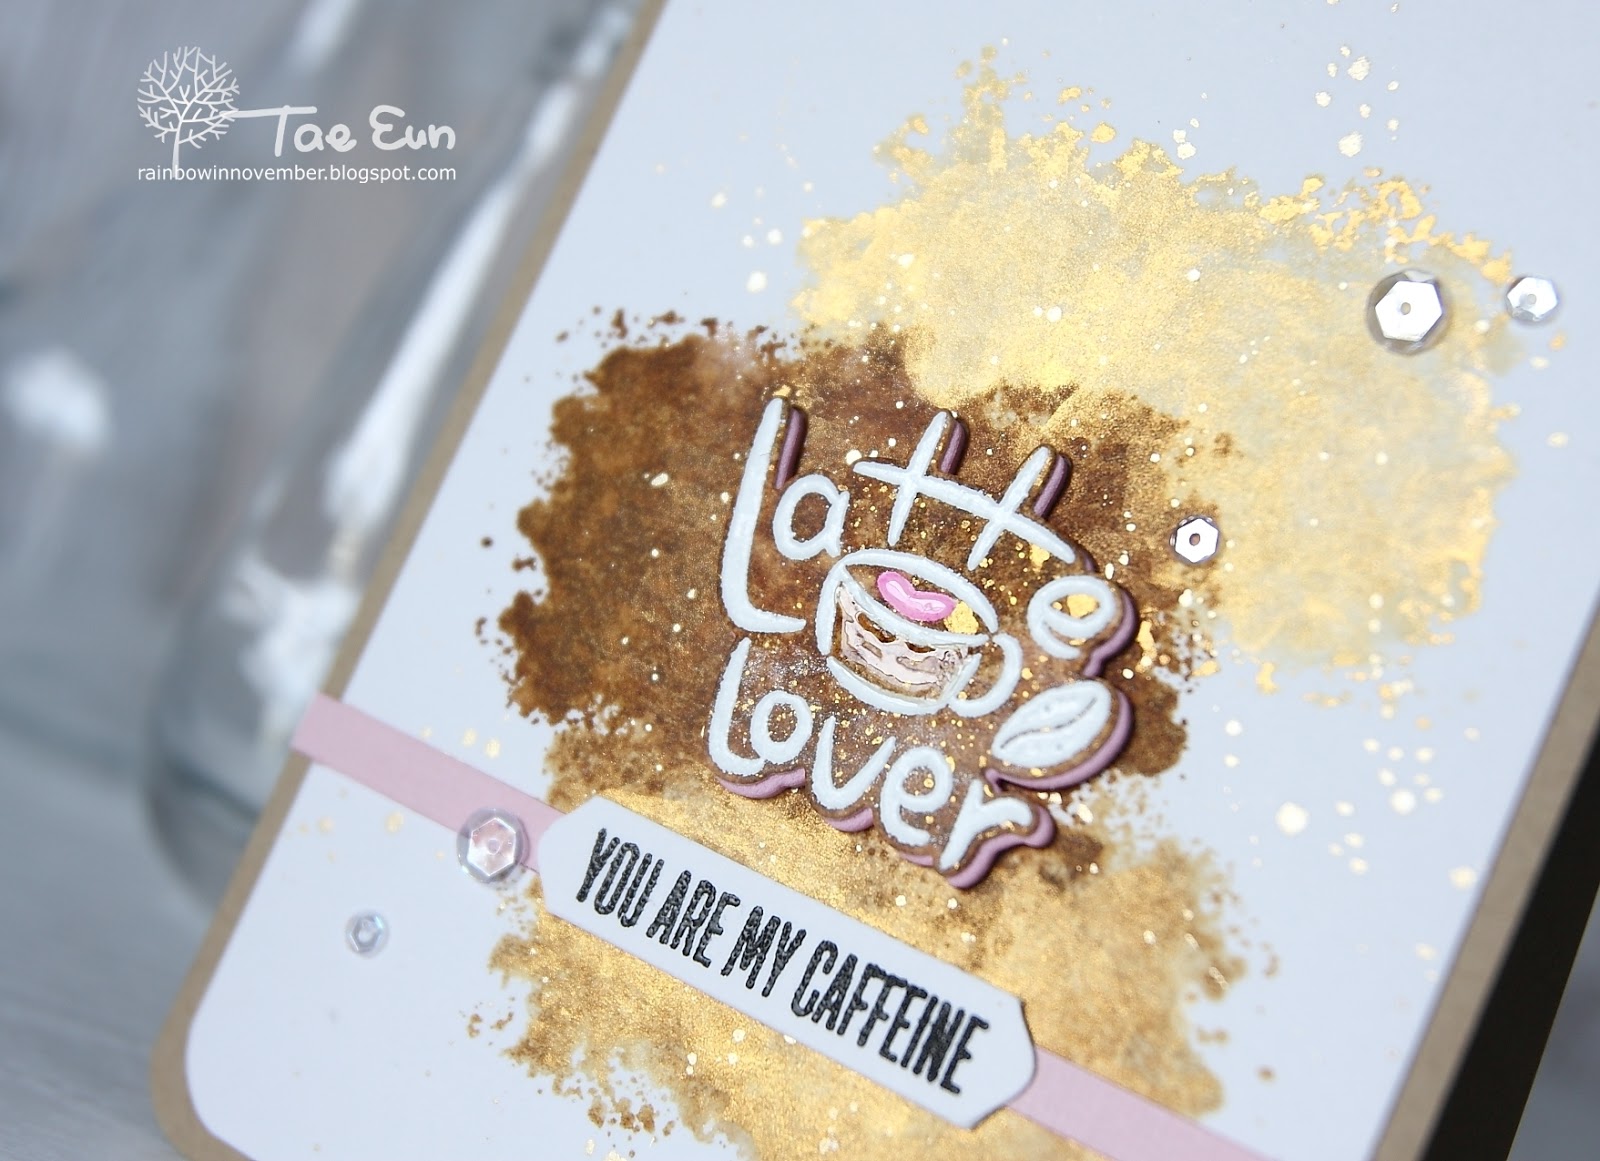
The sentiment was stamped in black pigment ink, clear heat embossed on a piece of white cardstock and added on a strip of soft pink cardstock, which was placed under the image. To finish off I colored the heart in the cup in pink using a Sharpie pen, added Glossy Accents on the cup and scattered some clear sequins.
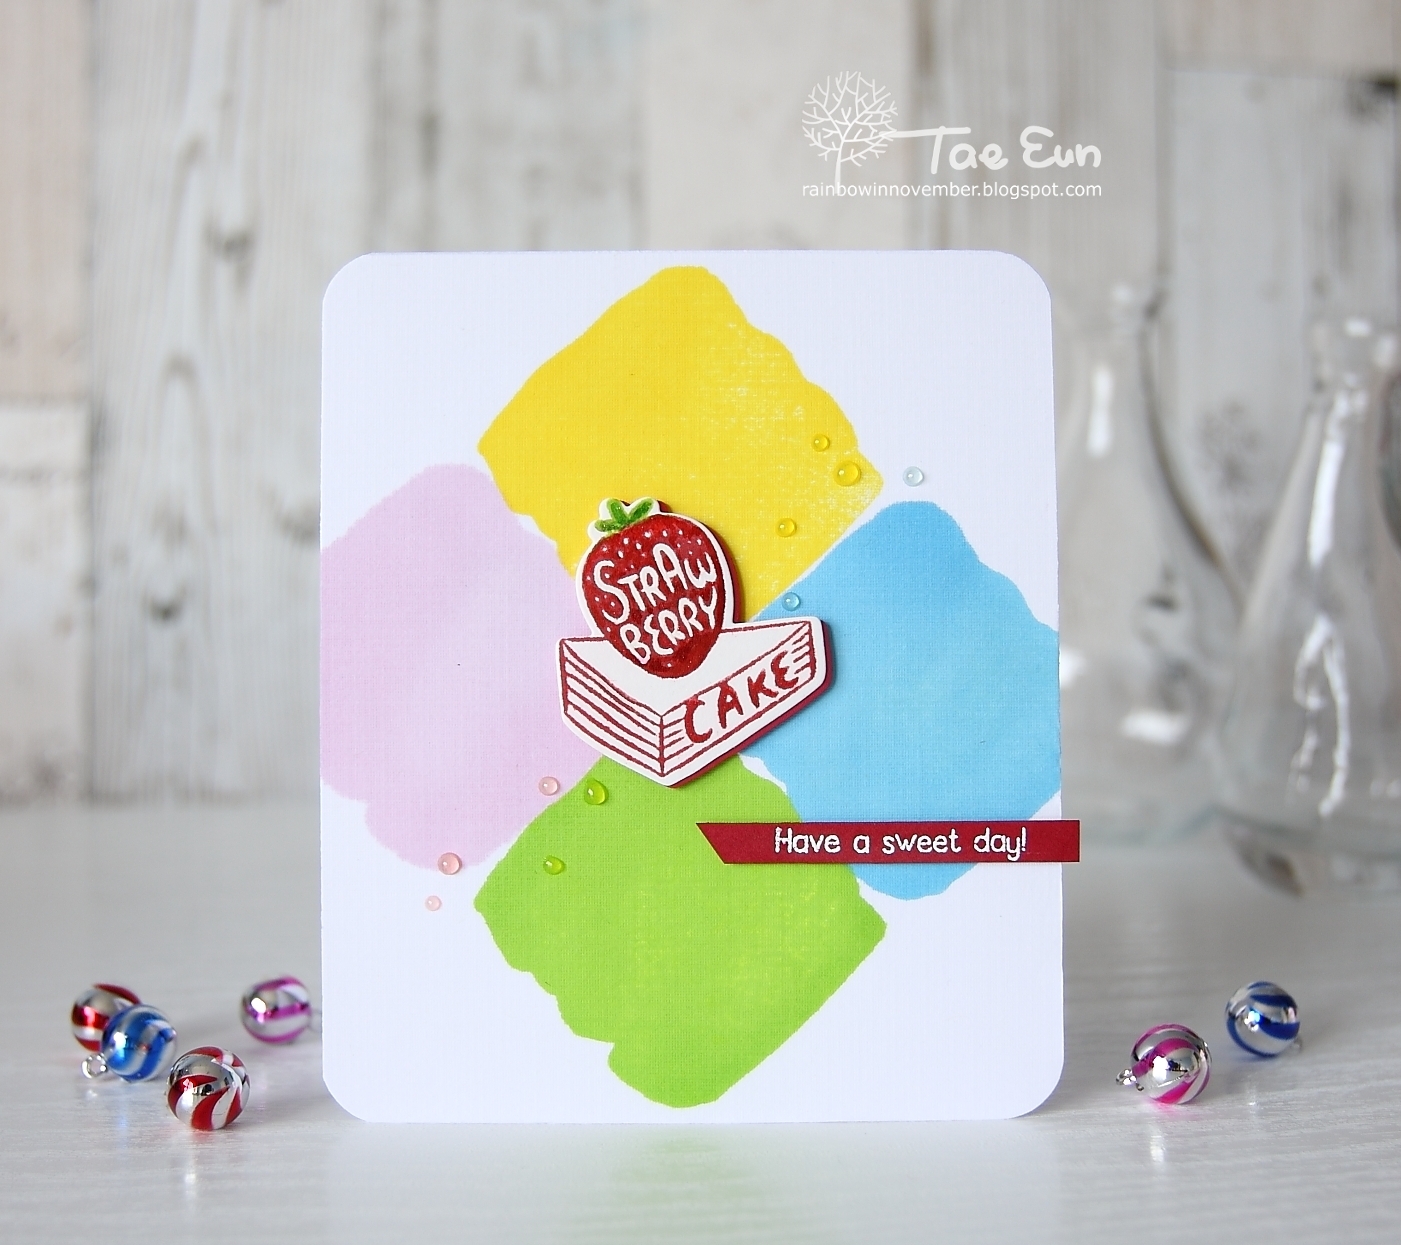
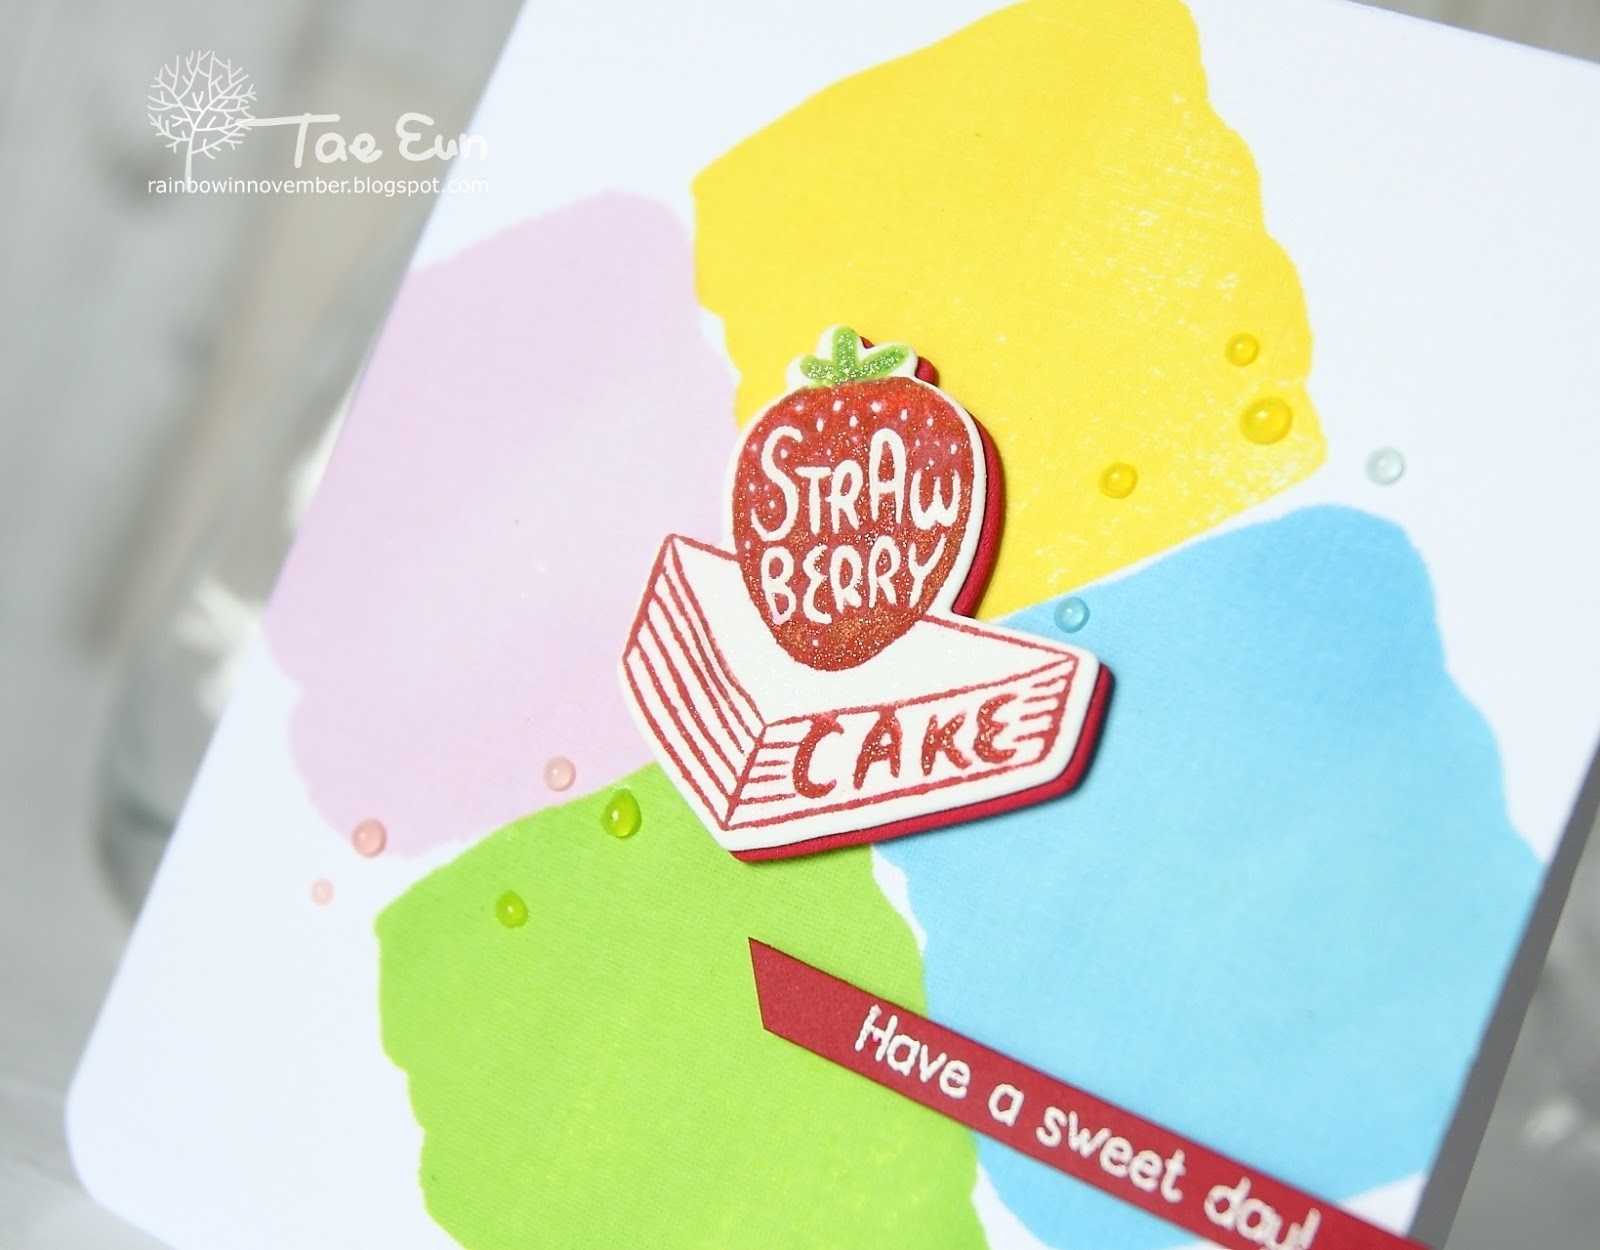
To start off my second card I stamped the brush stroke square shape from Watercolor Frames four times on a linen paper where I used bright colors for a cheerful look. I then stamped the Strawberry on a white cardstock in red except for the stem part, which I stamped in green. I die cut the image using Coordinating die and again from a red foam. I taped the front panel on the card base, rounded the corners and mounted the die cut red foam and the image onto the center of the card. I adhered the image offset so that the red fun foam can be shown. The sentiment was white heat embossed on a strip of red cardstock and foam mounted on the card. To finish off I coated the image with clear glitter and added some droplets using Nuvo drops.
My third creation is a faux shaker card :).

To start off I placed a textured pink card stock in my Misti tool and stamped the circular splatter from Watercolor Frames in embossing ink and heat embossed it in white with Pure White Crisp Embossing powder. I then stamped the same stamp on my white card base again using a pink ink. I repeated the process after moving the stamp towards the other corner of the card. I then cut out a circular frame to show the stamped card base and foam mounted the front panel. The Ice Cream image was white heat embossed with Pure White Crisp Embossing powder on a circular clear acetate sheet on which I colored a circle using Flamingo alcohol ink. The sentiment was stamped in black on some shimmer cardstock. I cut it in banner, matted with a silver glitter paper and glued it on the card. To create the look of a shaker card I added a few clear and iridescent sequins in the positive die cut space of the circular frame.

My next card is featuring Enchanted Iris stamp set, one of my favorites from this release :)!

It was hard to choose one coloring medium for this card. I decided to go with Zig brush markers this time, but I’ll surely try other mediums in the future to color this stamp set;). I stamped the iris image from Enchanted Iris on Canson watercolor paper along with masking when needed. I used Broken China and Twisted Citron Distress ink for stamping. After done with coloring of the iris I added light blue sky and grass with white flowers on the bottom. “Thanks” is heat embossed in Liquid Platinum and the small sentiment was stamped in black. I trimmed the colored panel and foam mounted it on the white A2 cardbase on the left edge of which I added a strip of silver glitter paper. To finish off I added clear droplets using Nuvo drop.

Next two cards show the beautiful and elegant branch image of Under the Cherry Blossom Tree stamp set.
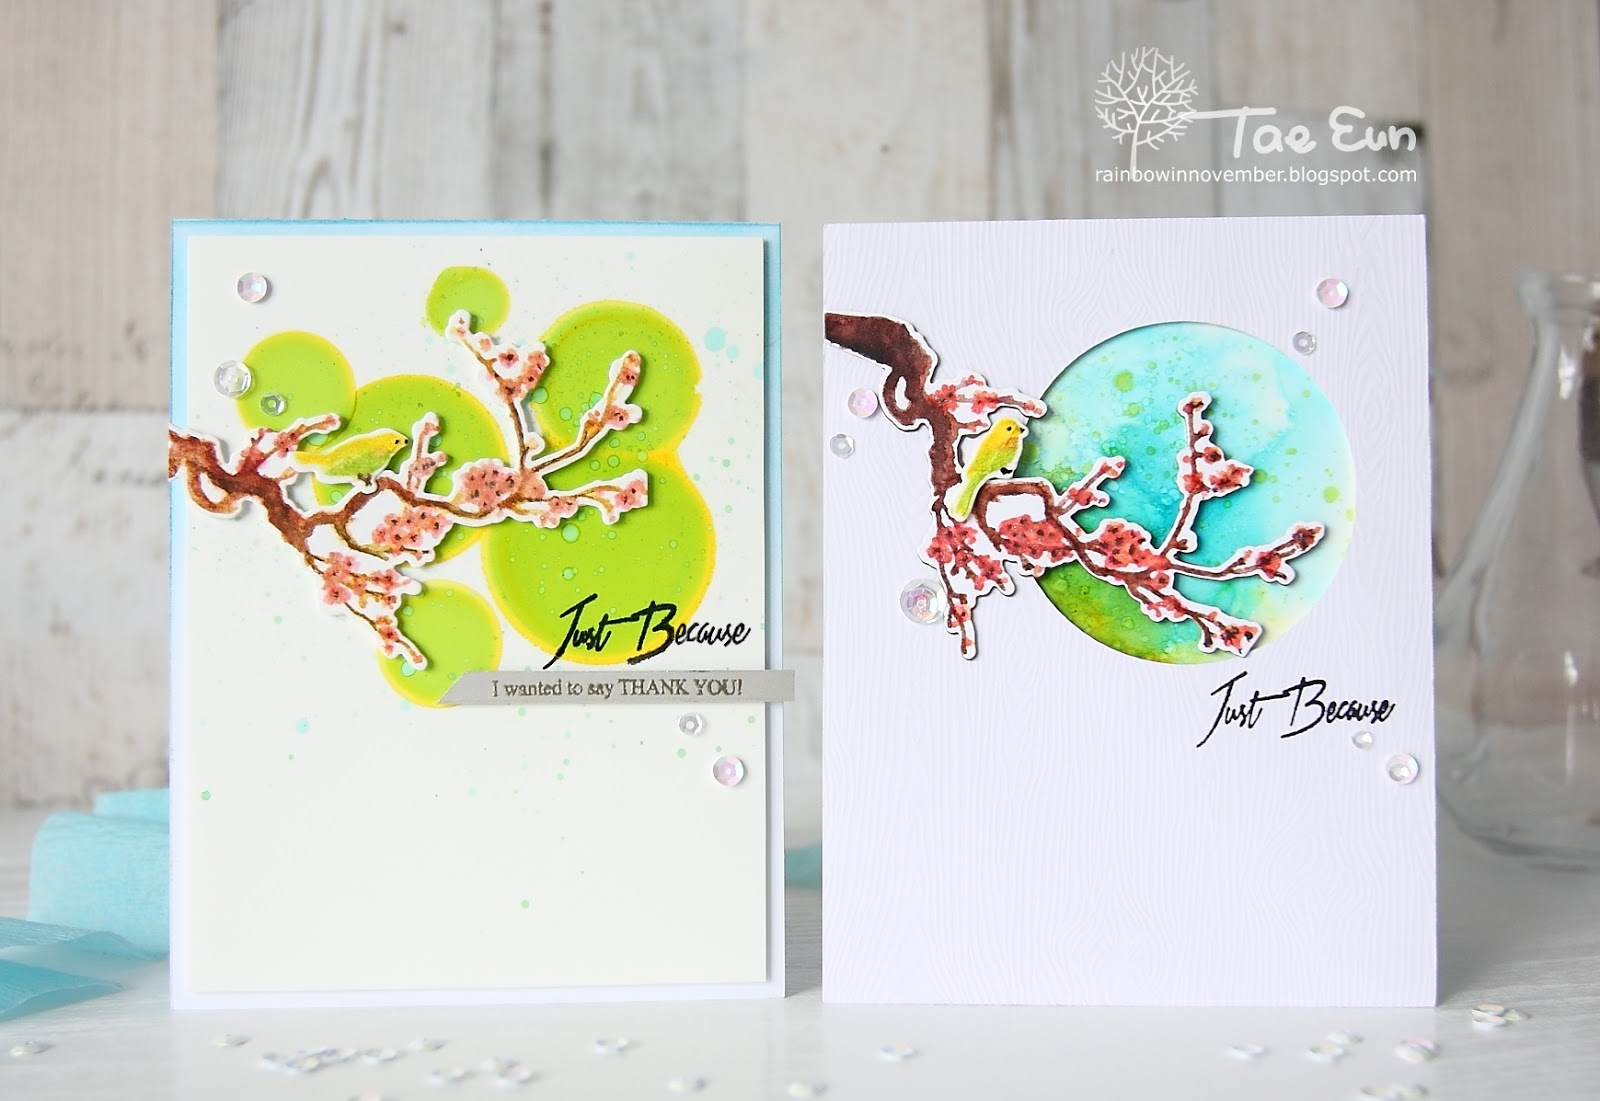
For these two cards I used the solid image of the branch and added the blossom. The background for both are created using alcohol inks on Yupo paper. Let’s take a look at the first one of the set.

I started by stamping the solid branch from Under the Cherry Blossom Tree on a piece of watercolor cardstock using Aquamarkers. I scribbled several shades of brown on the stamp and sprayed pearlized water before I stamped it with the help of Misti. I stamped the blossom in the same way in bright pink. I extended the branch at the base as I wanted the branch to go further towards inside of the card. The little bird was stamped in combination of yellow and green. I added some glitter on the flowers and on the bird with glitter brush pen. For the eye, beak and legs of the bird and the flower centers I used black gel pen and a dark gray glitter pen. I die cut the images using coordinating dies. Set them aside, I created the background with alcohol inks (Limeade, Citrus, Turquoise, Patina) and rubbing alcohol on a piece of Yupo paper. I sprayed rubbing alcohol first and added alcohol ink droplets and blew them using a straw in directions I wanted. I added some splatters and let the panel dry.
The front panel with a circle window was cut with my Cricut from a woodgrain textured cardstock, on which I stamped the sentiment in black pigment ink and clear heat embossed.
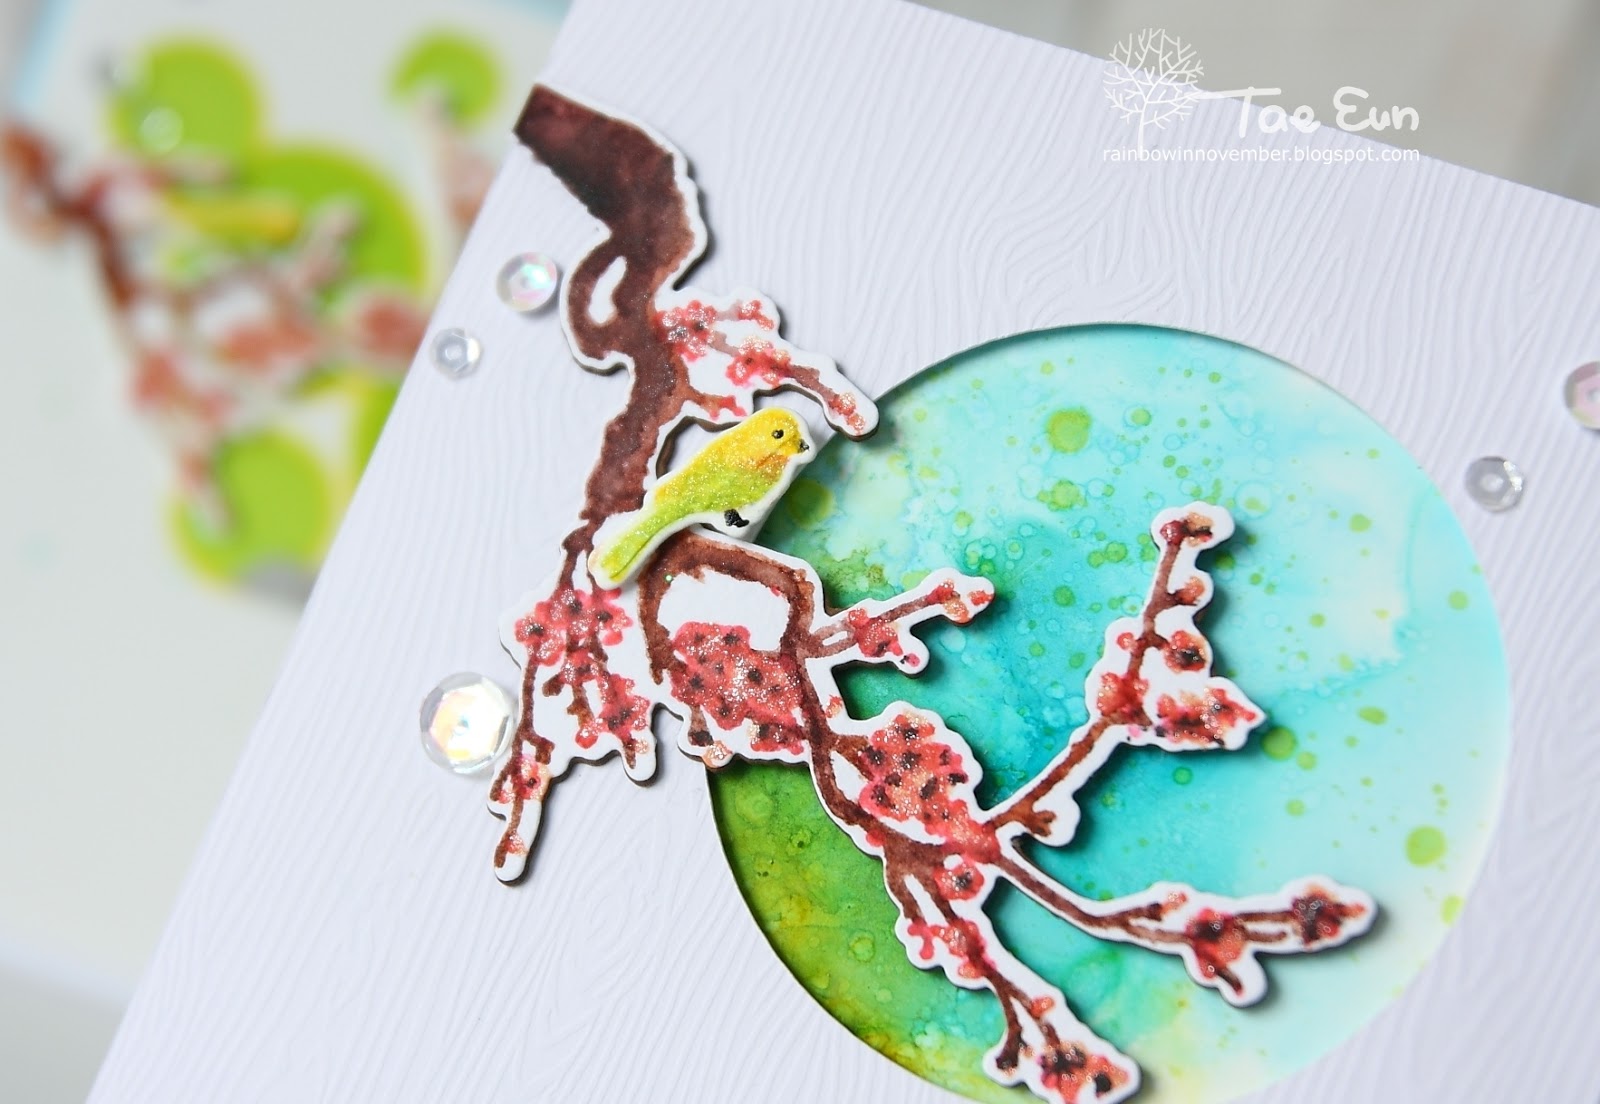
I glued the alcohol ink background panel on the card base, foam mounted the front panel with sentiment on it and added the die cut branch and bird with foam adhesives. For more dimension I stacked three die cuts from some dark brown cardstock under the colored branch die cut. Some sequins were my finishing touch.
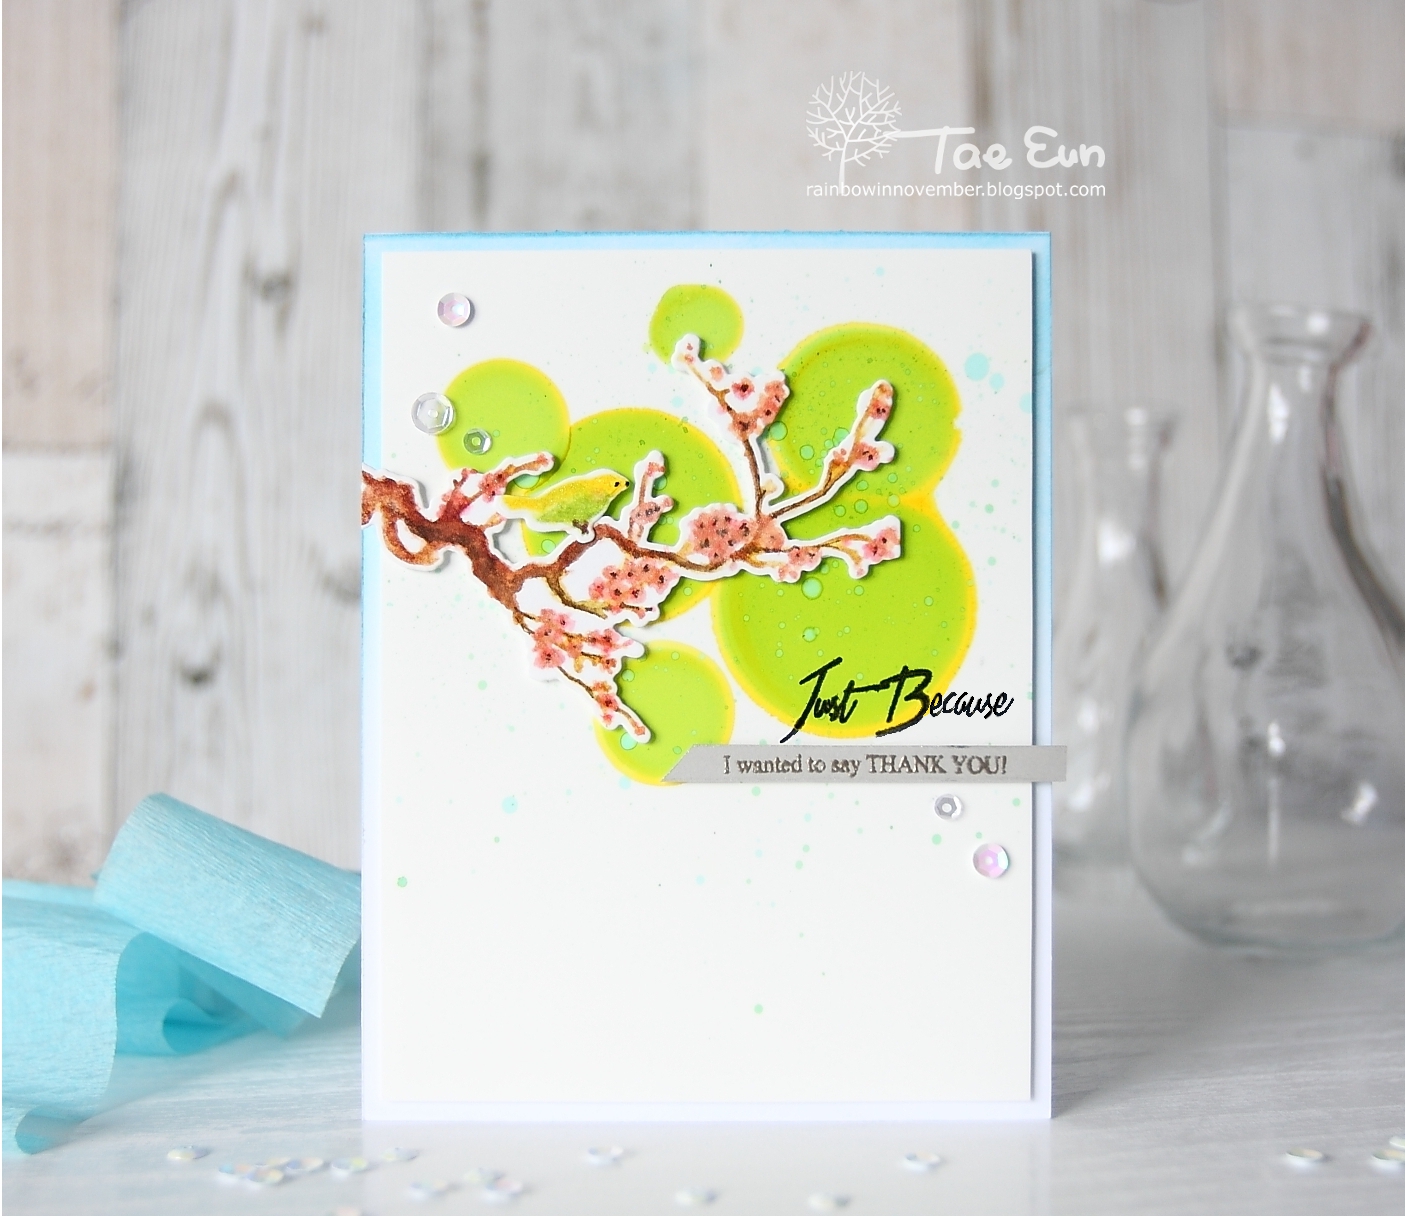
To stamp the branch and cherry blossom on this card I used lighter color than the previous card. The background was created by dripping alcohol ink (Limeade) on Yupo paper. I then splattered Patina on the panel to add some blue to my background. I trimmed the background panel down slightly smaller than A2 and foam mounted it on the card base, on the upper part of which I blended Tumbled Glass DI. I then foam mounted the branch and the bird. The sentiment was stamped in black. I added a long sentiment which heat embossed in Liquid Platinum on a strip of gray cardstock. I finished off the card by scattering some sequins.

—–GIVEAWAY—–
To celebrate this release, Altenew is giving away a $50 gift certificate to THREE lucky winners! Please leave a comment on the Altenew blog by Thursday, June 1st at 11:59pm EDT for a chance to win. The winners will be announced on the Altenew blog on Saturday, June 3rd.
I will also randomly choose a winner from comments left on this post by Thursday, June 1st at 11:59pm EDT, who will win a $30 gift certificate to Altenew online store! The winner will be announced on this post on Friday, June 2nd.


—–Winner(Edited to add)—–
chosen via Random Number Generator
Thank you so much for your sweet compliment and support, everyone!!! I truly enjoyed reading them all!!!
The Winner of $30 gift certificate to Altenew online store is

Congratulations Meghan! Please contact Altenew at [email protected] by 7/31/2017 with the subject line “Altenew May 2017 Release Blog Hop Winner from TaeEun’s blog”.
—–HOP ALONG—–
Next on the hop is talented Kavitha! Below is the complete blog hop list.
TaeEun Yoo <-- You are here.
Thank you so much for visiting my blog today!
Have a great day!
Hugs,
TaeEun