
Hello everyone!
Today I have two cards to share with you on which I colored the same Large Peony flower in two different ways. The stamp I used is by The Ton and is called Large Peony 4.
On my first card I colored the peony using gray and black colored pencils.

To start off I stamped the image in Noir. I masked off the flower and stamped the leaves as well. I then colored them using Payne’s Grey, Cold Grey V and Black Polychromos colored pencils. I then splattered some gold watercolor from FineTec. The frame was cut using Deckled Rectangles die from Spellbinders from some white cardstock. I gold heat embossed it and foam mounted it on the front panel. The word hugs was cut and gold heat embossed. I cut it once again from some black fun foam to give the sentiment some dimension.

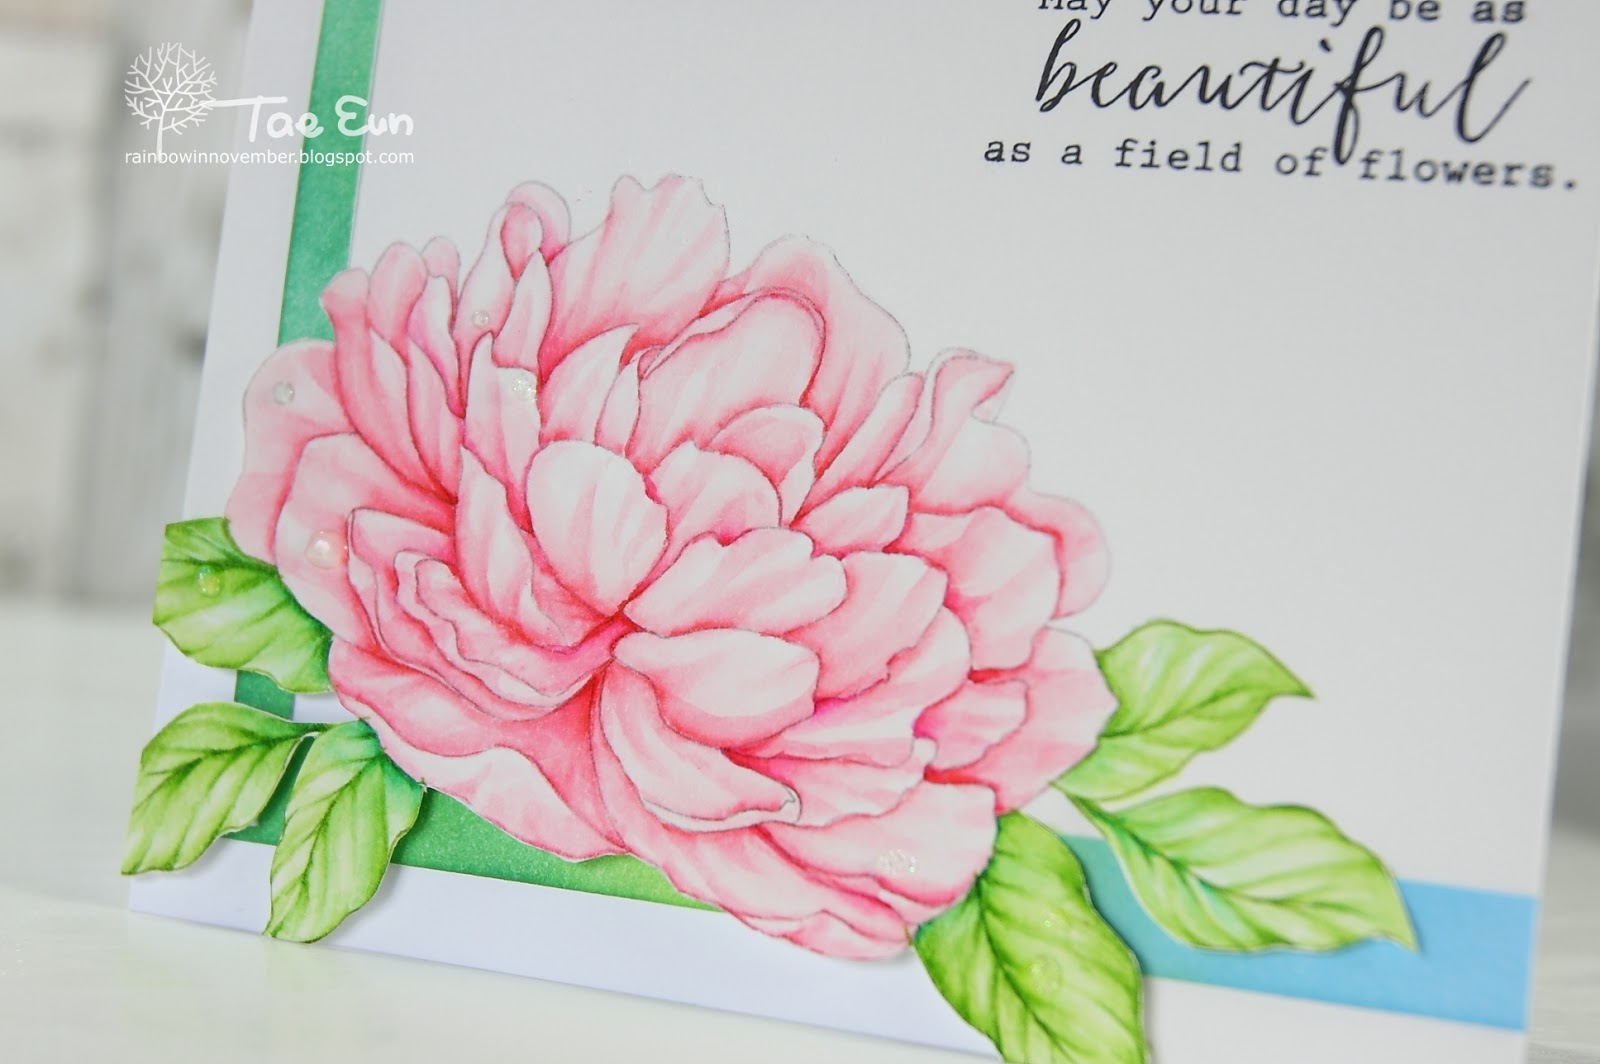
On my second card I watercolored the image using Zig Brush markers.

I wanted to do no-line coloring. So I started by stamping the peony in Ballet Slippers and the leaves in Soft Garden on Bristol smooth paper. Unfortunately the peony stamp wasn’t clean and it was stamped in gray mixed with pink color… I colored the image using Zig Brush markers.
After done with coloring I cut a L-shaped piece from a panel on which I blended green and blue inks. To put it underneath the flower image I cut the outline of the lower part of my peony. After I adhered the L-shaped piece on the colored panel, I mounted it flat on my cardbase. For some dimension I added foam adhesives under the bottom part of my image. The sentiment is from Large Peony 4 as well. I stamped it in Noir. To finish off I added some clear and glitter droplets using Nuvo Drops.
I’ve made a coloring video. You can watch it below or on my YouTube Channel. It’s hard to explain how I color, as I have no systematic approach while I’m coloring. Usually I pick a picture or drawing on google or pinterest as my reference and try to recreate what I see. Here I took my first card for my reference to color the folds of the petals. I’m using a black velvet silver brush 4.
I have one more coloring video to share. My 5yo daughter Yerin wanted to have a video of her coloring process like mom and like other cardmakers on YouTube :). So we made this! I’ve shared a short version of it on Instagram. Yerin was so happy and proud of herself, as she’ve got so many positive comments. Thank you so much, if you watched this on Instagram !!!
Hope you enjoyed my cards and video today!
I want to enter my first card into Addicted to Stamps and More #252: Make your Mark and the second one into this week’s Simon Says Stamp Wednesday Challenge: Anything Goes.


Thank you so much for looking :)!
Have a happy crafty day!
TaeEun