

Hello, crafty friends!! Welcome to Day 2 of the Countdown to Confetti over at Reverse Confetti!! Have you enjoyed the sneak peeks of Day 1 yesterday?
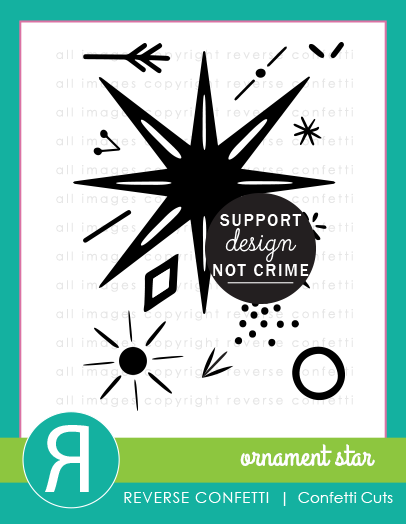
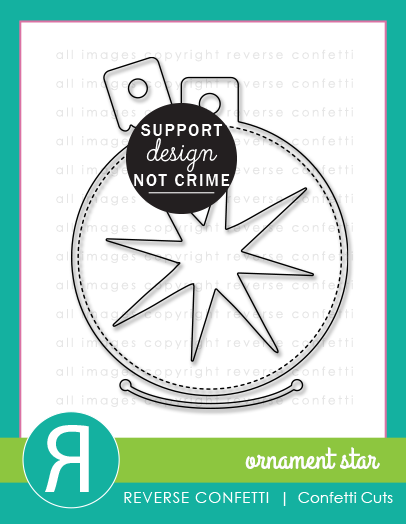
Today we are introducing two holiday Themed stamp sets, Ornament Star and Seasonal Say It All. The Ornament Star Confetti Cuts are so versatile! You can cut a large ornament with a pretty topper, a large star which could be stamped using the Ornament Star stamp set. And there is also a die for an opening for a gift card! How awesome! I’ve made two cards for today to show you the versatility of the set!
*All the links to the new items will be active tomorrow!

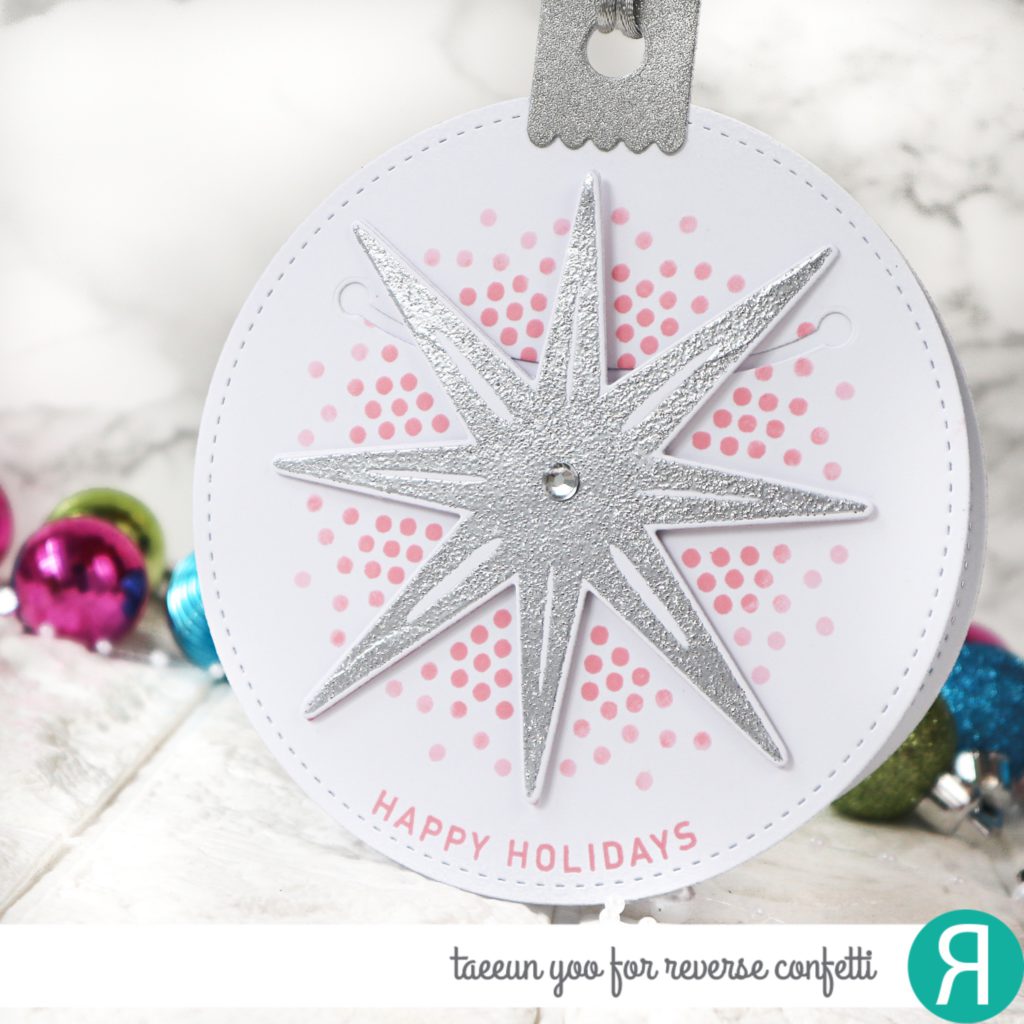
The first card is a shaped ornament card with a gift card holder function.
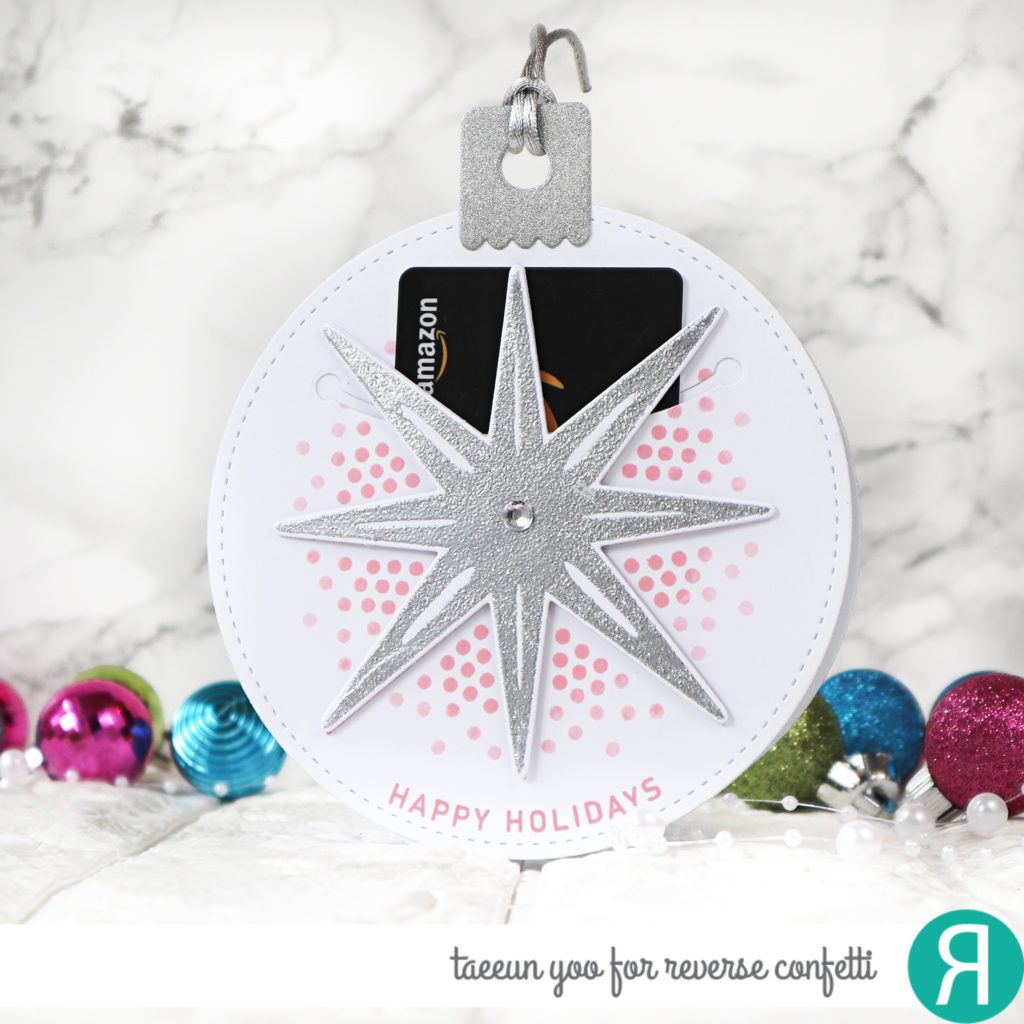
I cut the Ornament three times from some heavyweight white cardstock using Ornament Star Confetti Cuts. I stamped the confetti stamp from the Ornament Star set in two shades of pink inks on one of the die cut ornament and cut the gift card slit using the Ornament Star Confetti Cuts . I also stamped the sentiment from Joyful Holiday Wishes stamp set on this front ornament in pink.
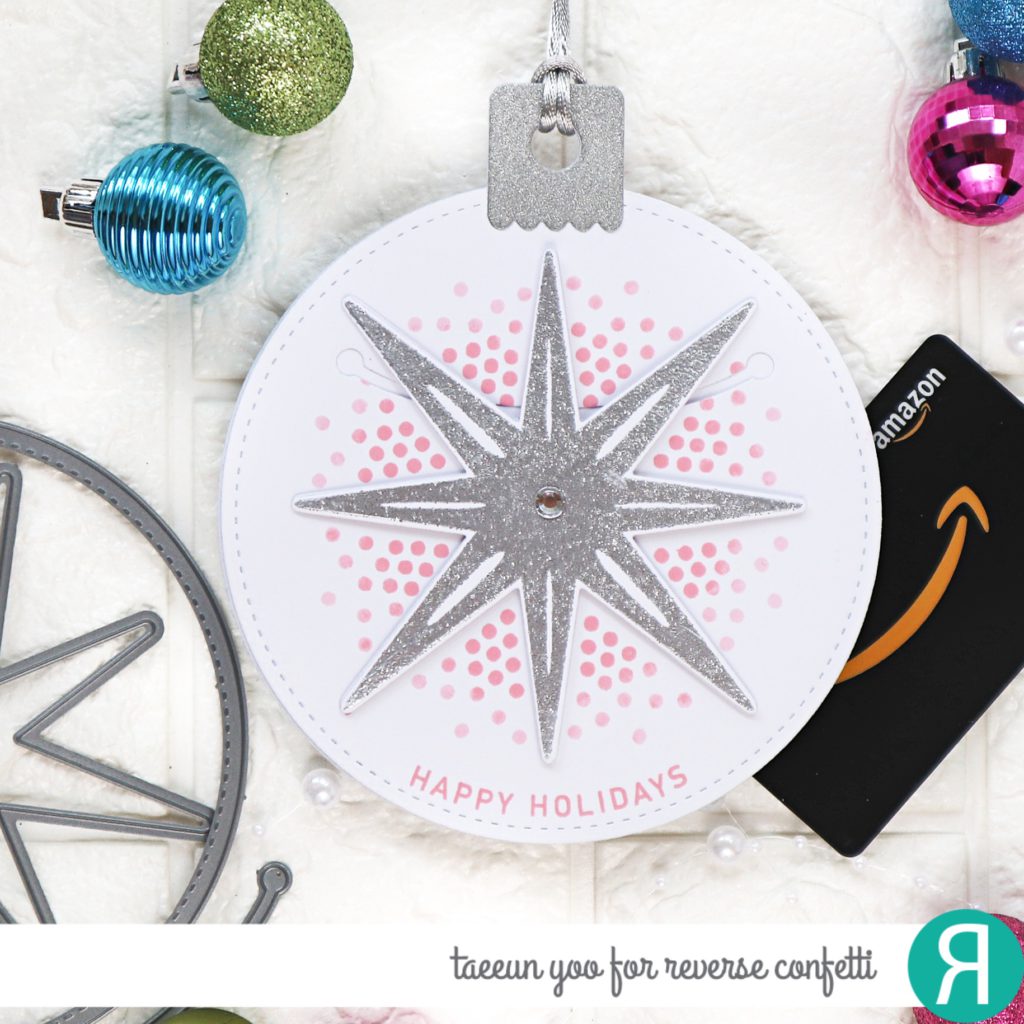
I adhered another die cut ornament on the back of the front die cut. I also adhered the top of the third die cut ornament on the back of the assembled front panel to make the back of the card. I heat embossed the star in Silver glitter EP and cut it using the coordinating die. I foam mounted it on the front of the card. The top of the ornament was cut from some silver glitter paper. I finished off the card with a silver string and a clear rhinestone on the center of the star.
The second card is featuring all the sentiment from the Seasonal Say it All stamp set. I made a DIY background with them and added an ornament to it.
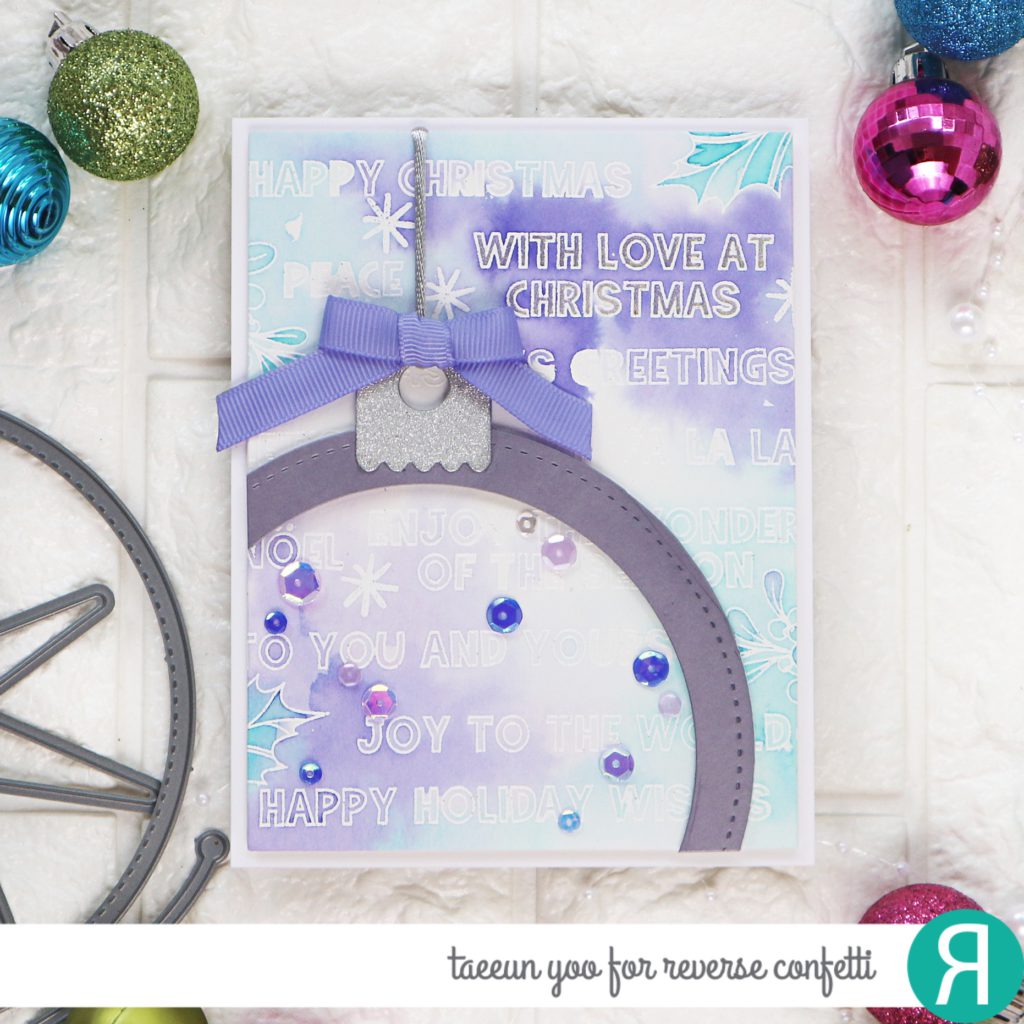
I started by white heat embossing the sentiments from Seasonal Say it All stamp set and some small elements from Holiday Bough set on a watercolor paper panel. I then colored the panel in turquoise green and soft violet and let the panel dry.
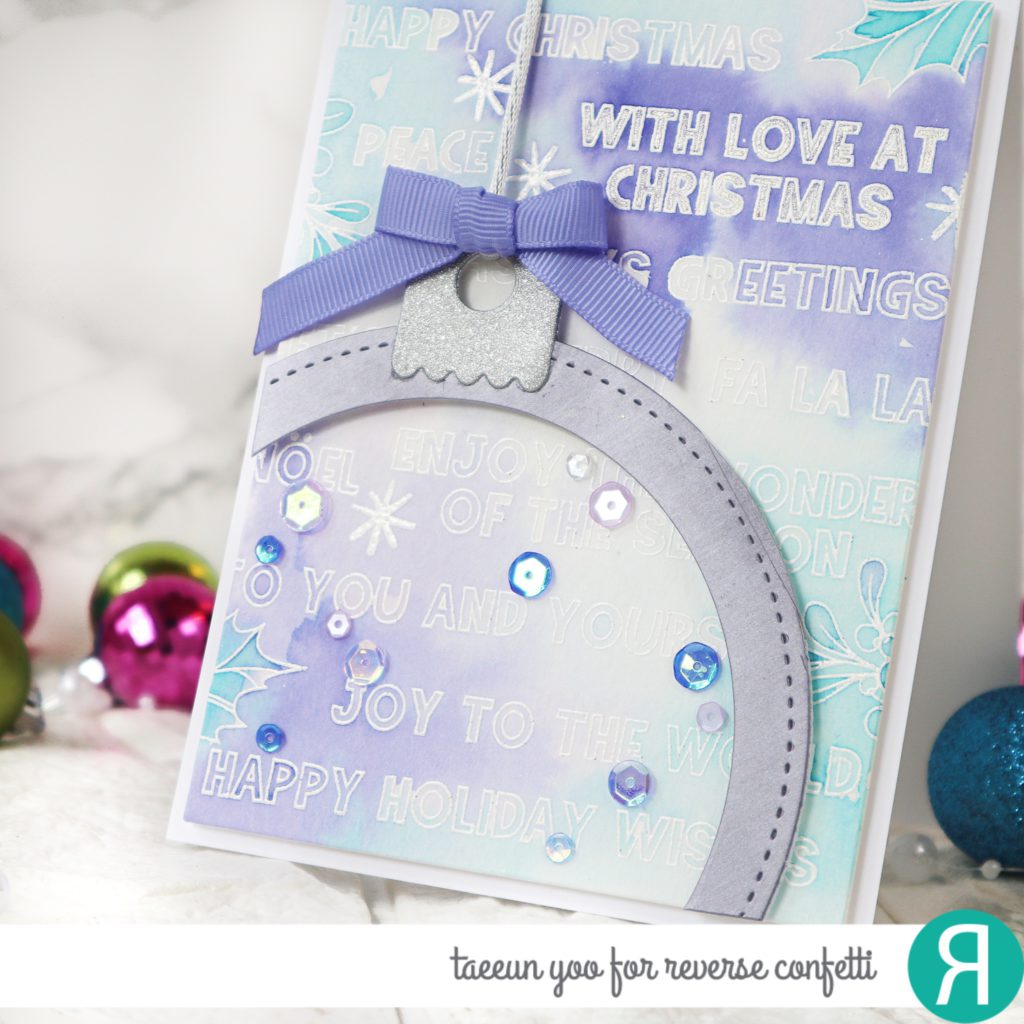
To create the ornament I cut a purple shimmer paper using the Ornament Star Confetti Cuts and a circle die. The top of the ornament was cut from a silver glitter paper. I added the ornament on the background panel using foam tape, tied a silver string and a violet bow and secured the end of the string on the back of the background panel.
The background panel with the ornament was then foam mounted on a white cardbase. I colored a sentiment on the upper right corner with a glitter pen to emphasize it. I finished off the card by embellishing the ornament with lots of violet and blue sequins.


HOP ALONG
- Reverse Confetti Blog
- Amy Kolling
- Ali Farmer
- Tricia Barber
- Lisa Henke
- Amy Tsuruta
- Megan Quinn
- Kathy Schweinfurth
- Olga Moss
- Jeanne Jachna
- Nicole Vögeli
- Deanne Kuntz
- Mayra Duran-Hernandez
- Olga Matyushevskaya
- TaeEun Yoo –> You are here. Thank you!
Thank you so much for looking! Don’t forget to stop by tomorrow for the October Mini Release Blog Hop!
Have a wonderful day!
TaeEun
I participate in the affiliate program of Reverse Confetti. It means I earn a small commission at no additional cost to you each time you click through and purchase the product(s) shared here. Thank you for your support :).
I don’t know how time went because of Cobid 19. Already looking at the Christmas card?! That’s what it feels like.^^
These are beautiful!
Great ideas for using this star and just the bauble shape too TaeEun and I love the idea of using as in the first example to send a gift card, and then the words make a great background to the partial bauble, and all such pretty colours. x
Love these pretty ornament designs! Beautiful creations!