
Hello, everyone! Hope you’re having a nice weekend!
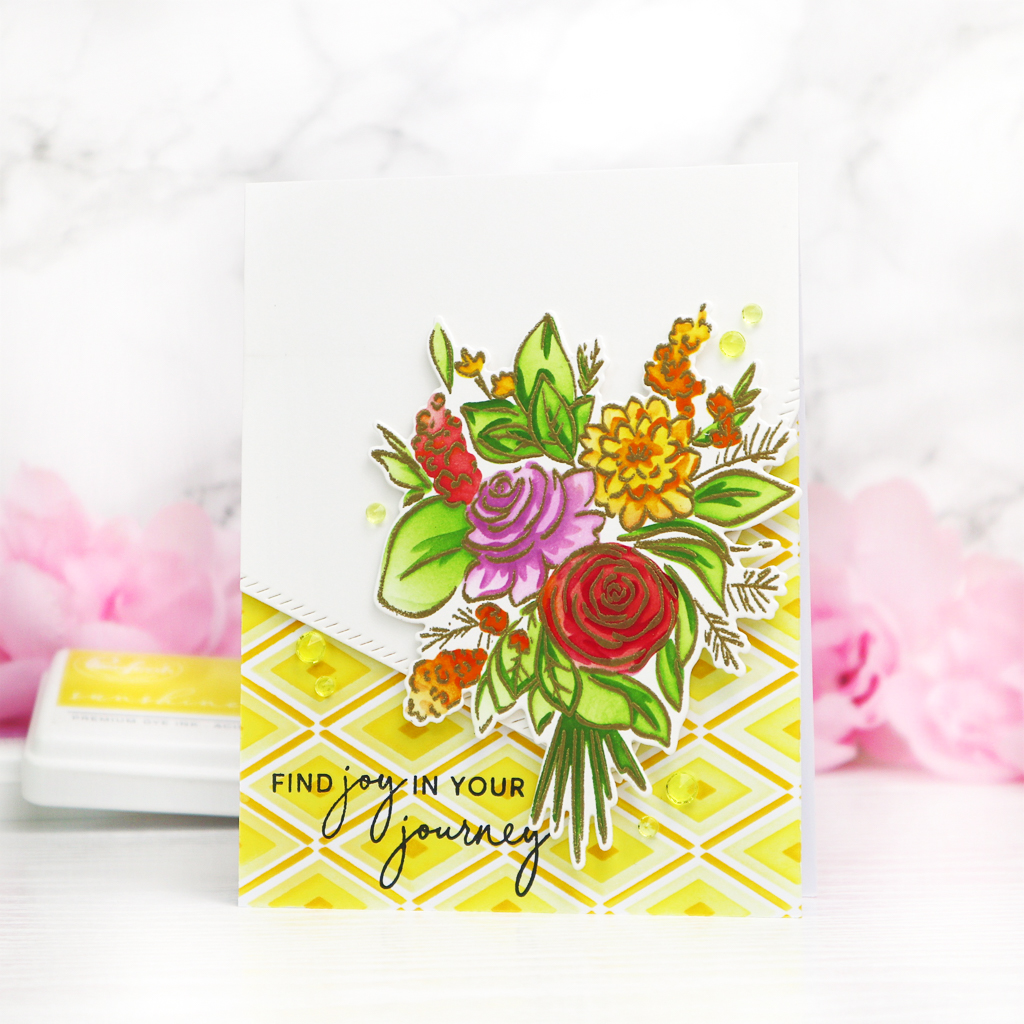
Lately I’m having fun using the layering stencil sets by Pinkfresh Studio. For today’s card I chose the Joyful Bouquet stamp and Layering stencil sets. For the background I used the new Slimline Diamond Builder Layering Stencil.
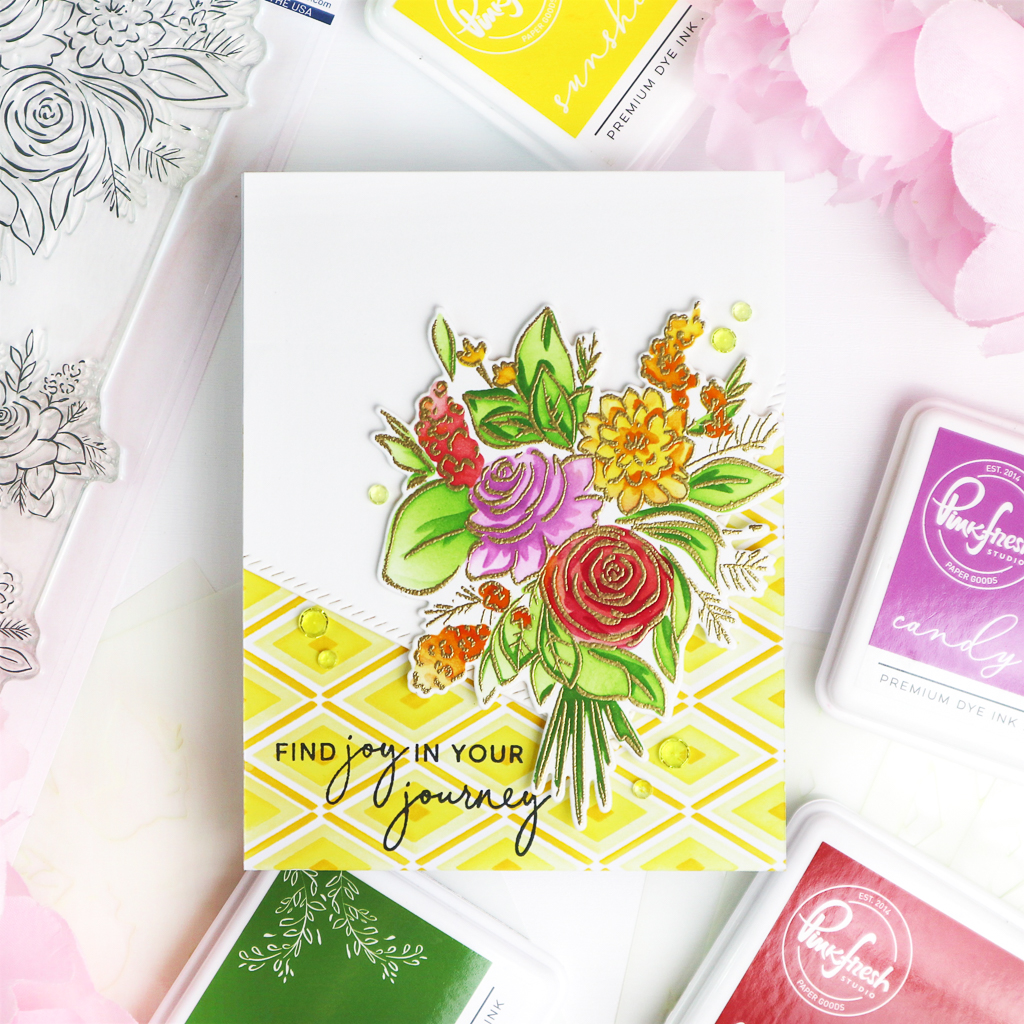
I gold heat embossed the Joyful Bouquet on Neenah solar white cardstock and added colors to it using the Layering stencil set. The ink colors I used for this card are listed below.
- Red flower: Passion Fruit, Candy Apple
- Purple flower: Soft Lilac, Candy Violet
- Yellow flowers: Sweet Mustard, Clementine
- Leaves: Key Lime, Olive
I then cut the image using the coordinating die and set it aside.
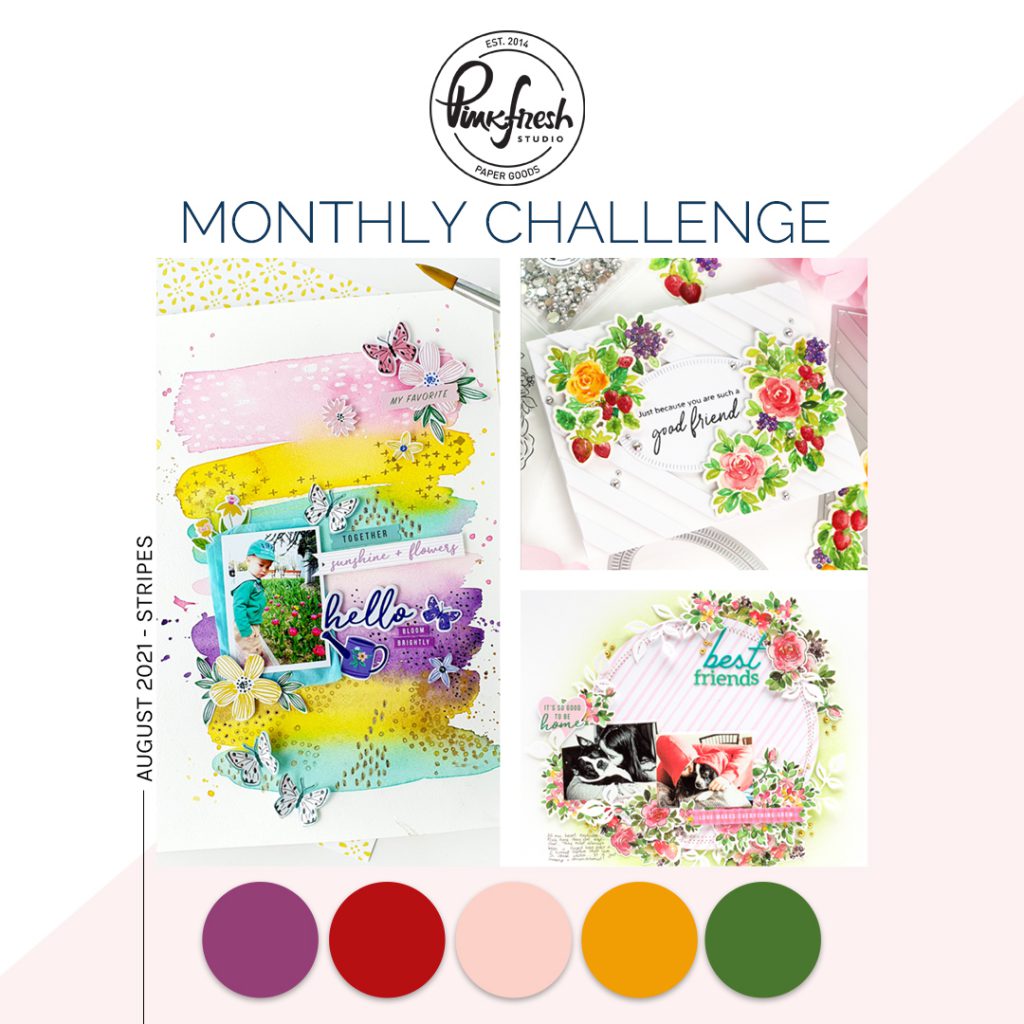
I chose the color palette from the Pinkfresh Studio August Challenge graphic. It’s a great help to use a color palette which is already provided at a challenge if you’re having a hard time choosing the colors 🙂 . The theme of the challenge is STRIPES Which I didn’t took for my card today. There is still time to enter into the Pinkfresh Studio August challenge! Hope you’ll play along 🙂 !

To stencil the Slimline Diamond Builder I used Lemon Whip, Sunshine, Sweet Mustard and Marigold. As it’s a slimline sized stencil I turned the stenciled panel to a side and trimmed it to the A2 width. I then adhered it on the bottom of a A2 cardbase and stamped the sentiment from the Joyful Bouquet stamp in Detail Black on it.

I cut a white panel using a Diagonal Stitched Rectangles die and foam mounted it tilted on my card to cover the upper portion. The stenciled bouquet was then added using foam tape as shown in the picture. I finished off the card with a few yellow Crystals.
That’s it! Hope you enjoyed looking my card!
Wishing you all a lovely weekend!
Hugs,
TaeEun
So beautiful and happy/bright colors.
I love this pretty card TaeEun and the Diamond Builder stencilling looks fabulous in shades of yellow and ochre, and the angled ornate mat over the top half with the beautiful bunch of flowers, brilliantly coloured over the top, and some added yellow crystals, finish this card perfectly. x