
Hello everyone! Today I have four holiday cards to share with you. They all are made using the new holiday stamp and die sets from Merry and Joy Release by Penny Black.

It’ll be a photo heavy post. So grab something to drink before you start 😄!
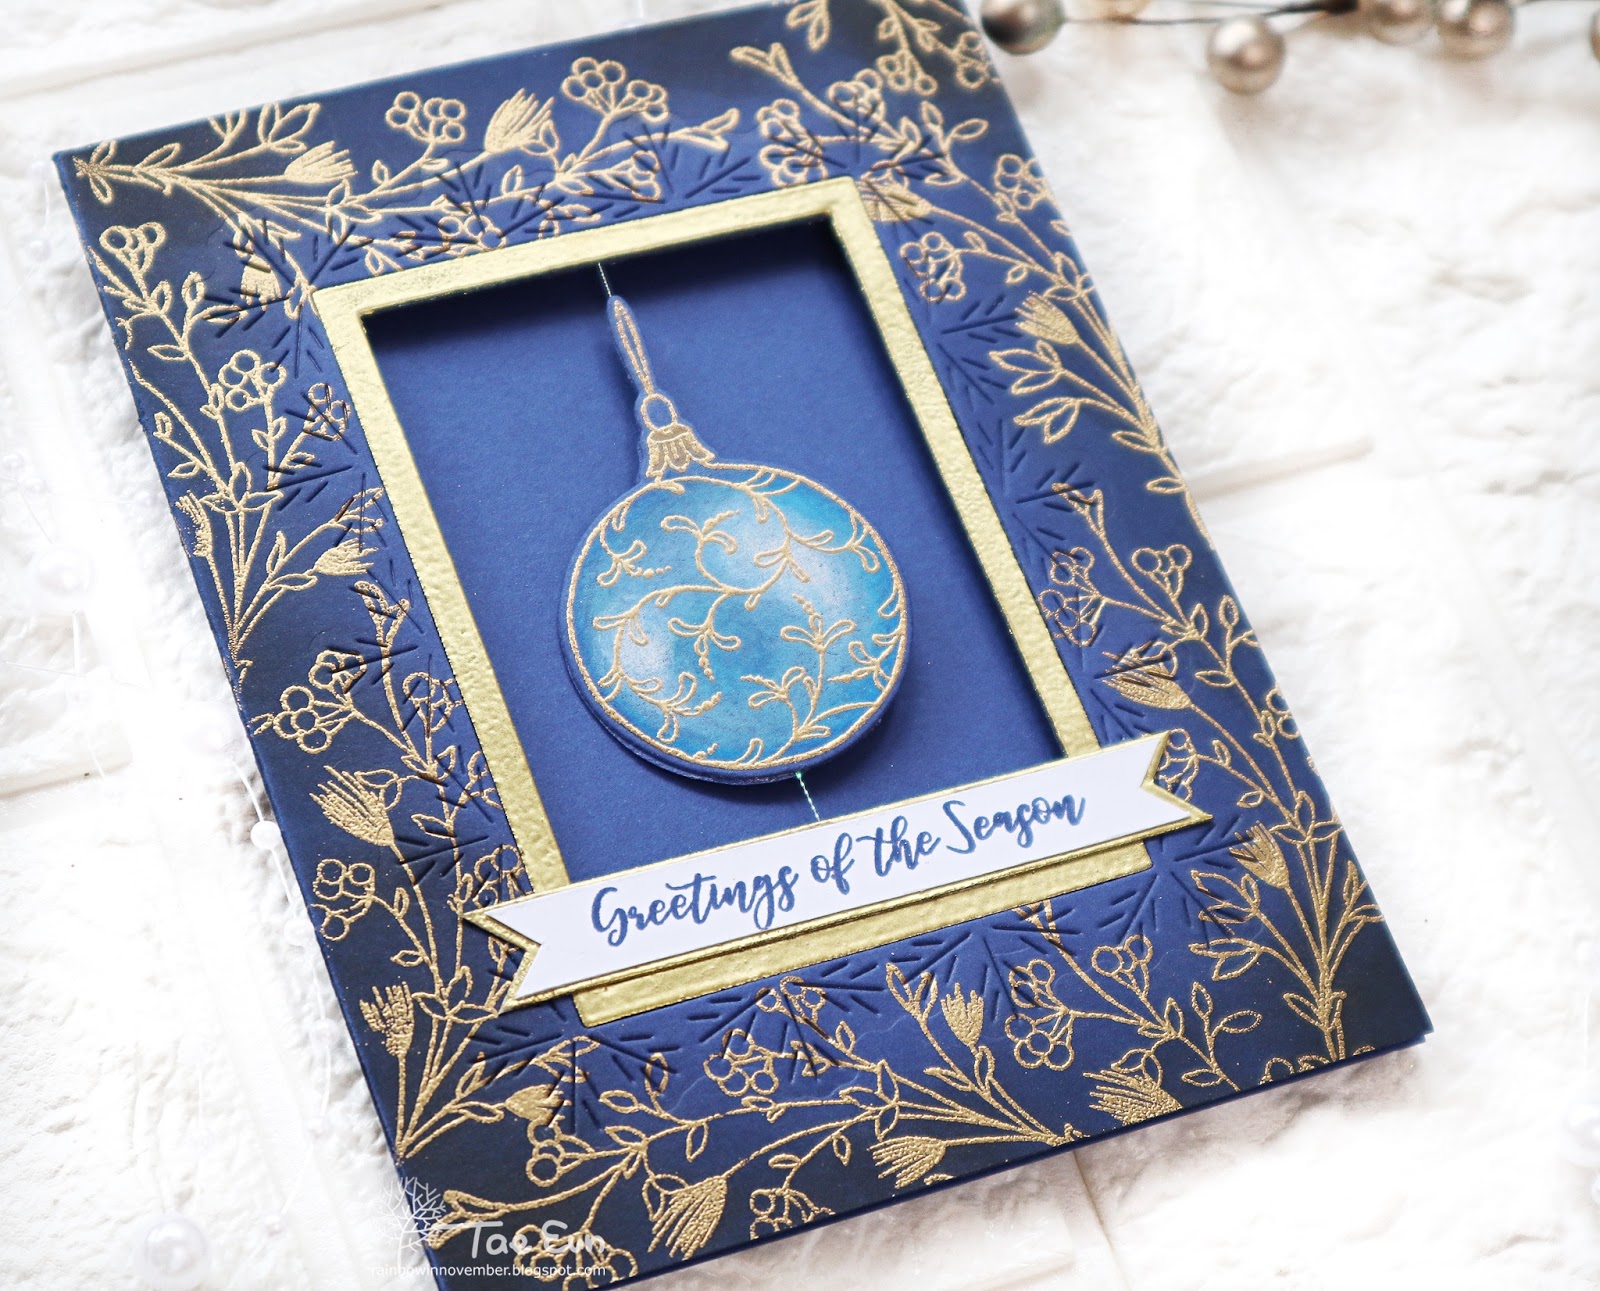
My first card is a spinner card. I used the Ornate (30-610) stamp set and Ornate Cut Out (51-575) to make the spinning bauble.
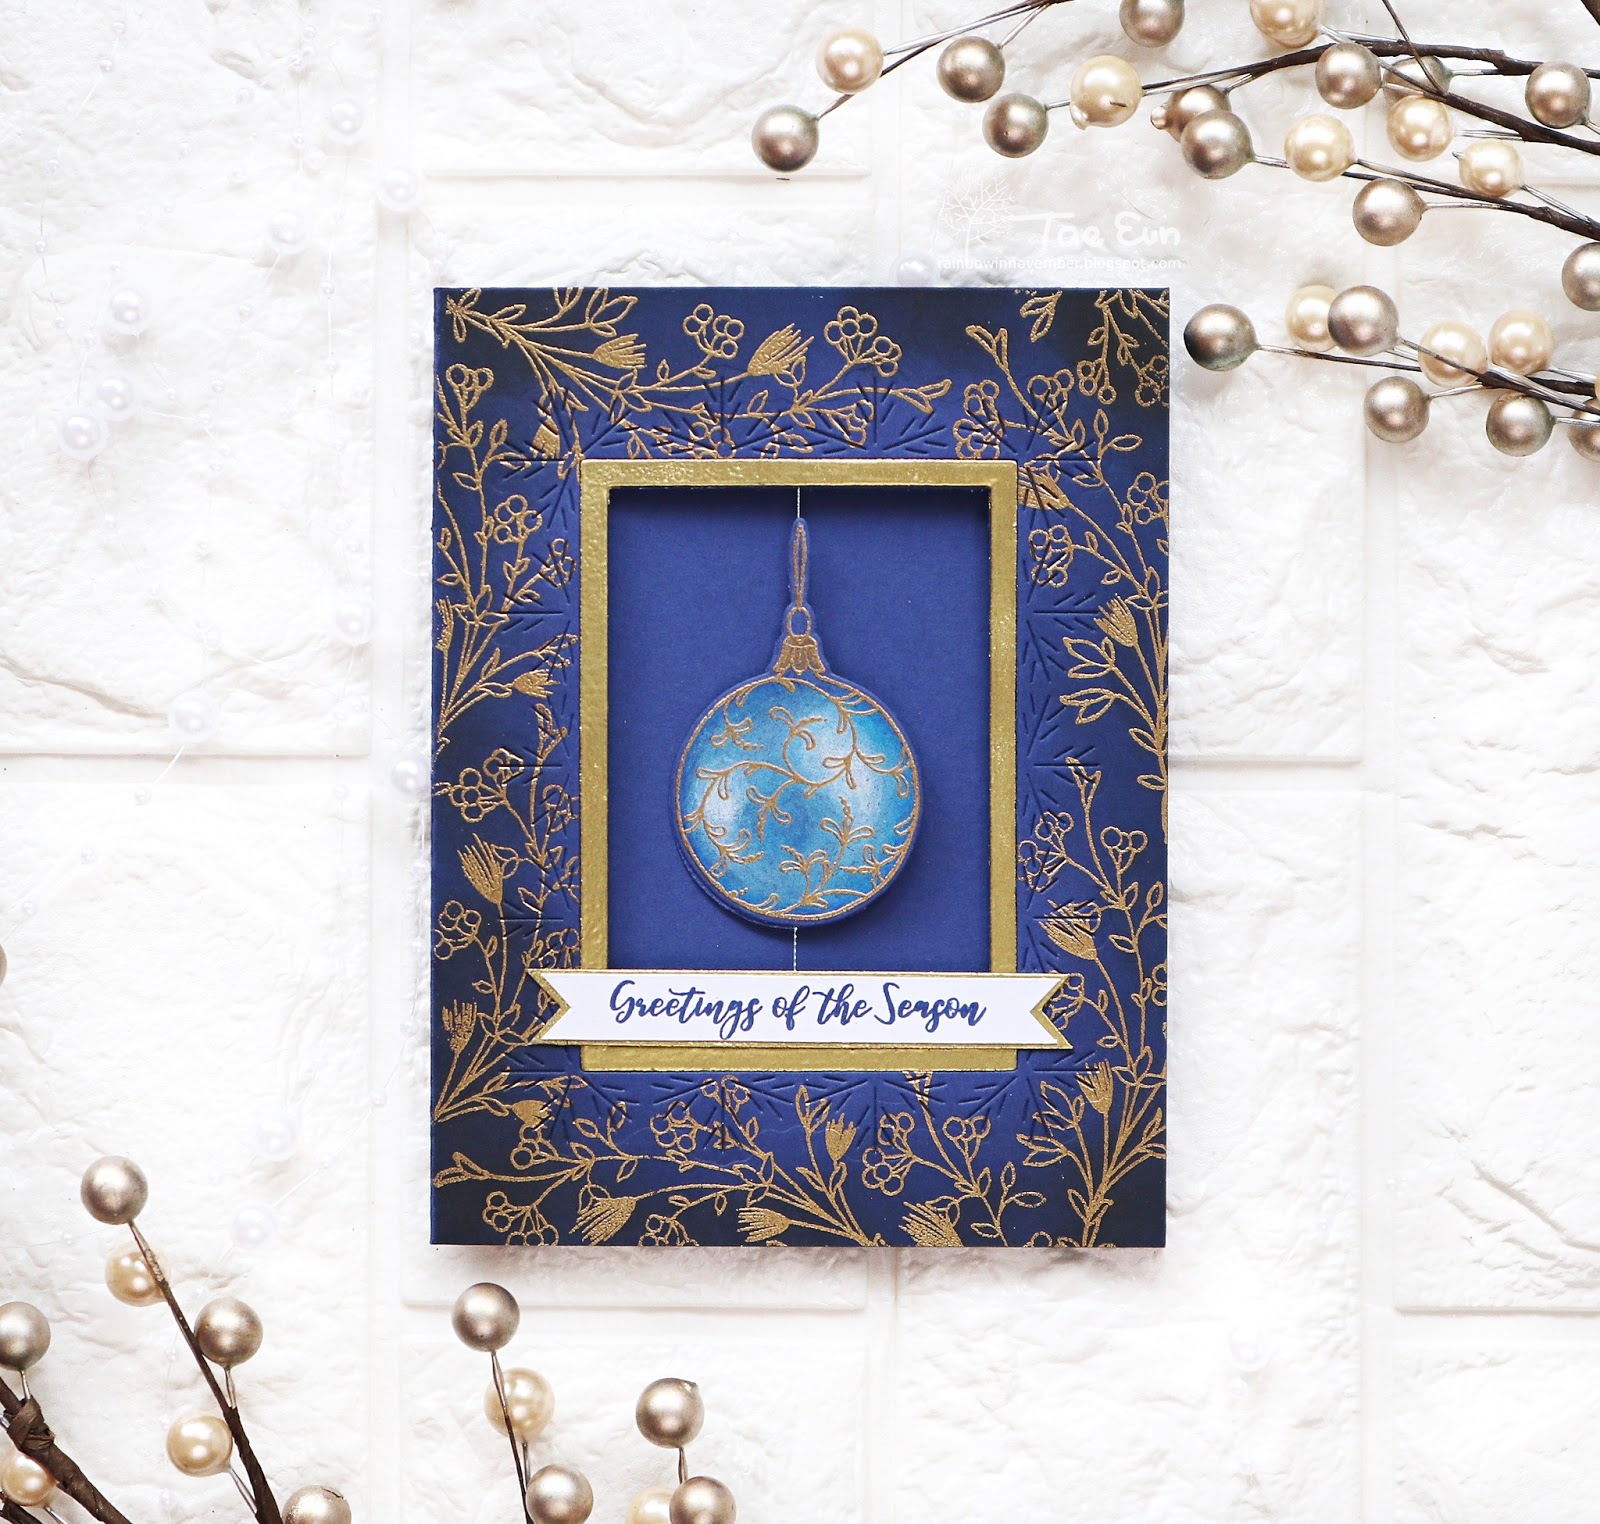
I started off by preparing a navy cardbase. I gold heat embossed a branch from All Wrapped Up (30-607) stamp set on the front of the navy cardbase several times so that I get the all over patterned look. I ink blended Faded Jeans and Black Soot Distress ink on the perimeter of the front and cut it using Snowflake Frame die (51-565). I took off the central rectangle and gold heat embossed the thin frame.
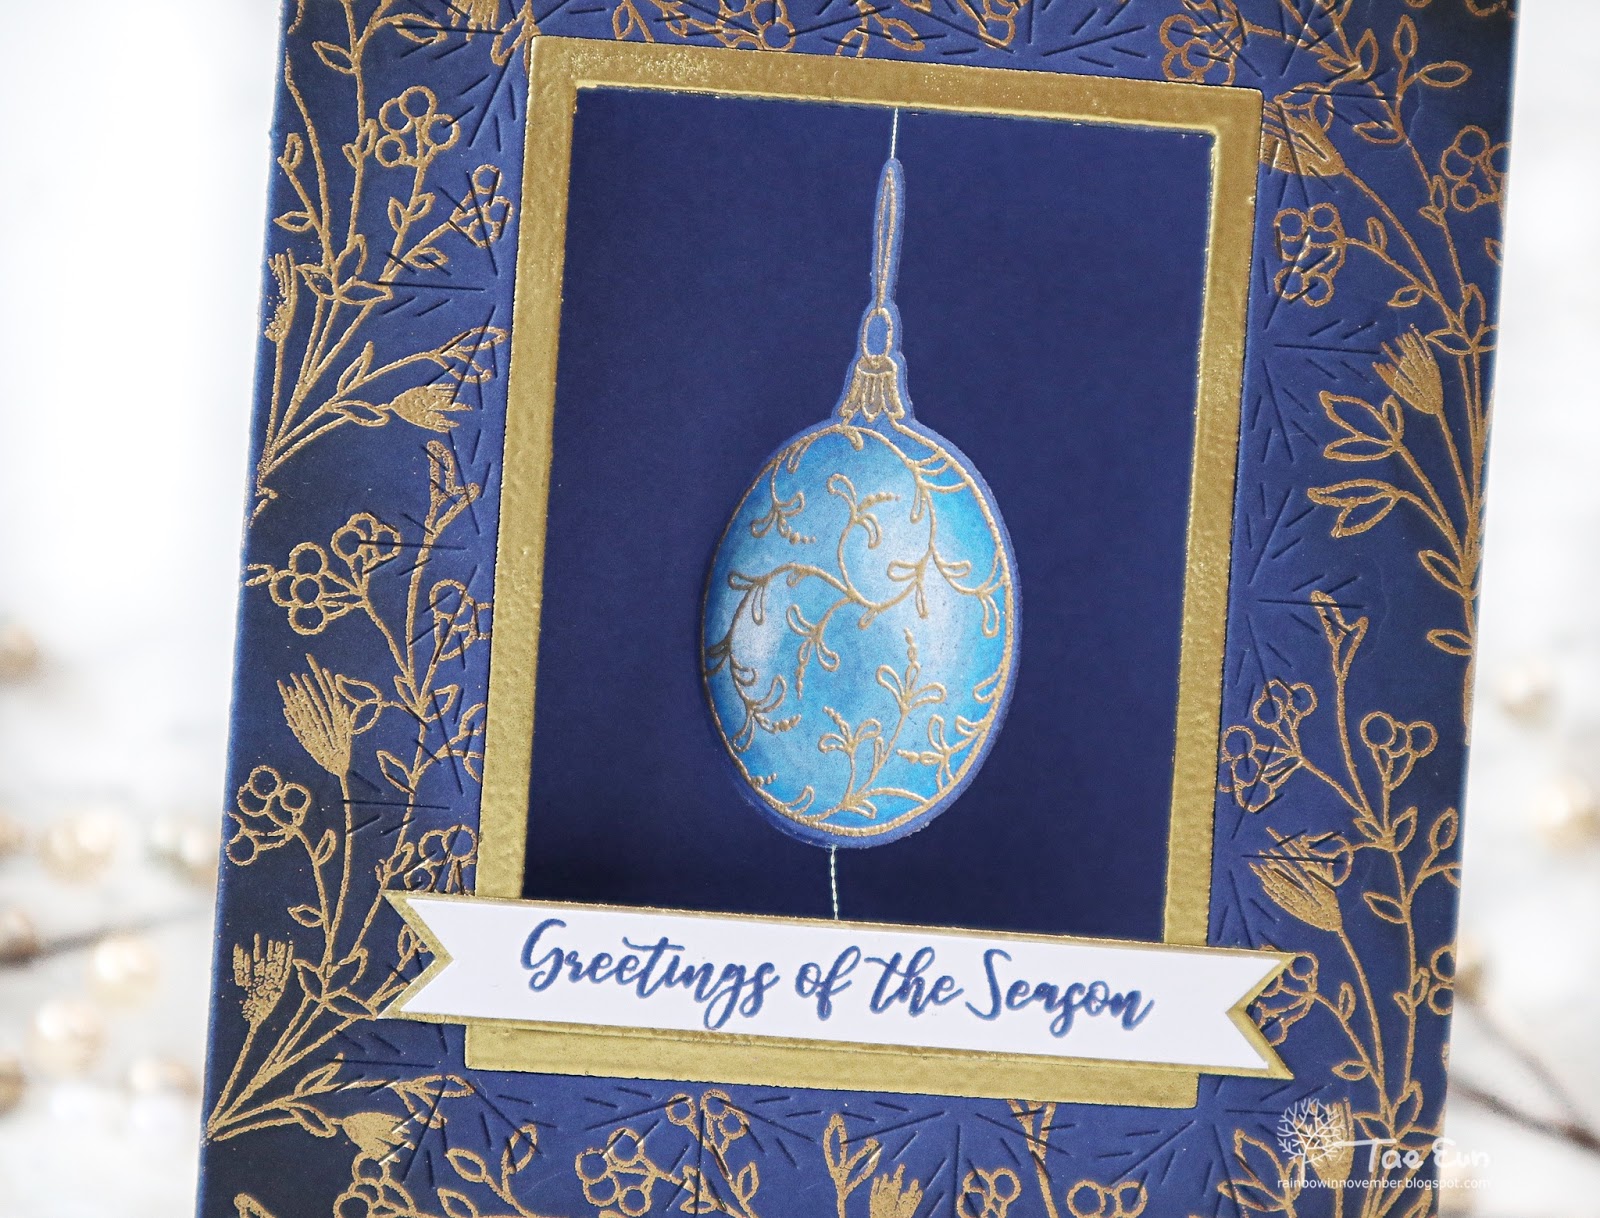
I chose one bauble from the Ornate (30-610) stamp set and gold heat embossed it two times on some navy cardstock. I colored them using Prismacolor colored pencils and cut them with the Ornate Cut Out (51-575).
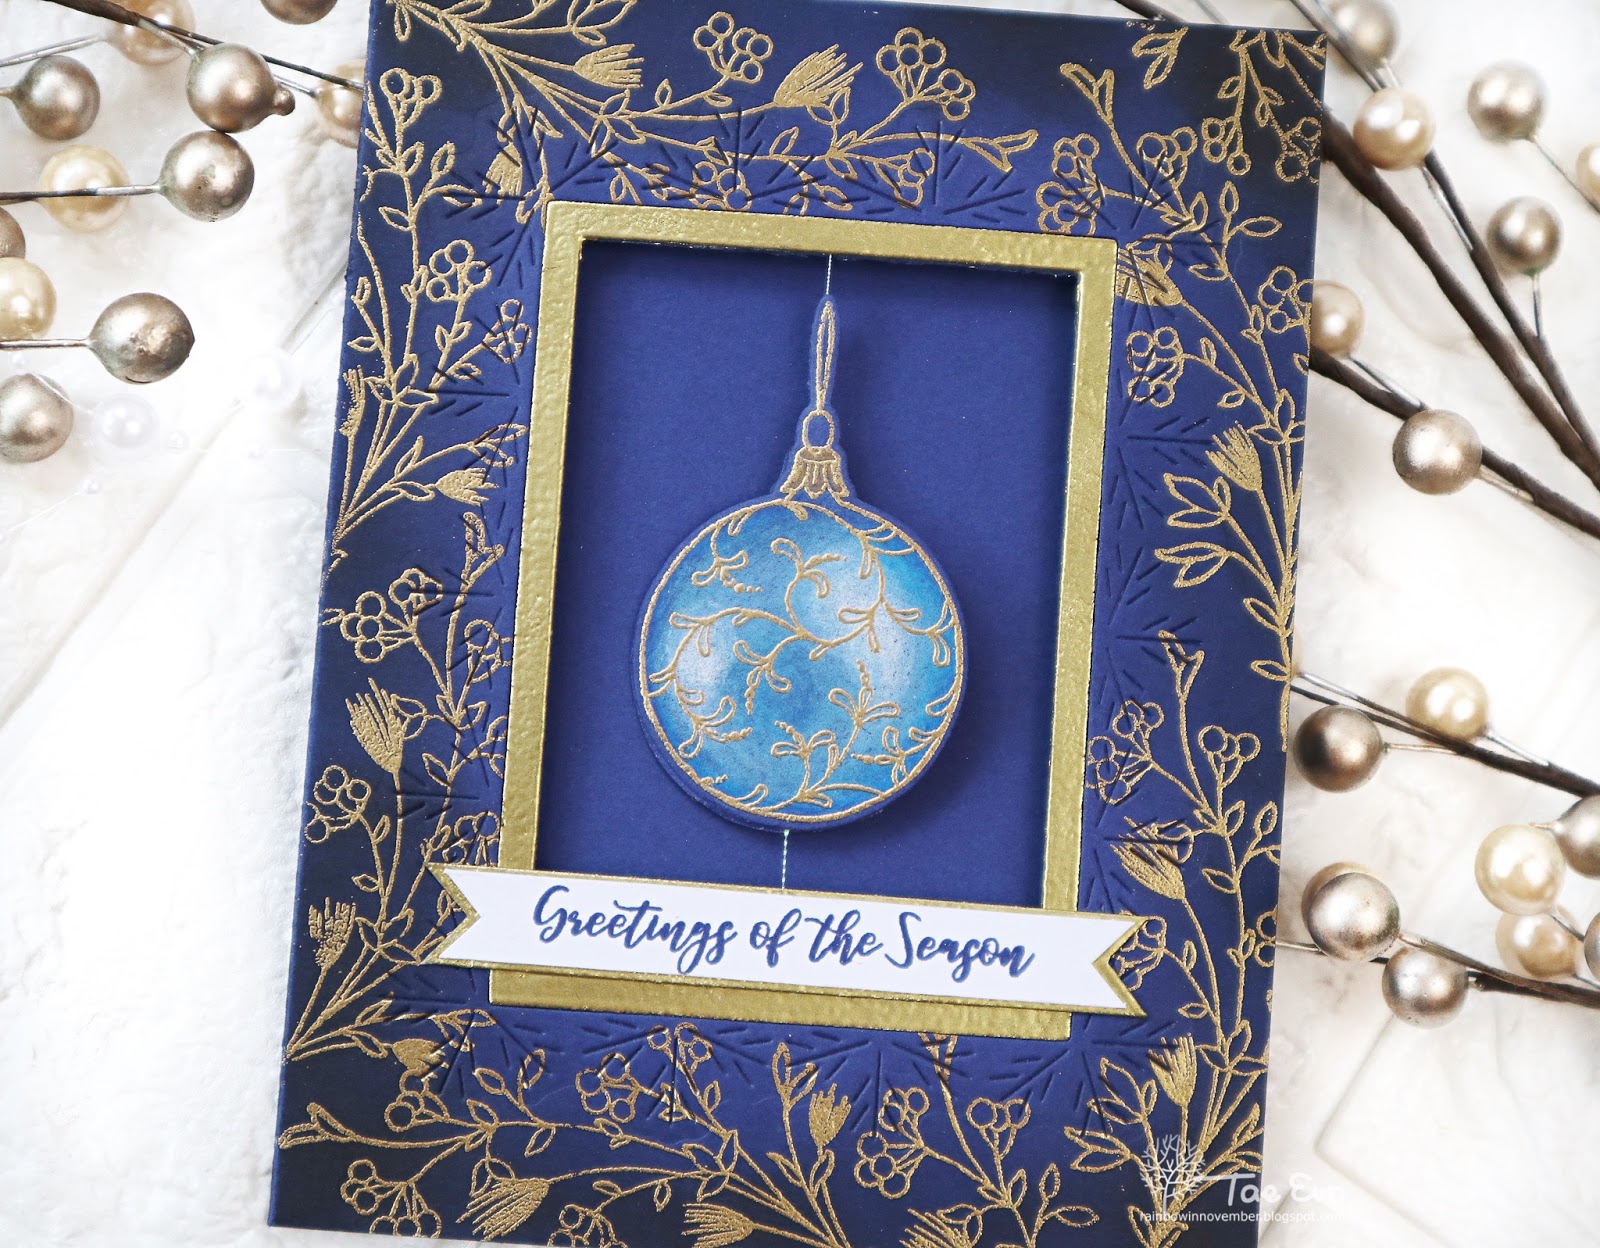
Then I started assembling the card. I cut a extra navy panel with the small snowflake frame die from Snowflake Frame die (51-565) set and adhered it on the back of the front side of the cardbase. I put a thin string between them and glued the two colored baubles to the string. The sentiment from Merry Up (30-622) set was stamped in navy on a white banner. I matted it with a bigger banner which I heat embossed in gold. I’ll add one more sheet of navy cardstock in the inside so that it turns into a tri-fold card and I can write something :).
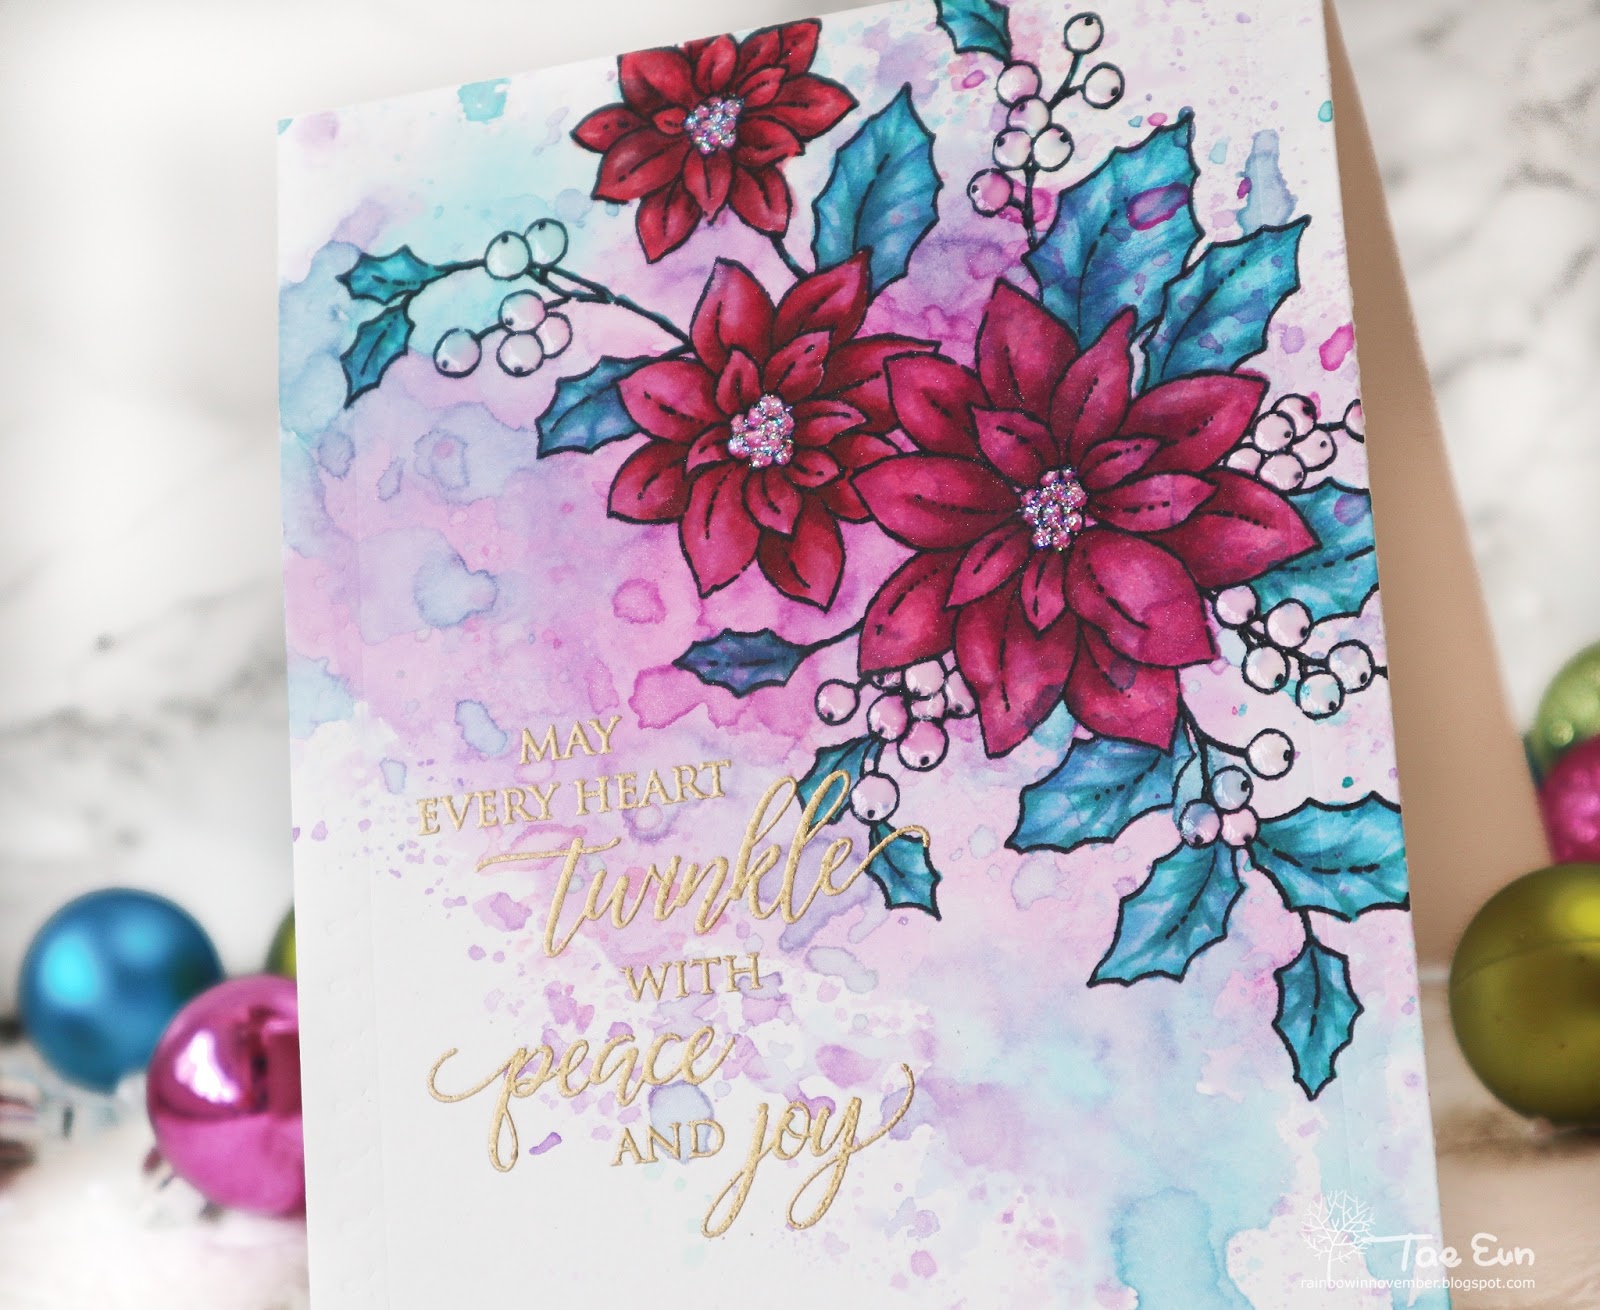
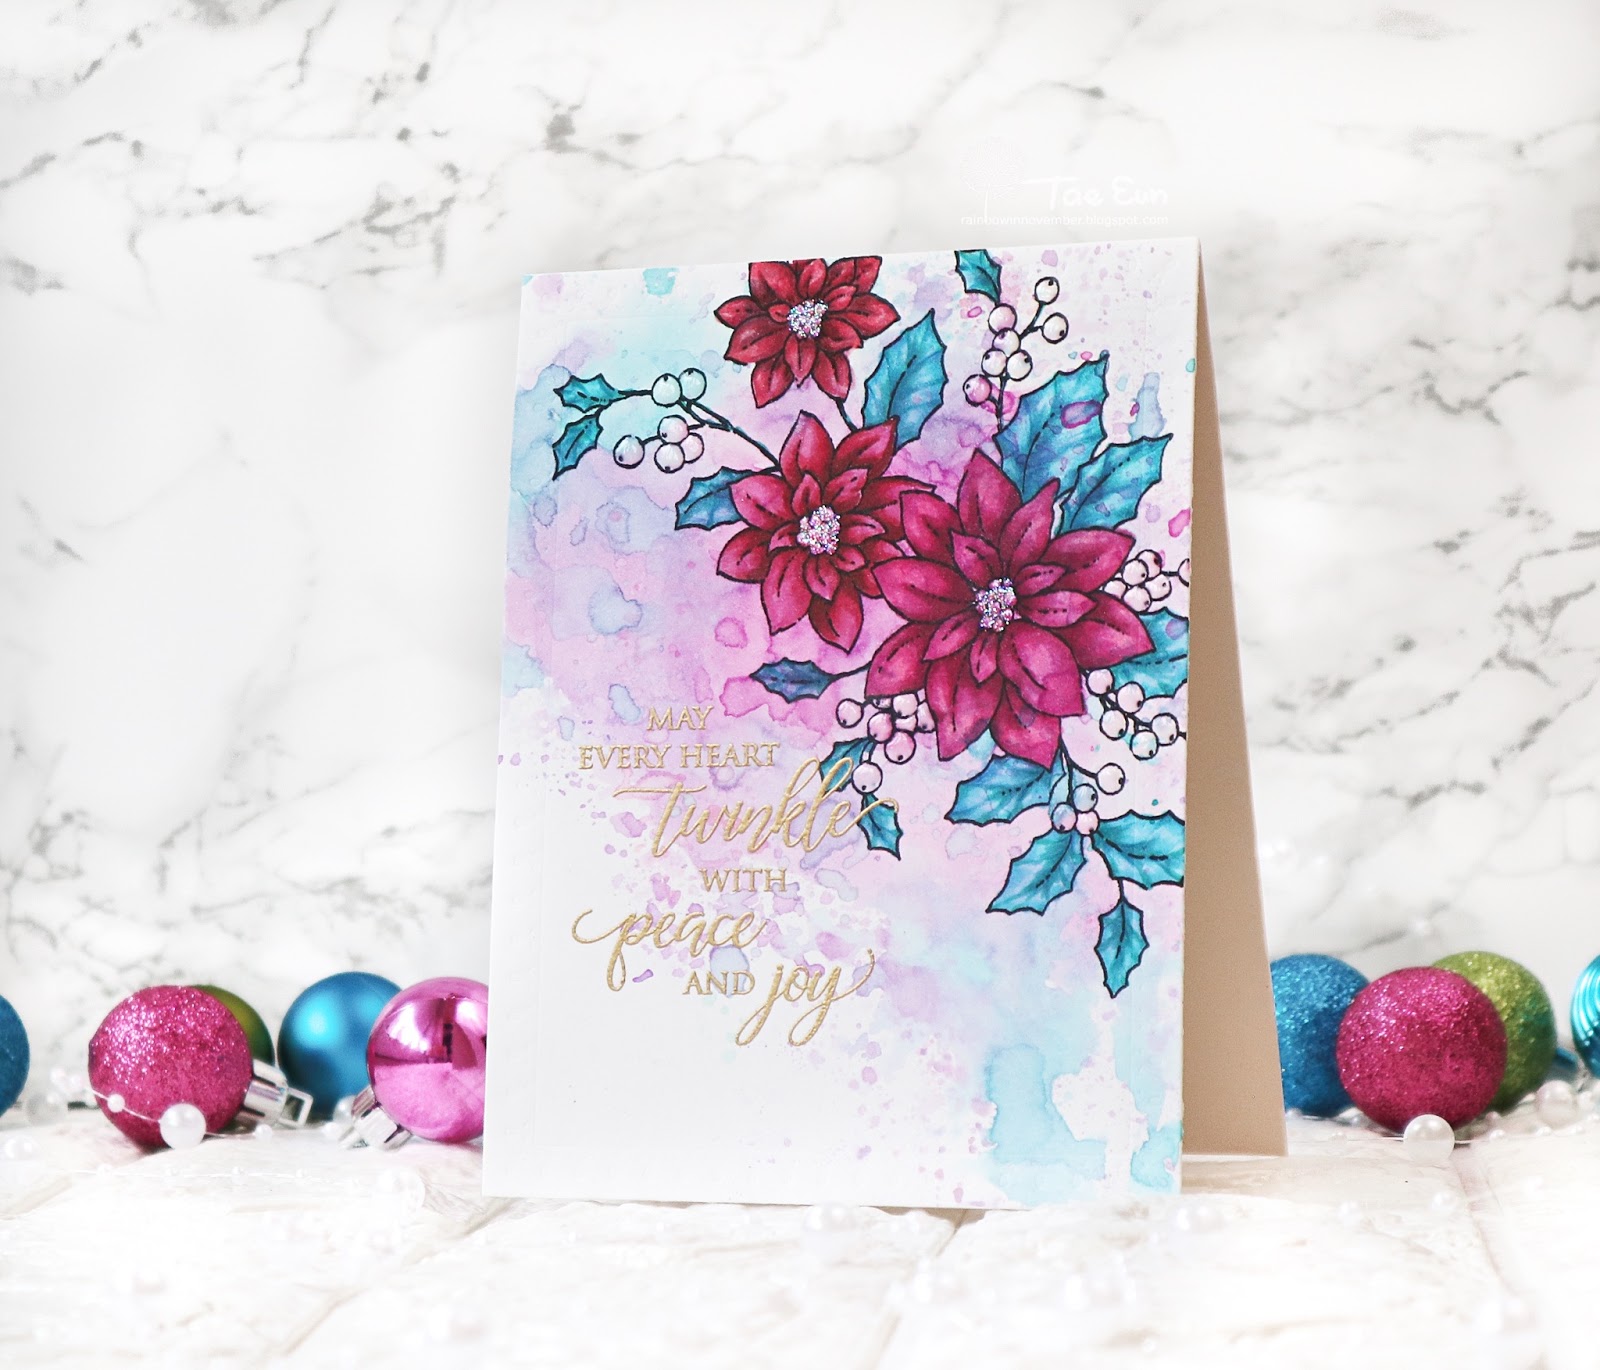
My next card is showcasing a beautiful cling stamp called Poinsettia Poem (40-700). I made a one layer card, as I wanted to focus on the image.
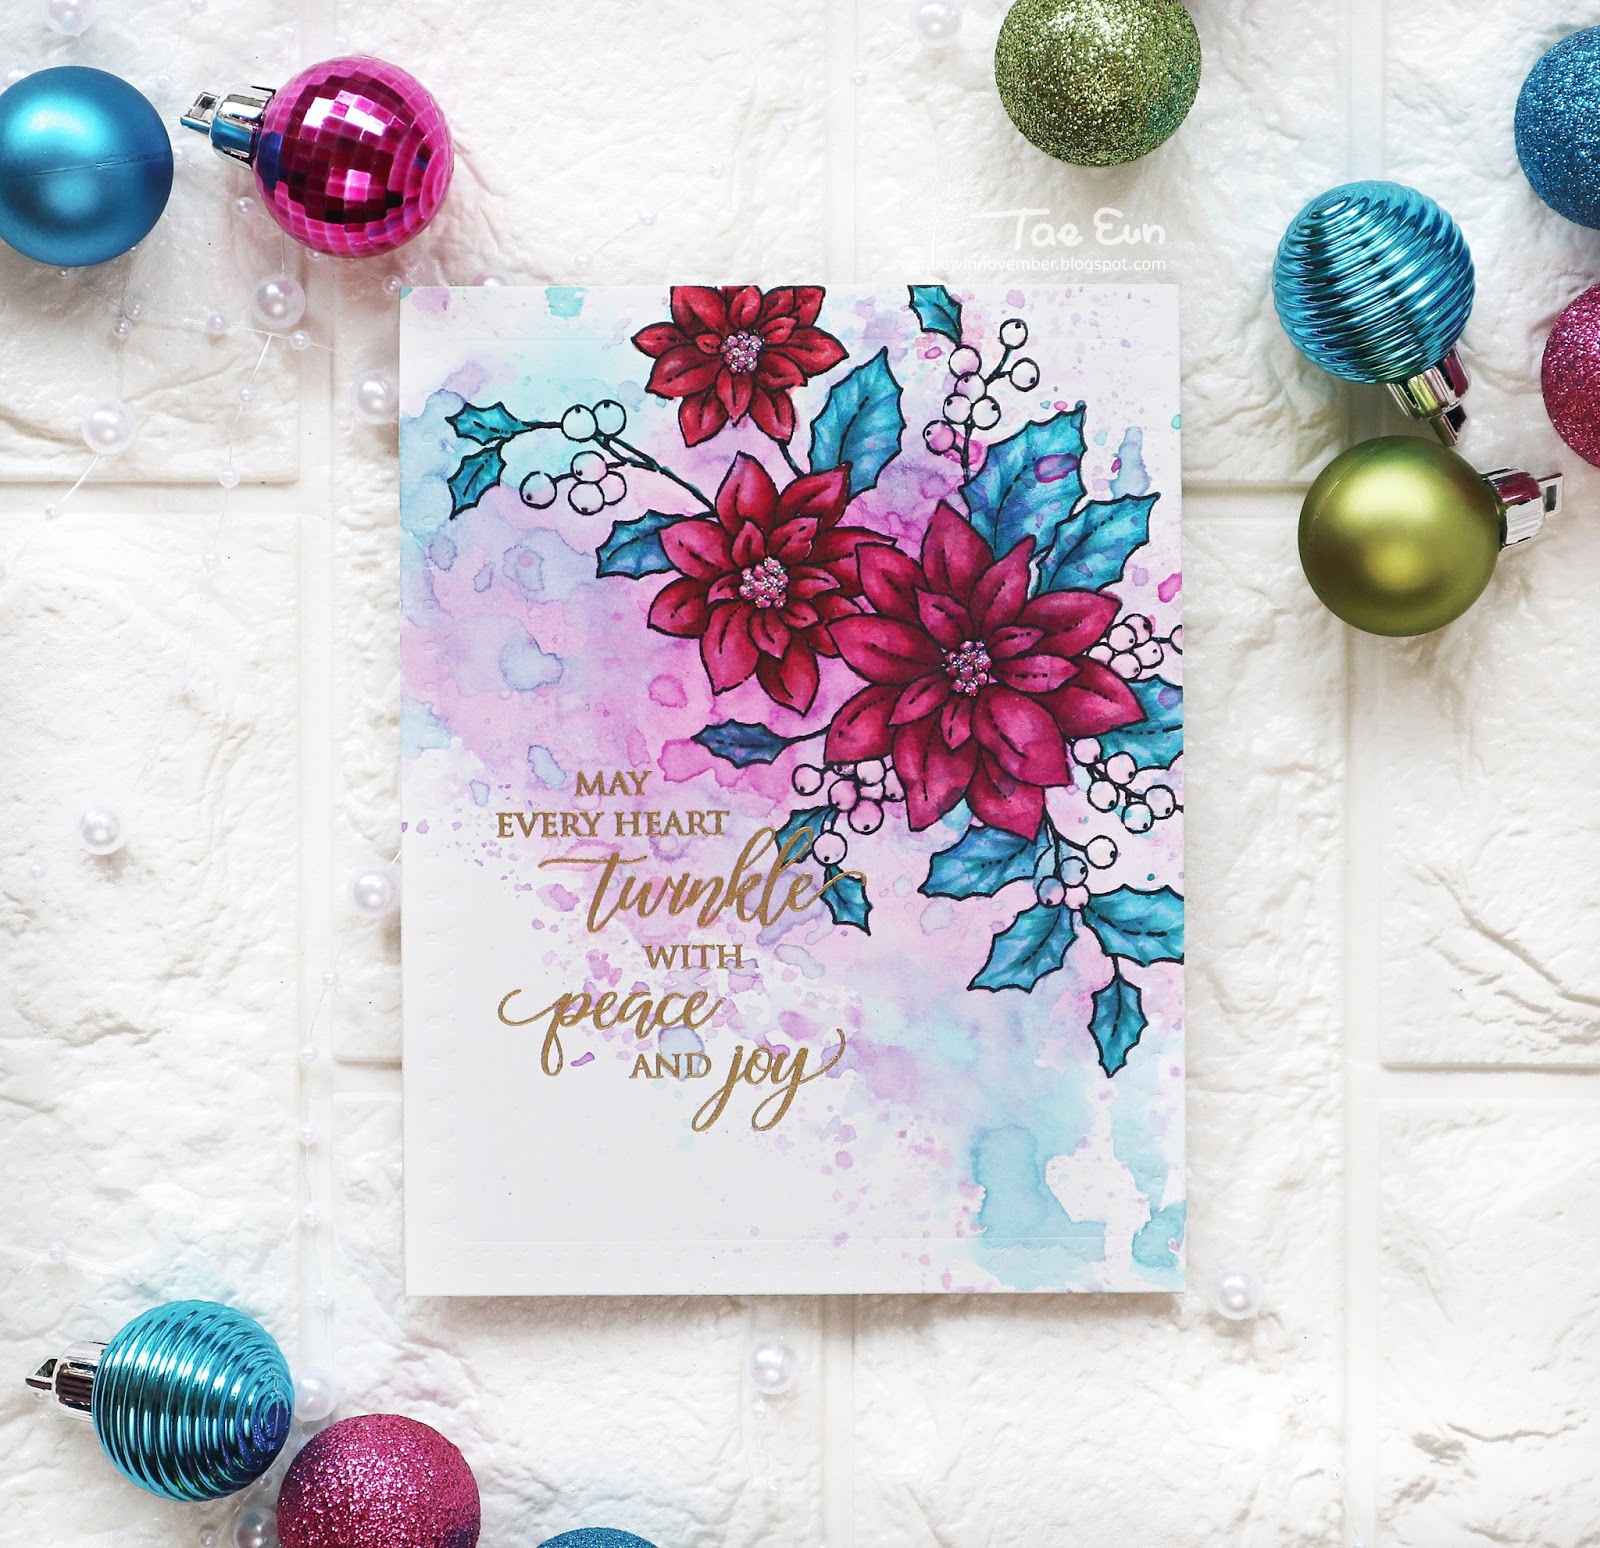
To start off I stamped the Poinsettia Poem (40-700) in a light gray ink on Bristol Vellum paper and added the background colors by “smooshing”. I used Spun Sugar, Picked Raspberry, Peacock Feather, Broken China and Wilted Violet distress ink. I applied pink and purple inks first on a acetate sheet, sprayed lots of water and pressed it on the paper. I dried the panel and added teal and blue inks in the same way. The light gray image helped me while adding the colors in the background, so that I have more pink on the flowers and blue-teal color on the leaves.

After the panel was completely dry I stamped the Poinsettia Poem (40-700) again in Memento black ink and colored it using Copic markers. I used R83, 85, 37 and 89 for the magenta poinsettias and R32, 35, 37 and 39 for the red one. The holy leaves were colored in BG colors. To add some texture on the panel I dry embossed it using a Stitched Loops die (51-573).
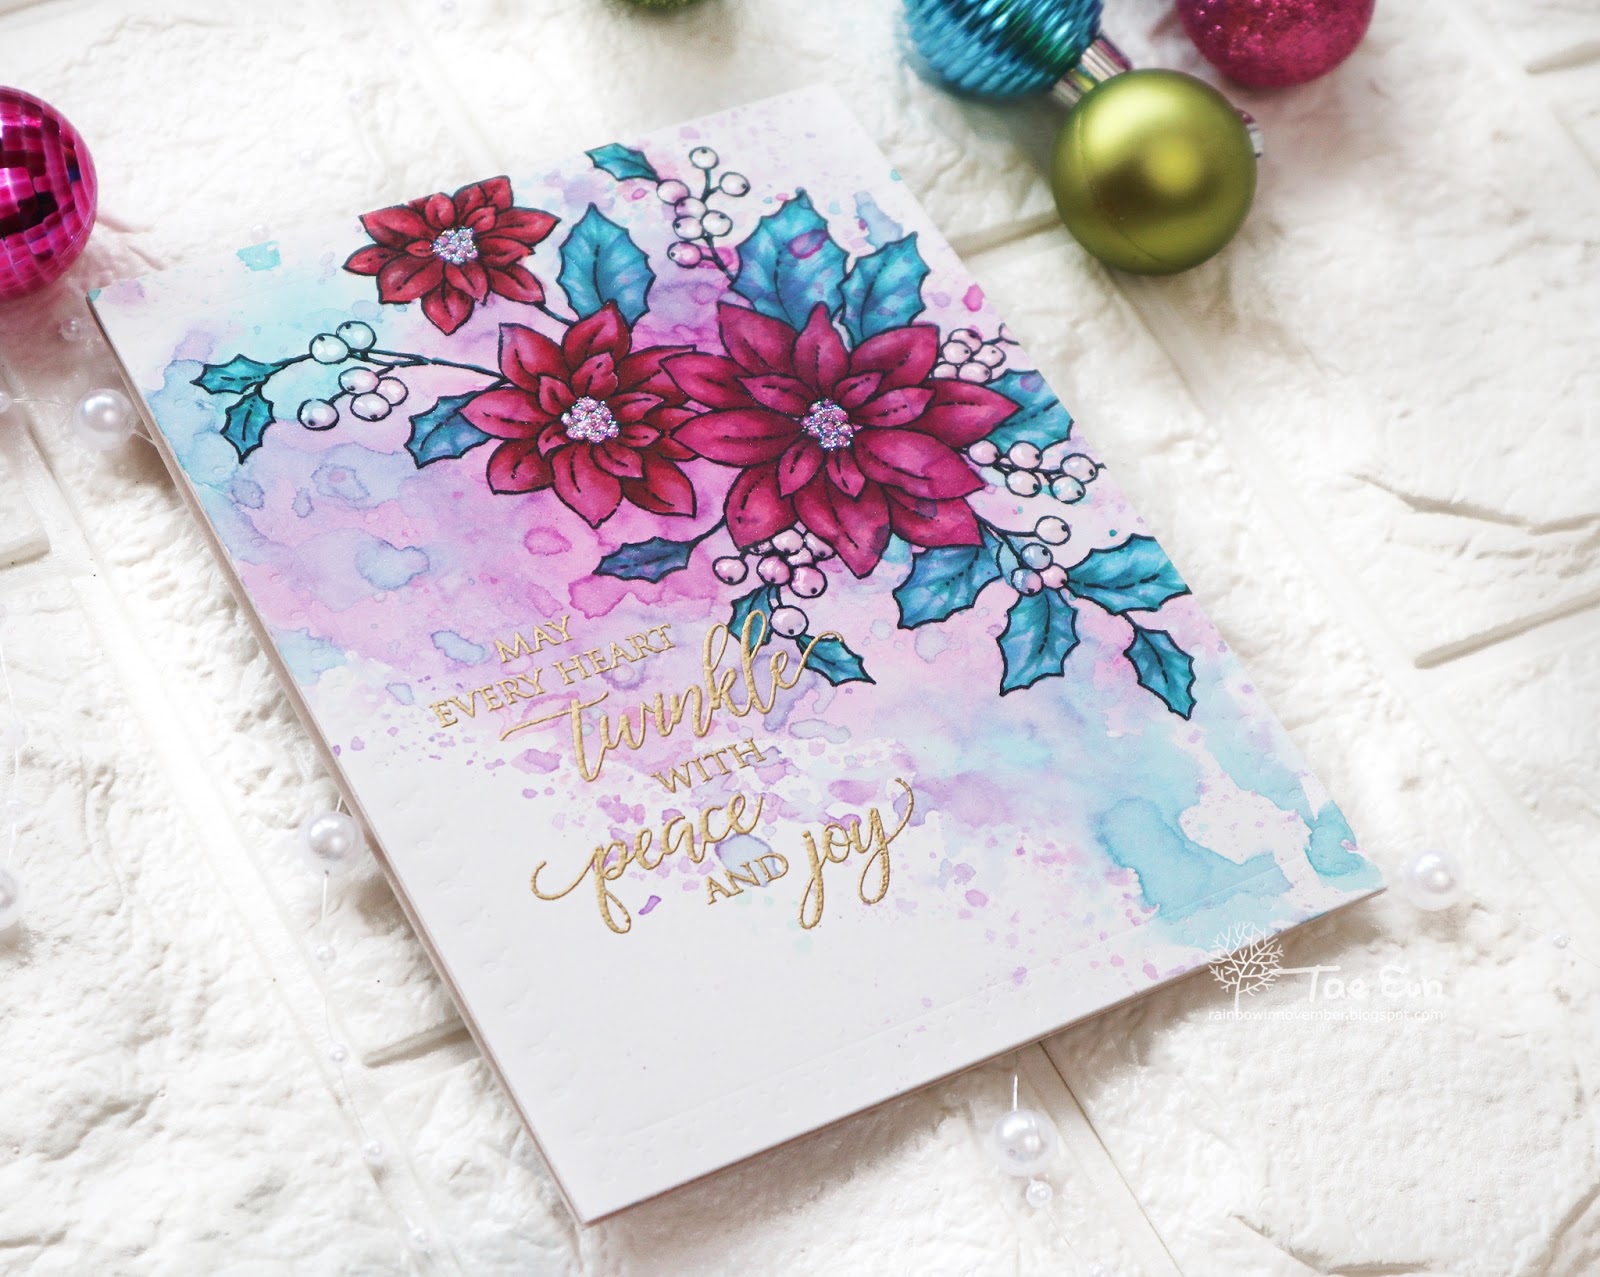
The sentiment is from Thrill of Hope (30-616) stamp set. I gold heat embossed it directly on the colored panel and mounted the panel flat on a cream cardbase. To give the card some shine and sparkle I added white Pico Embellisher on the berries and Crystal Stickles on the center of the poinsettias.
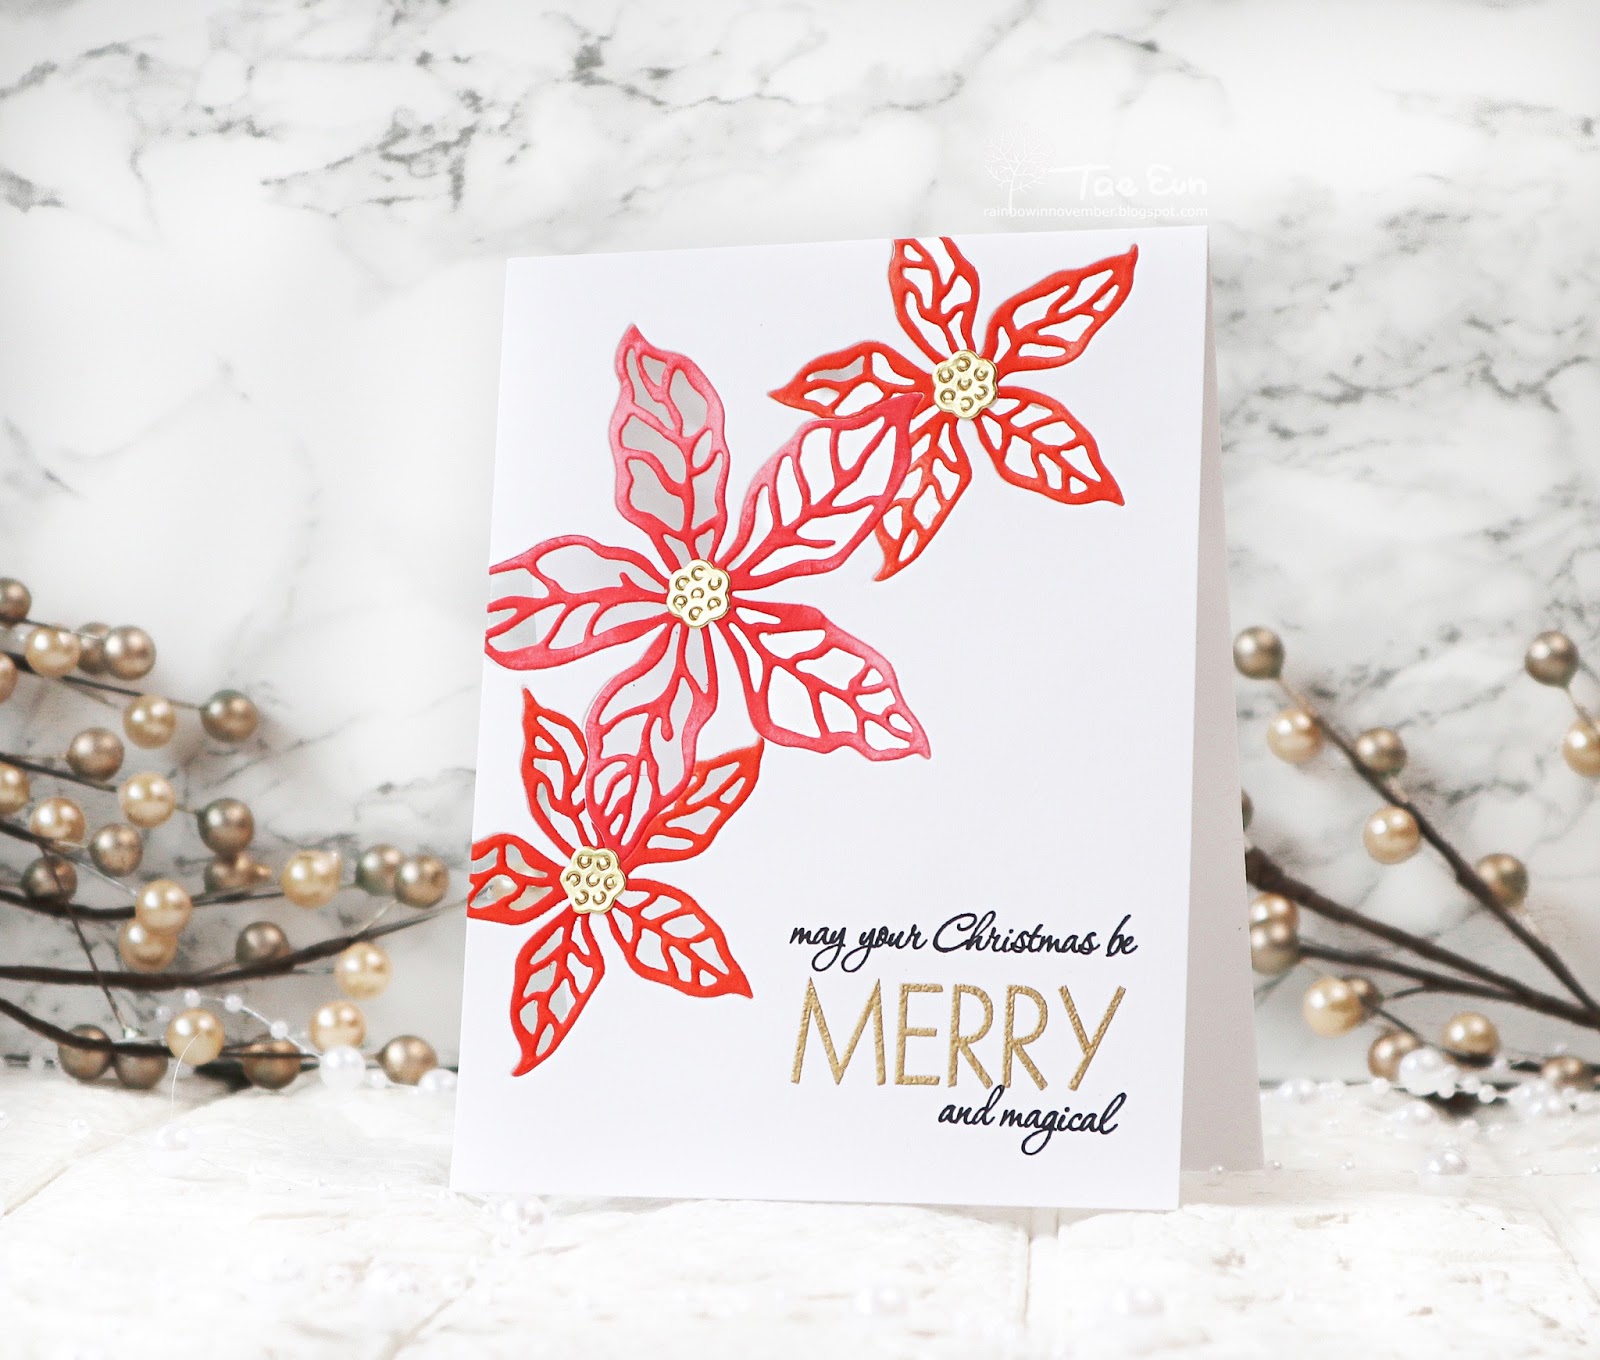
For the next card I used the gorgeous Scarlet Season die set (51-559). I chose a modern version from the design ideas I had in my mind 😊! This card is practically one layer and showing transparent poinsettias.
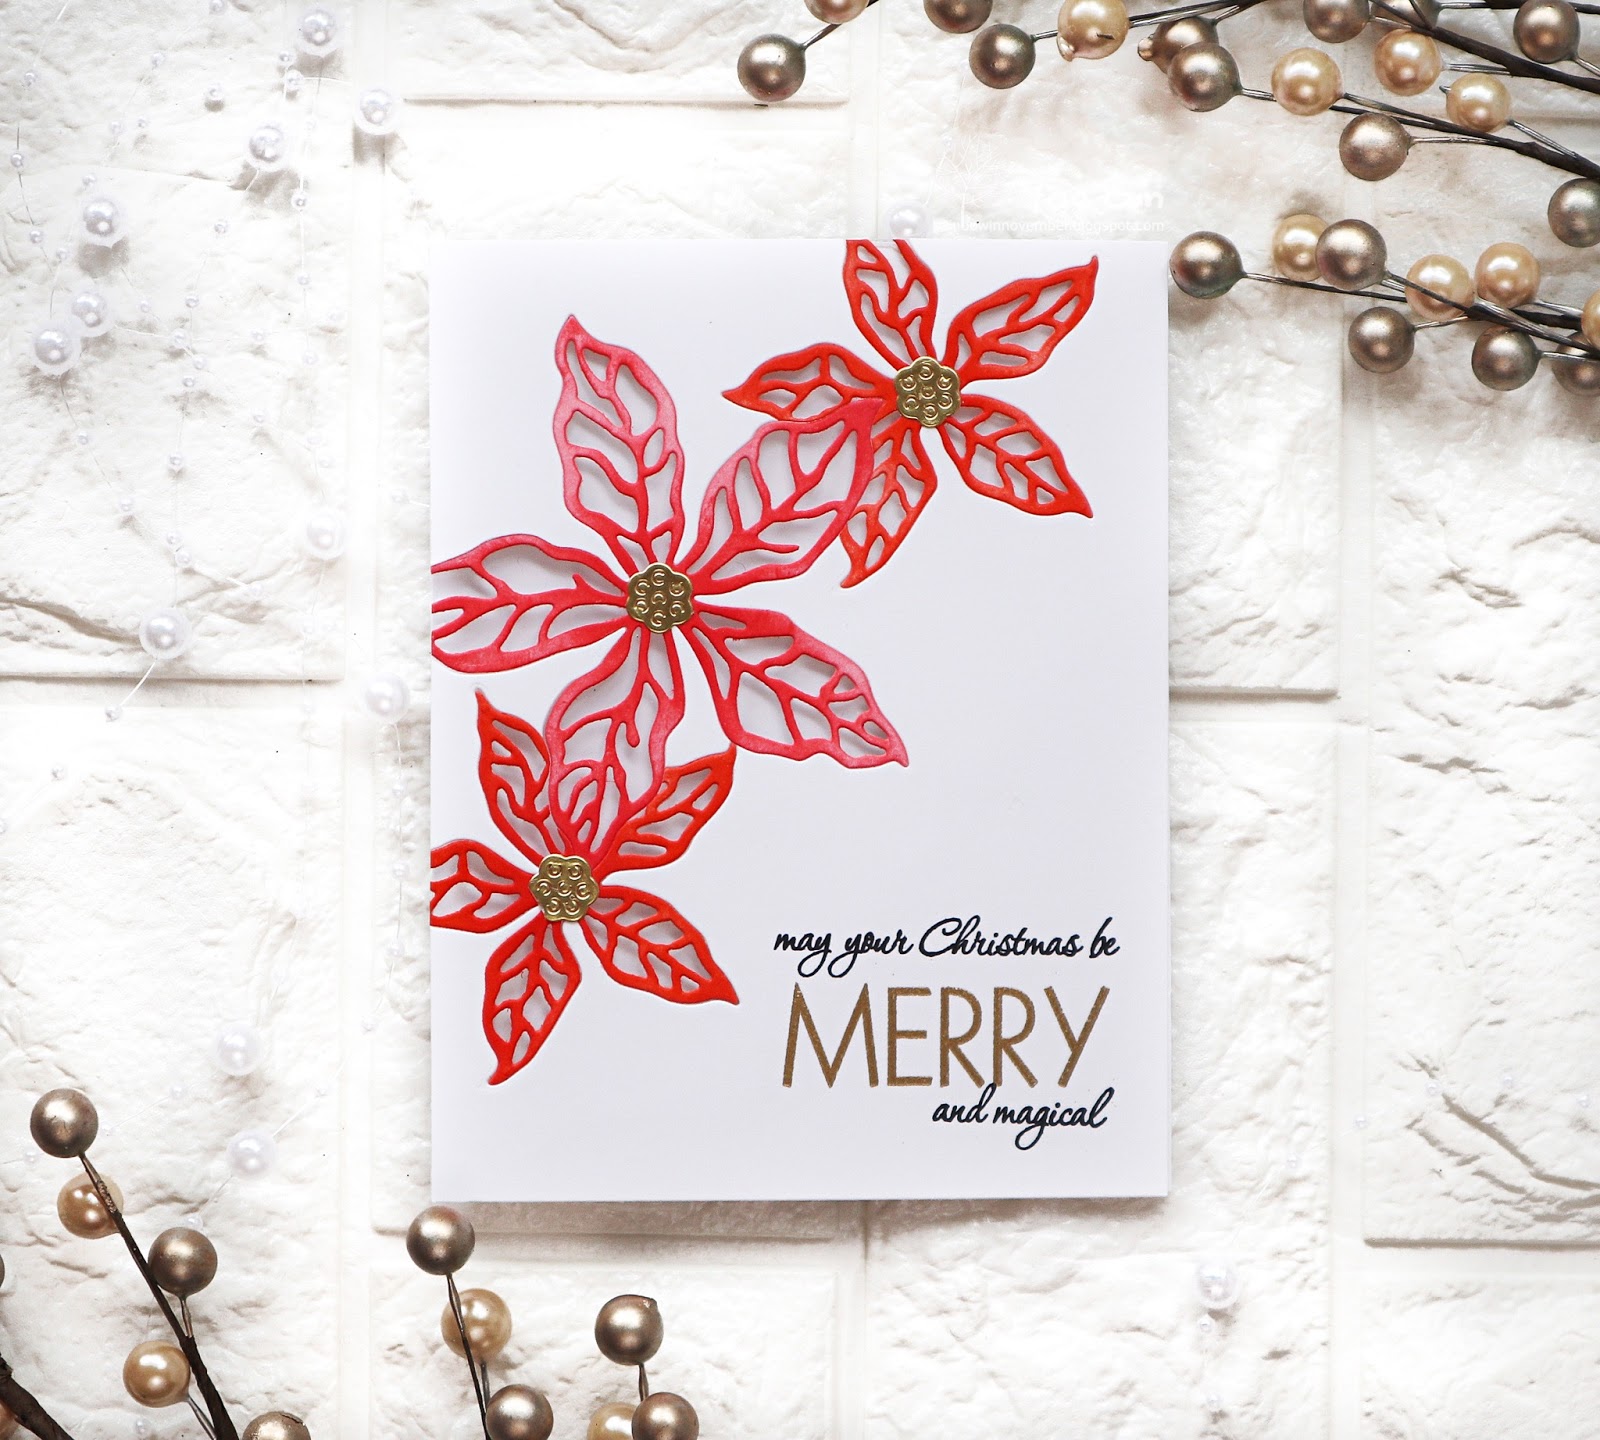
Scarlet Season die set (51-559) includes poinsettias in two different sizes. Each poinsettia has one base layer and one detail layer. I used the detail layer dies. First I cut the large poinsettia from an A2 sized Bristol smooth paper panel. Next I cut two small poinsettias on both sides of the large one.
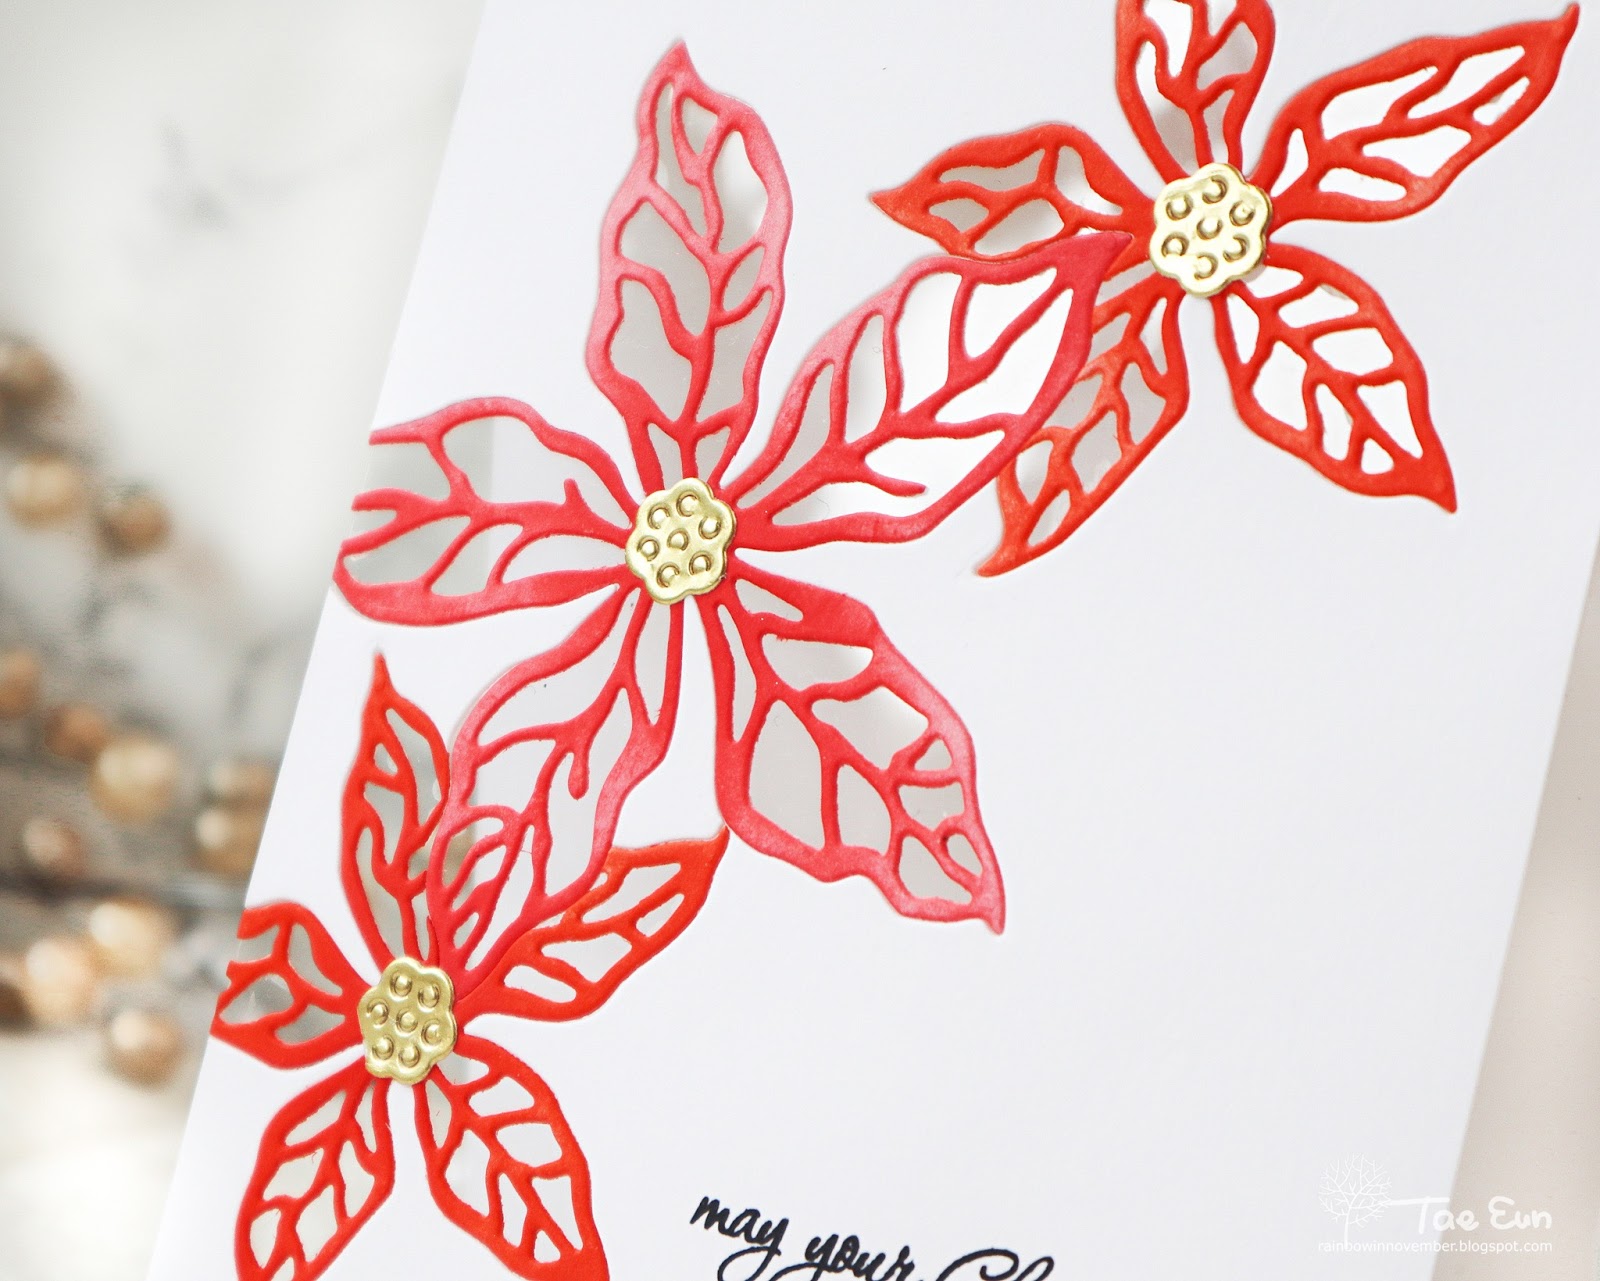
I took the detail die cuts out and ink blended them in Ripe Persimmon and Abandoned Coral distress ink. I adhered a piece of clear acetate on the back of the panel and inlaid the die cuts by adhering them on the acetate. I die cut the center pieces from some gold foil cardstock and adhered it on the poinsettias.
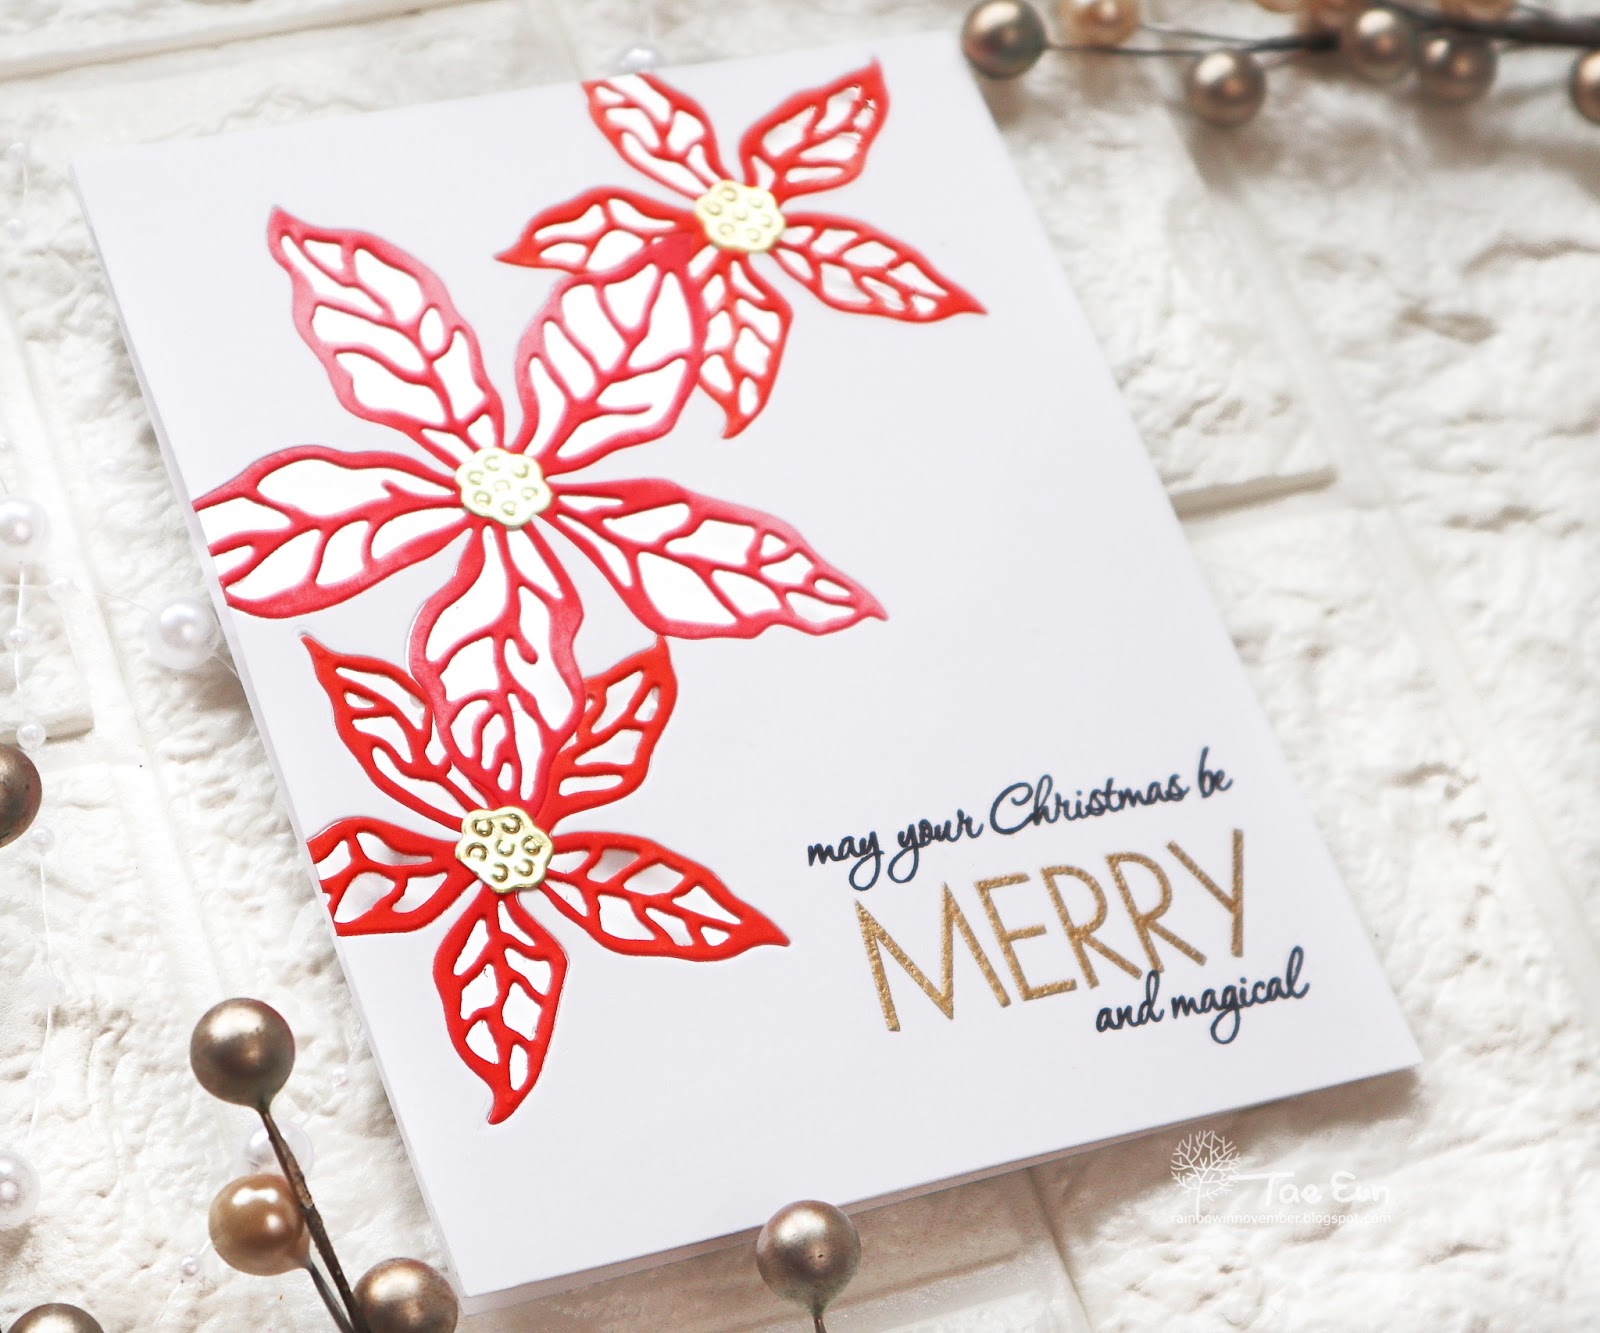
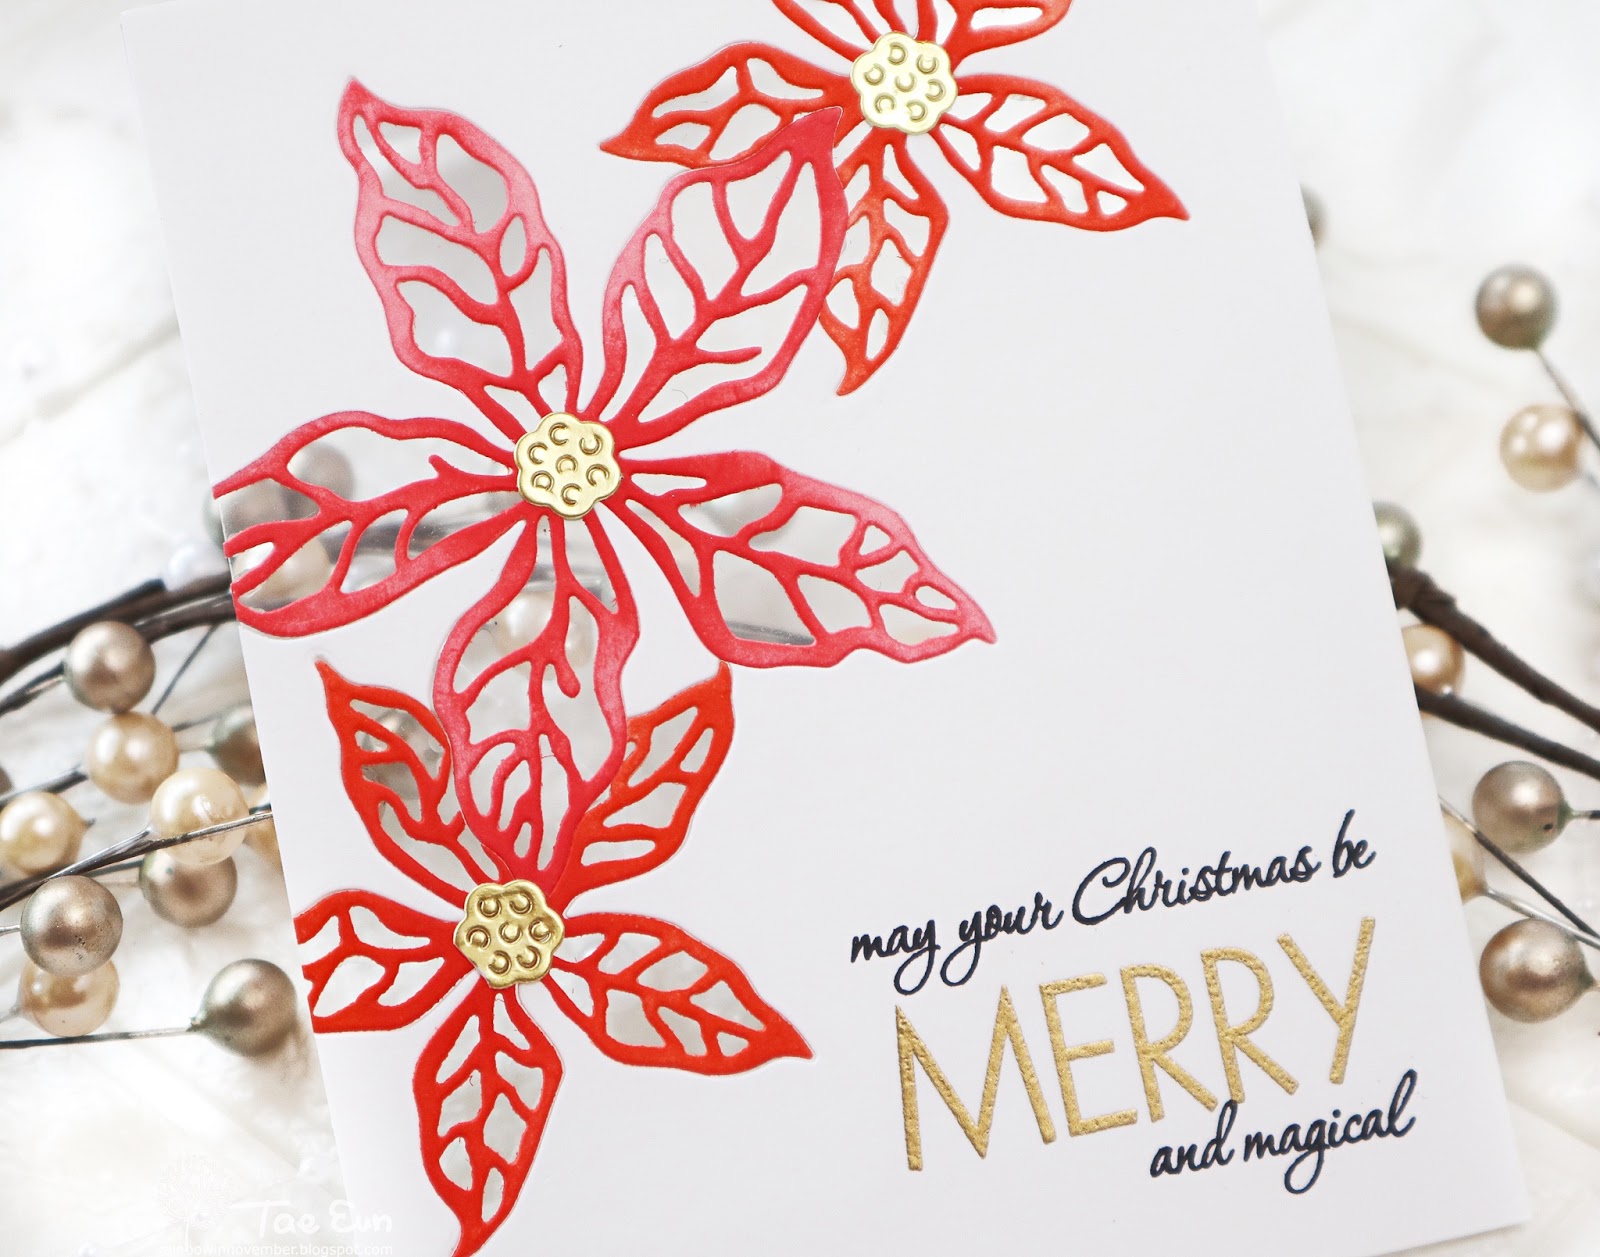
The sentiment is from Merry Builder (30-619) set. I gold heat embossed “MERRY” and stamped the rest of the sentiment in black. I cut a white cardstock in A2 size and adhered it on the back of the front panel to finish off the card.
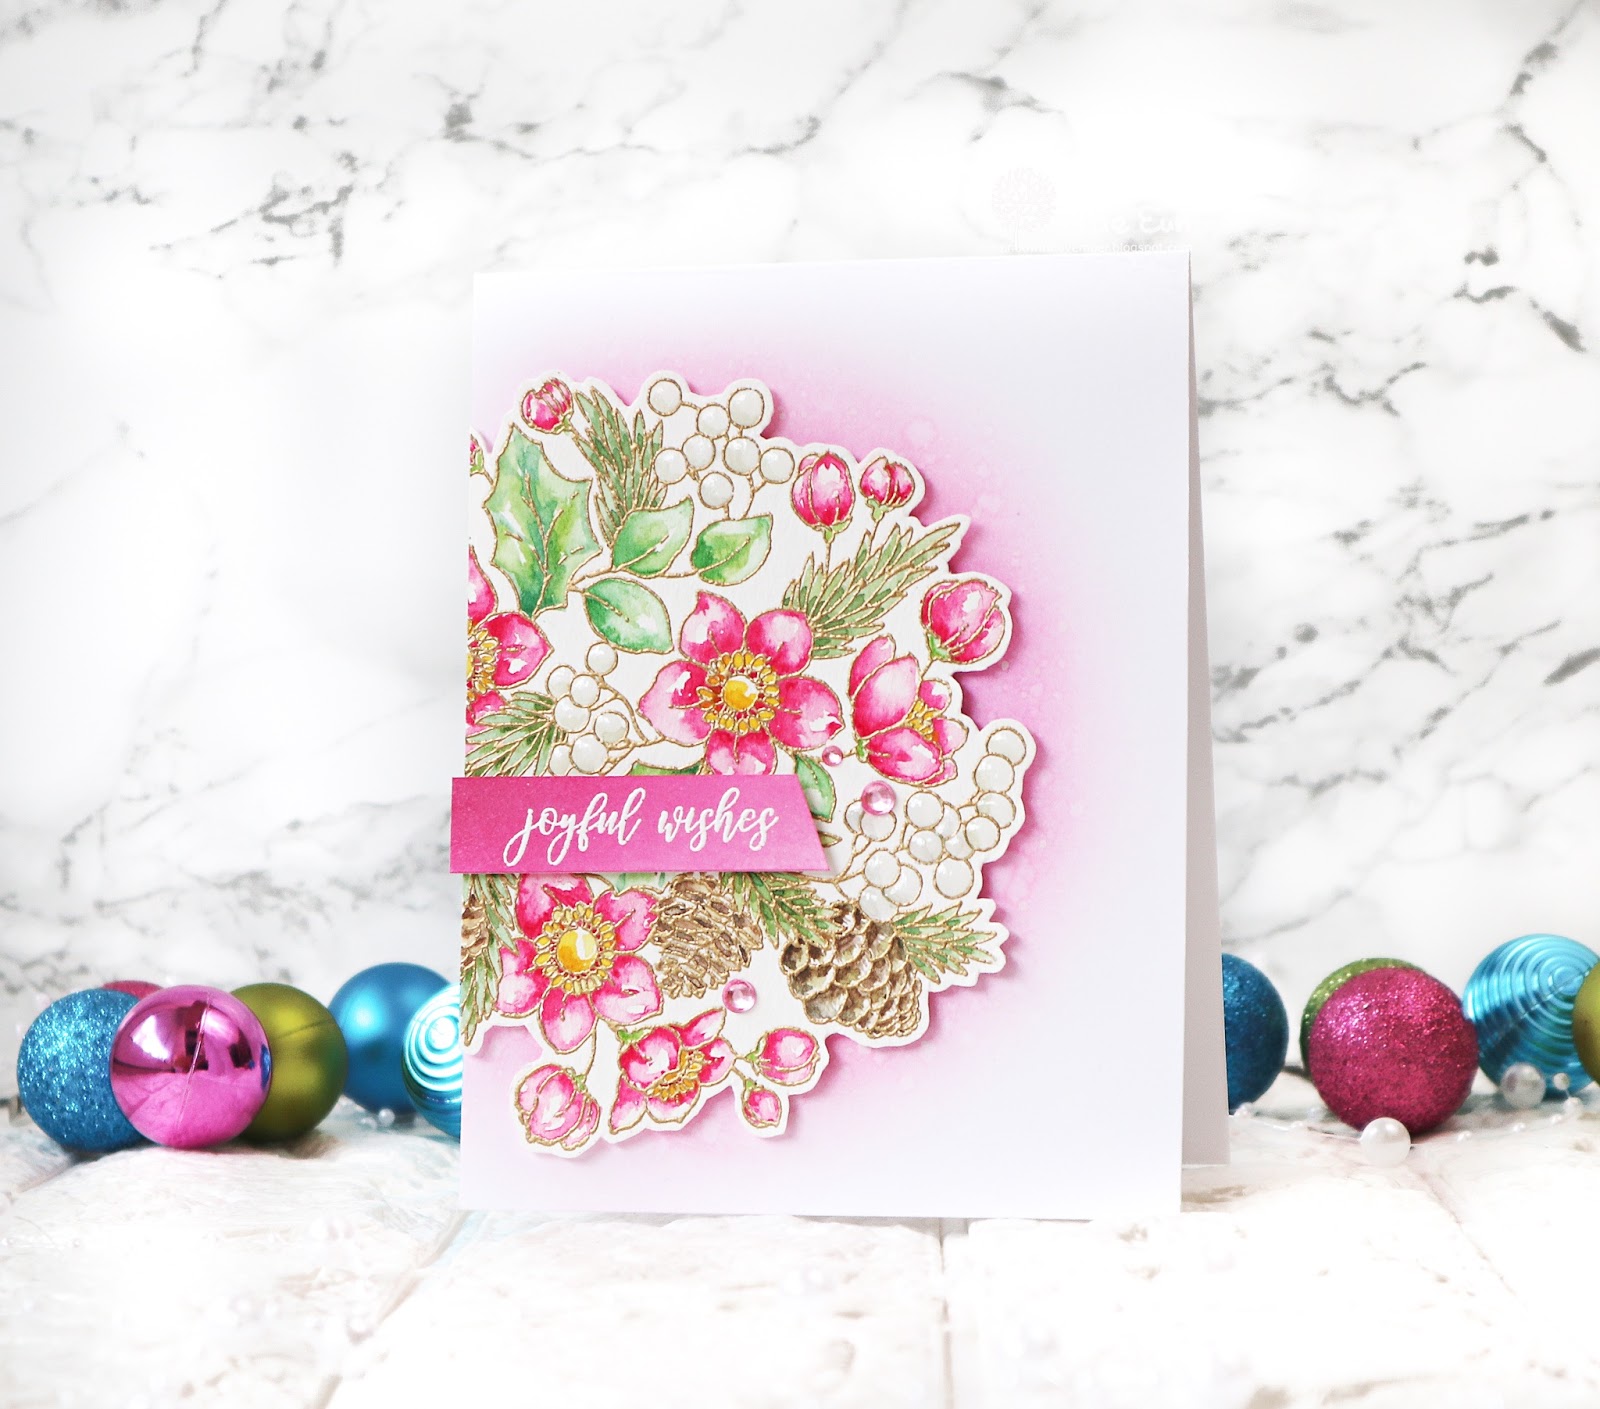
The last card for today is a holiday card in pretty pink! This is featuring the beautiful Winter Garden (40-711) cling stamp set.
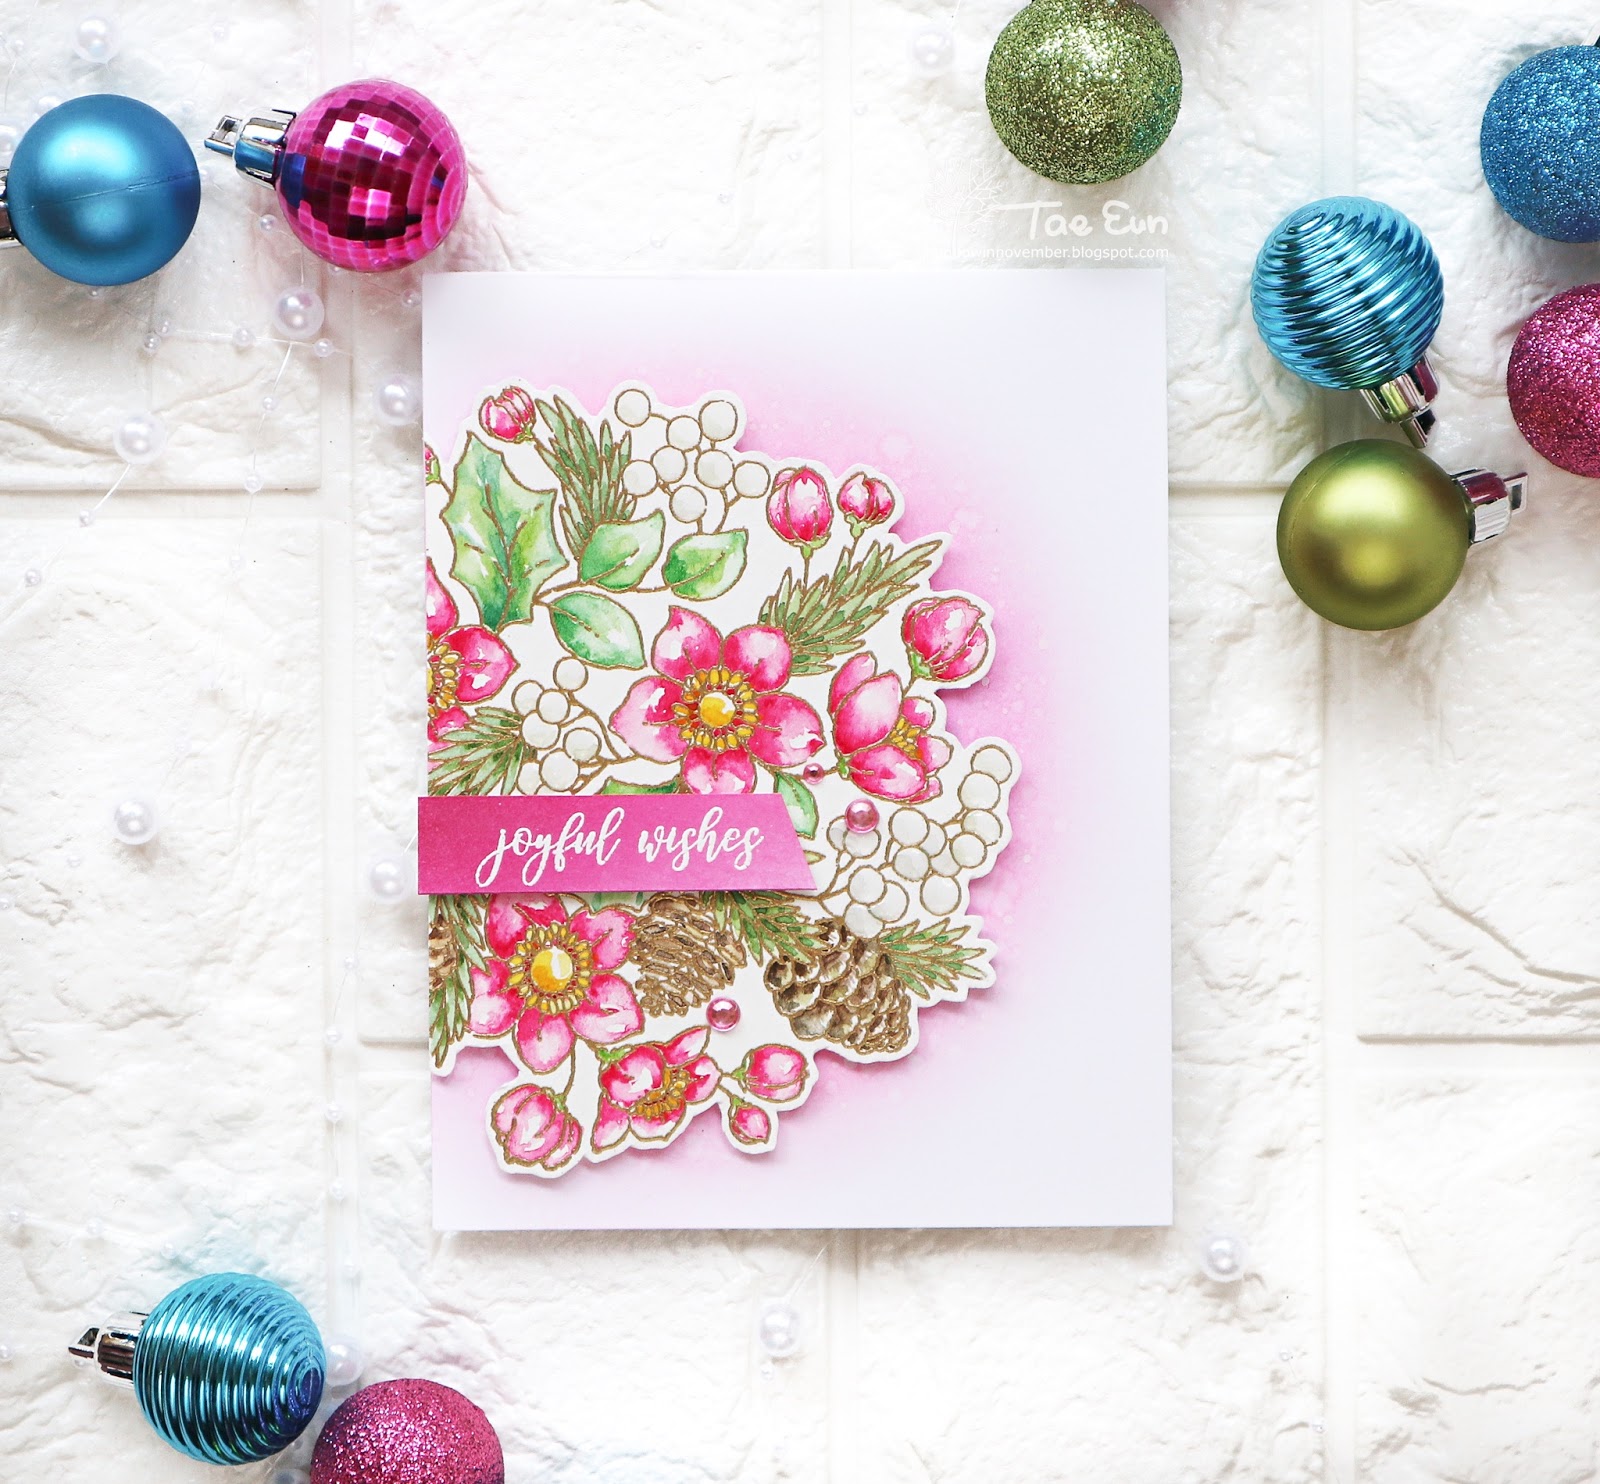
I gold heat embossed Winter Garden (40-711) image on a Canson watercolor paper and watercolored it. After coloring was completed, I fussy cut the image.
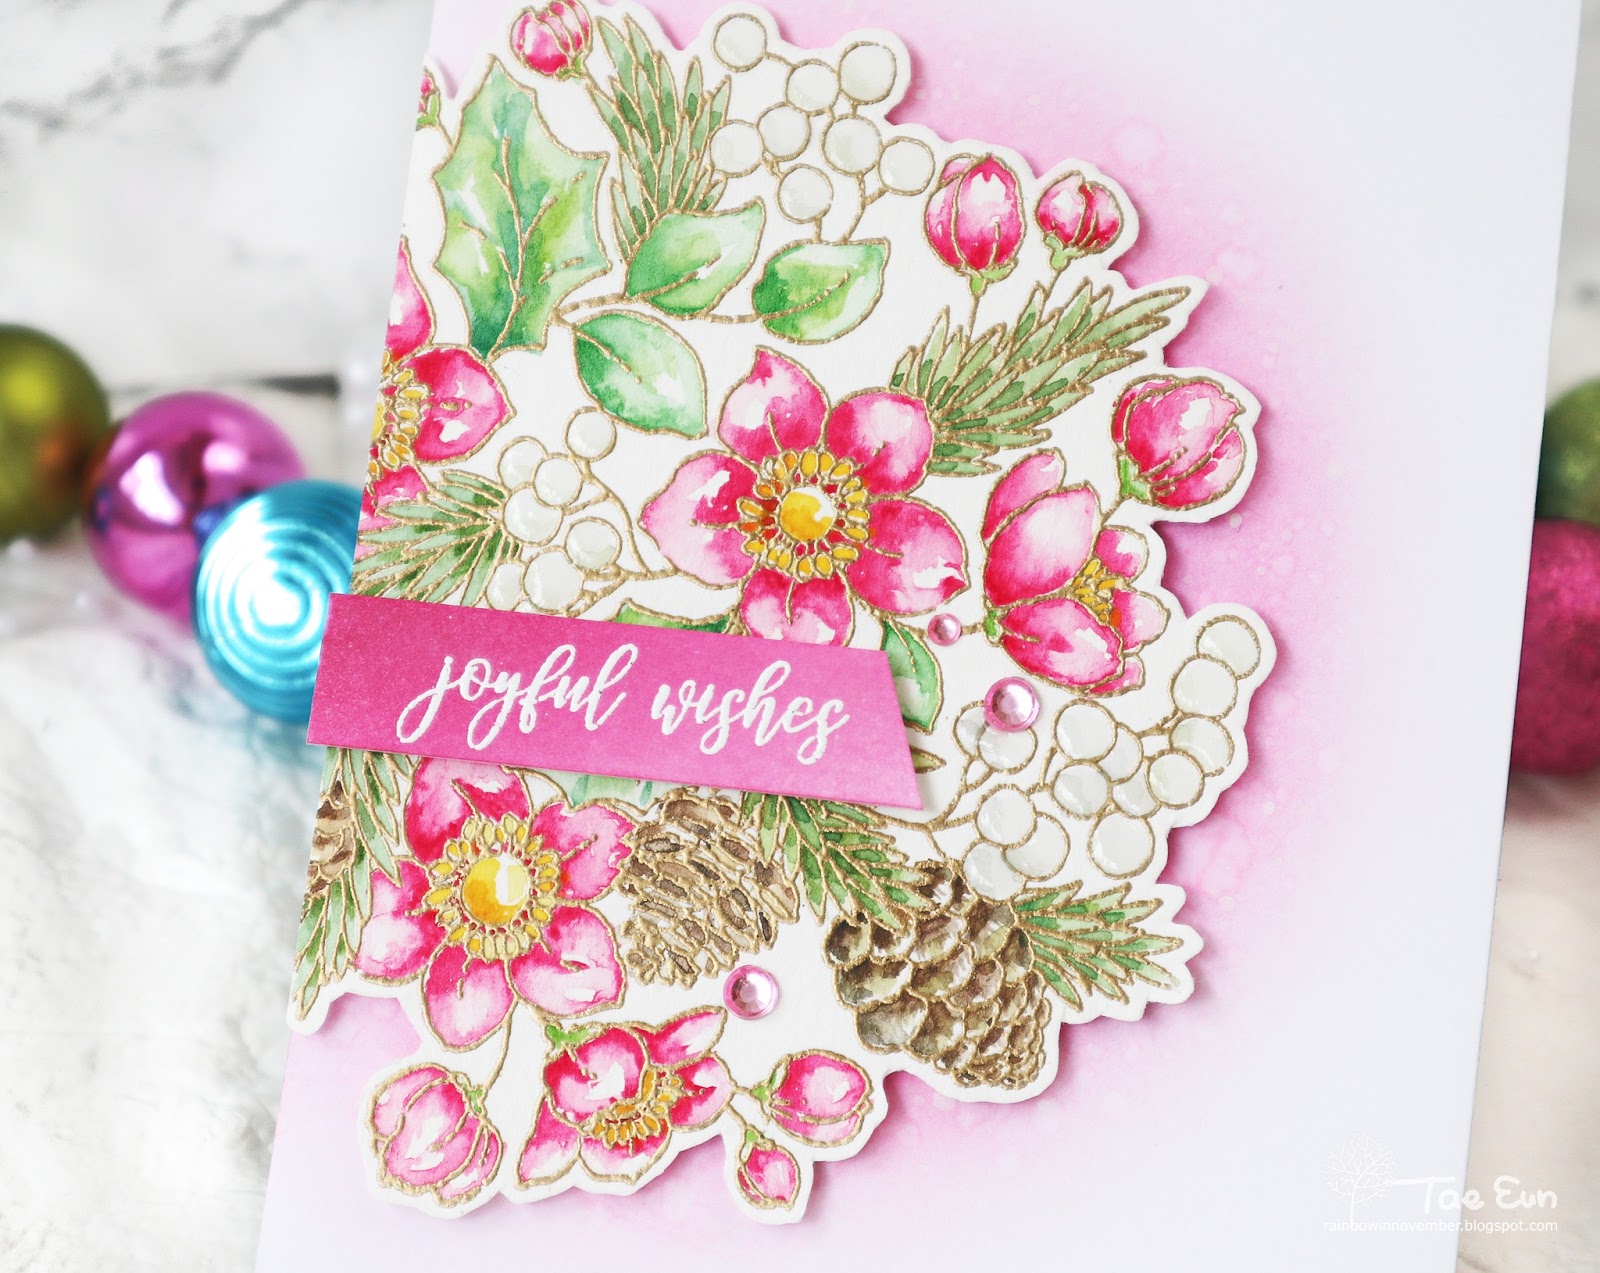
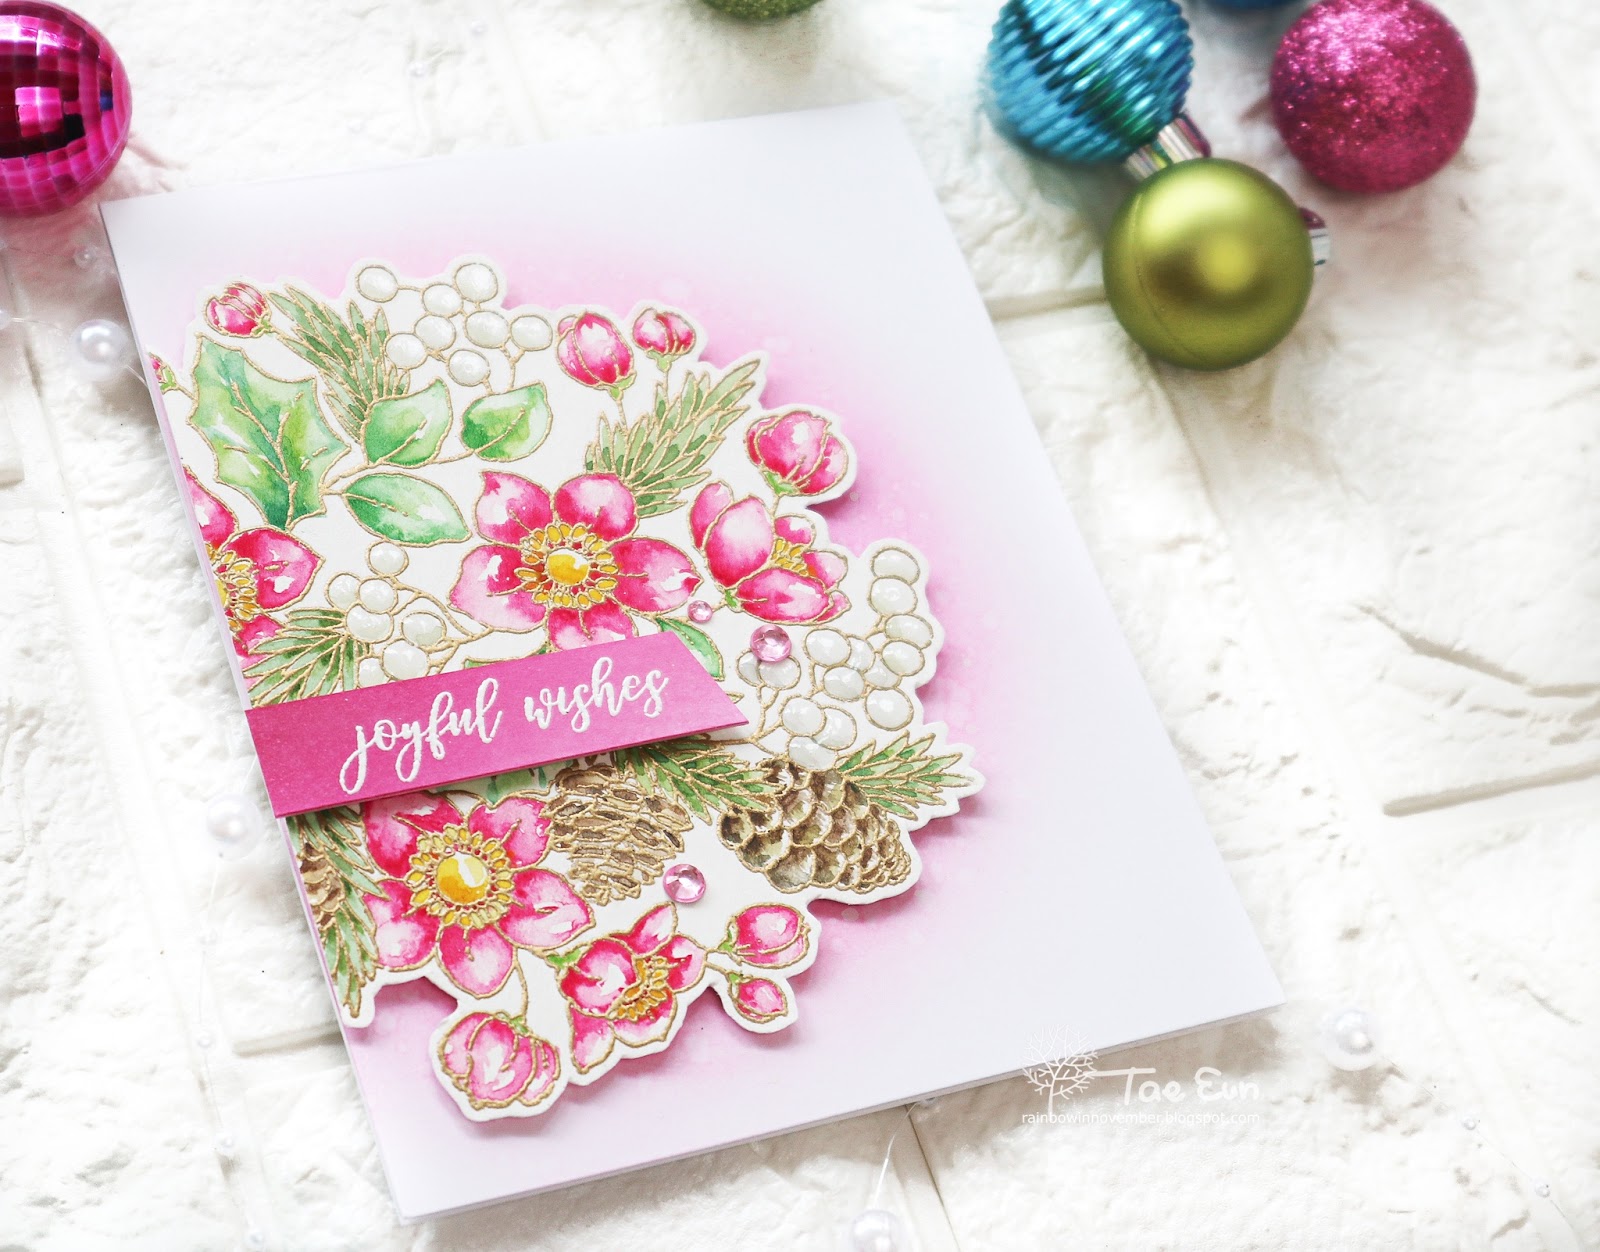
I ink blended Spun Sugar and Picked Raspberry distress ink on a white cardbase on the area where the image would be placed so that the pink blending peeks from behind of the image. I splattered clear water on it and dabbed it off with a paper towel.
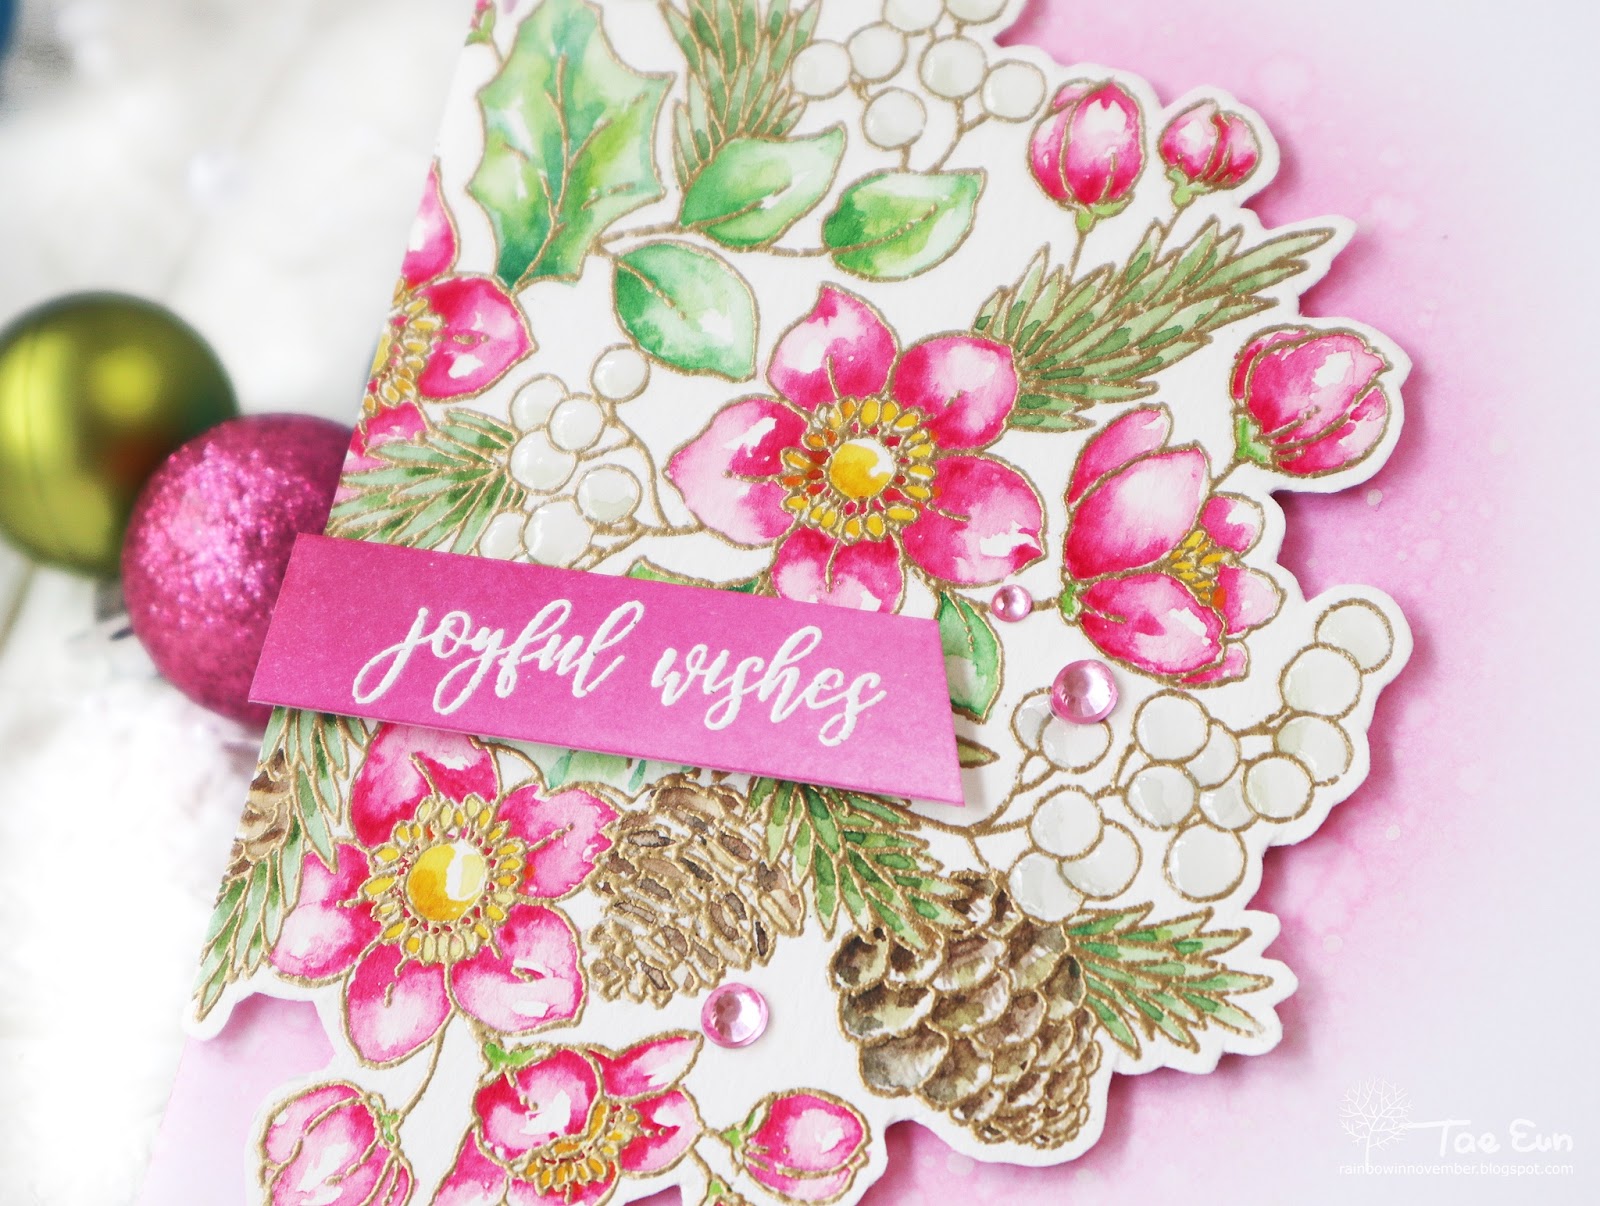
The colored image was then foam mounted off the edge on the left side of the cardbase. The sentiment from Merry Up (30-622) set was white heat embossed on a strip of cardstock on which I ink blended the pink distress inks in an ombre fashion. To finish off the card I added Shimmer Pico Embellisher on the berries and three pink rhinestones to the card.
That’s it! Thank you so much for staying with me through the long post. I hope I could inspire you with my cards today!
There are cute, fun and beautiful designs in Merry and Joy Release by Penny Black! I love them all! I posted some cute holiday cards featuring adorable elves and critters from Merry and Joy Release last week. Click here if you missed the post !
Thanks again for looking!
Wishing you all a happy weekend!
Hugs,
TaeEun