

Hello and Welcome to Altenew February 2019 Stamp/Die/Stencil Release Blog Hop!!!
How was the hop so far? I’m sure you’ve got lots of inspiration on the way to here :)! If you arrived here from Lilith Eeckels‘ s blog, you’re right on track. If you want to start from the beginning of the hop please head on over to the Altenew Card Blog!
As always Altenew is introducing beautiful and unique stamp and die sets along with the mask stencils. I’m so excited to be part of this awesome blog hop to celebrate the Altenew February 2019 Release.
I’ve created three couples of cards which are showcasing three stamp sets.
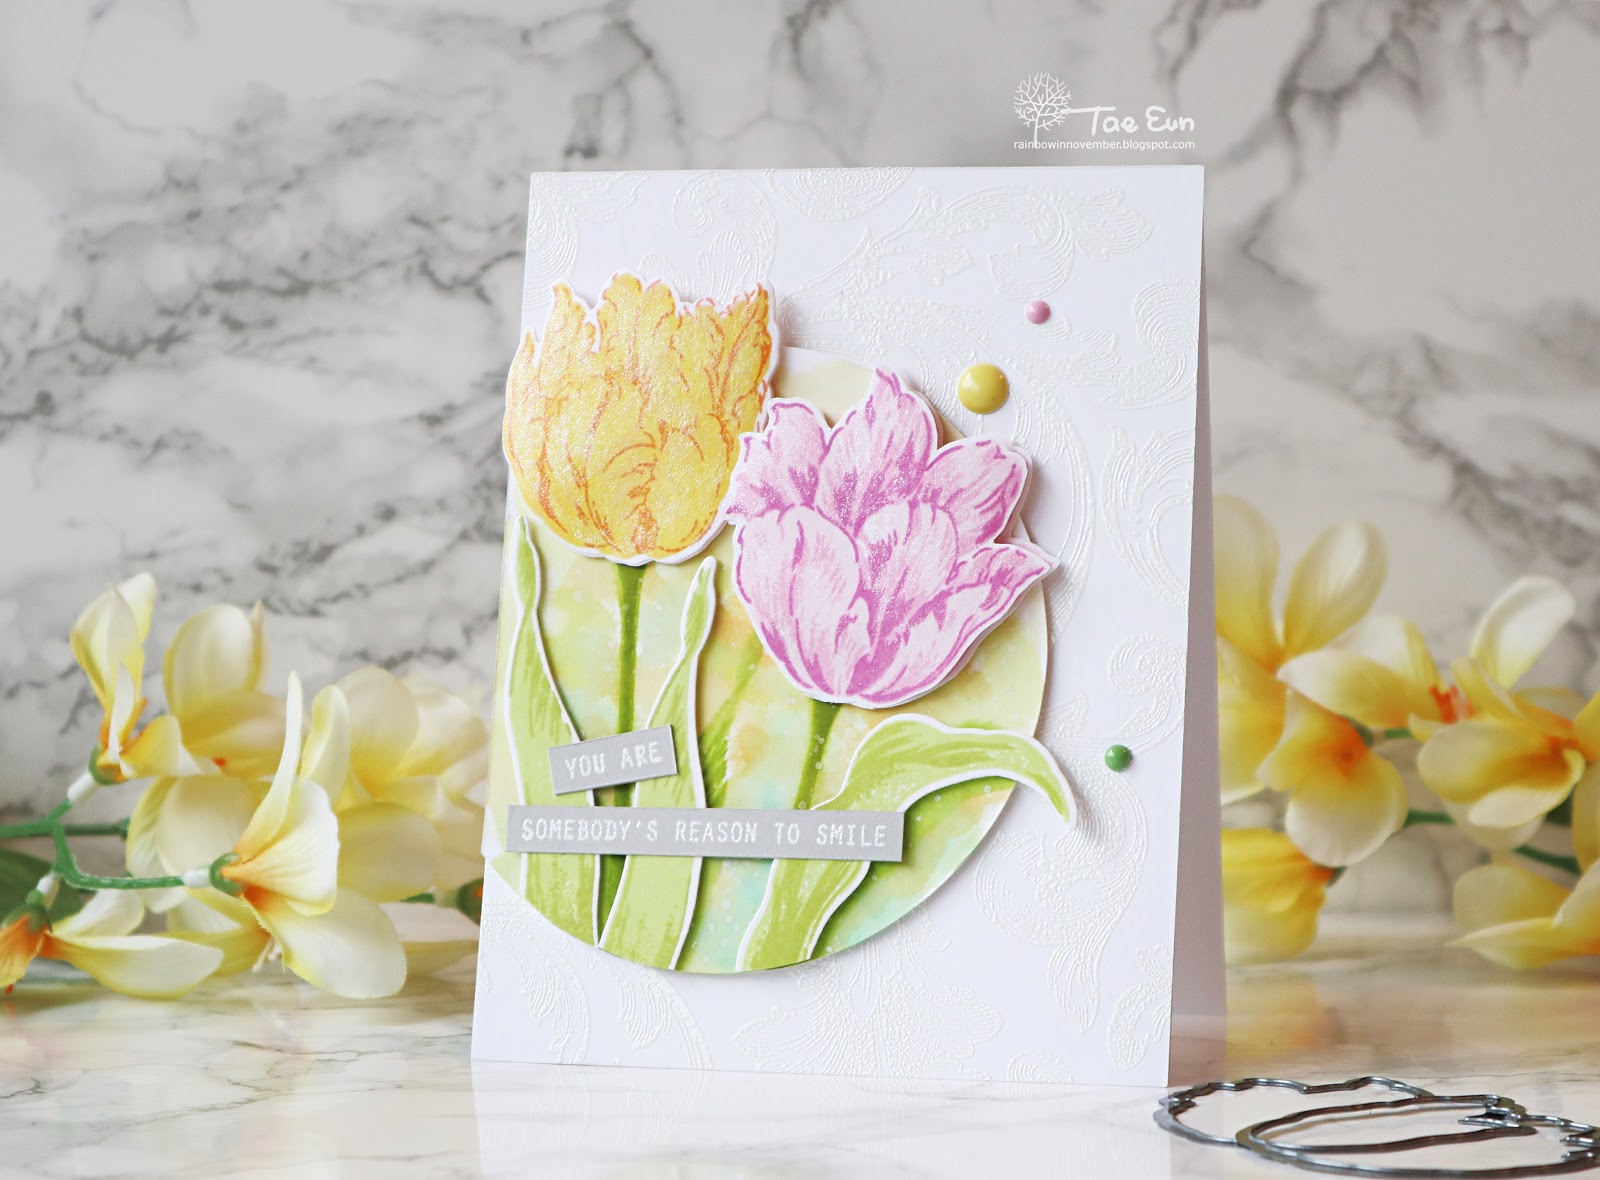
First two cards are featuring Exotic Tulips set.
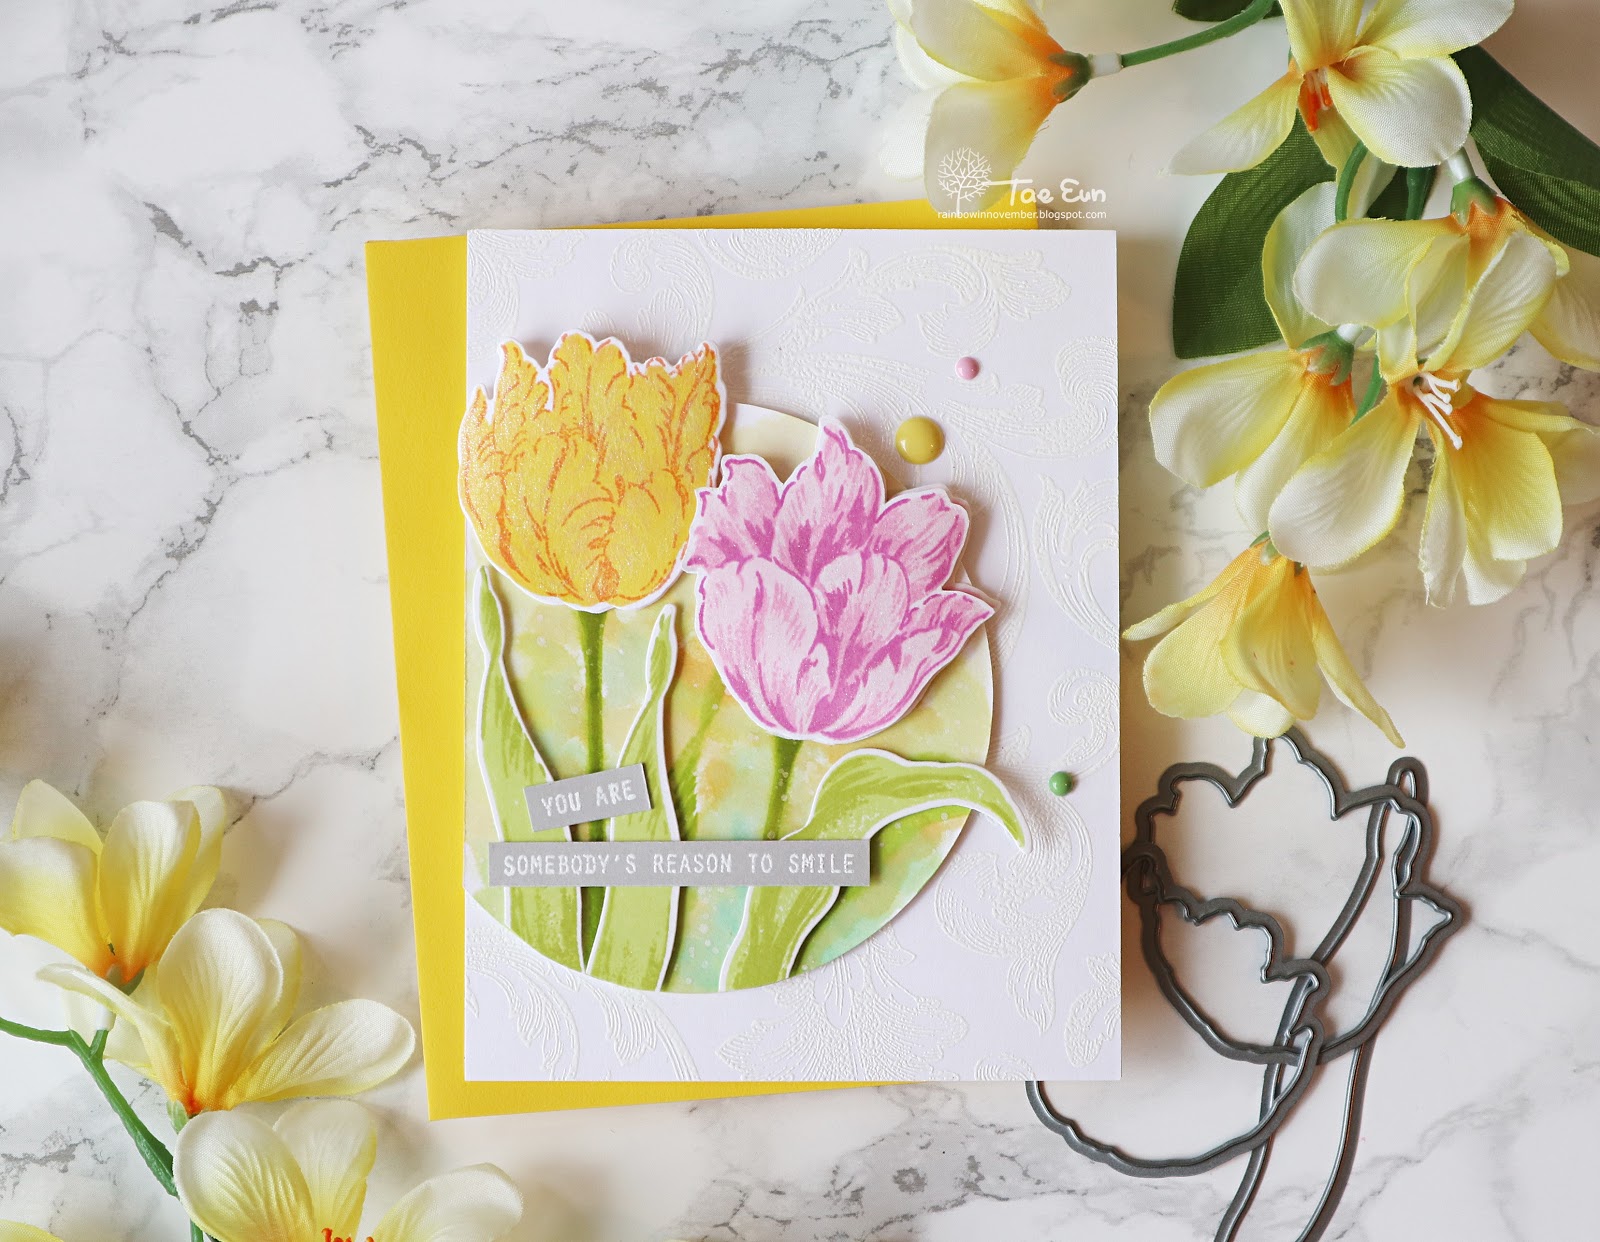
To start off I’ve stamped the layered tulips and leaves on some white cardstock. For the yellow tulip I used Maple Yellow, Sunkissed and Orange Creme, for the pink one I used the Rose Petal mini inks and for the leaves Tropical Forest mini inks. I’ve stamped several leaves and two tulip flowers for each color and cut them using coordinating dies.

I also stamped two stems and some leaves on a white cardstock panel and added soft background color using Altenew Watercolor Brush Markers Spring Garden Set. I cut the panel in a circle and set it aside. To give some texture to the background I white heat embossed the Baroque Motifs stamp on another white panel in Pure White Crisp embossing powder.
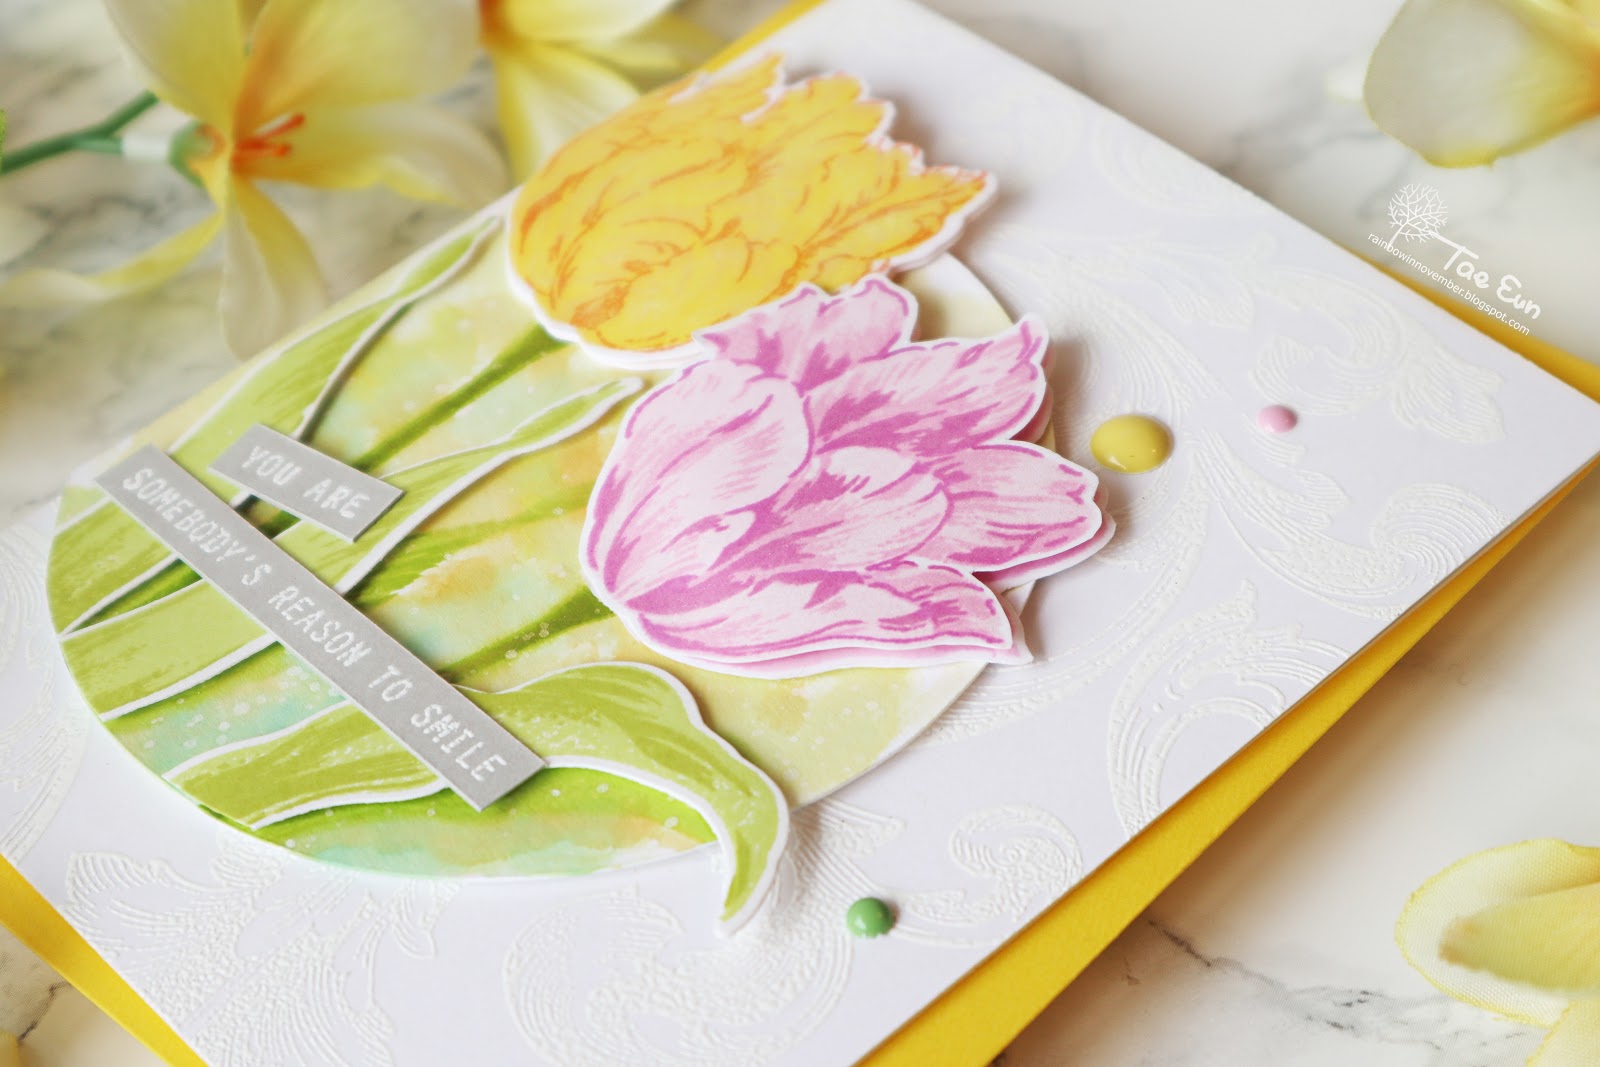
I then started assembling the card. I adhered the background panel on a white cardbase and foam mounted the circle panel offset on it. I cut off the part which stuck out. I then arranged the tulip flowers and leaves on the circle panel using some foam adhesive. The flowers were added twice for more dimension and interest.
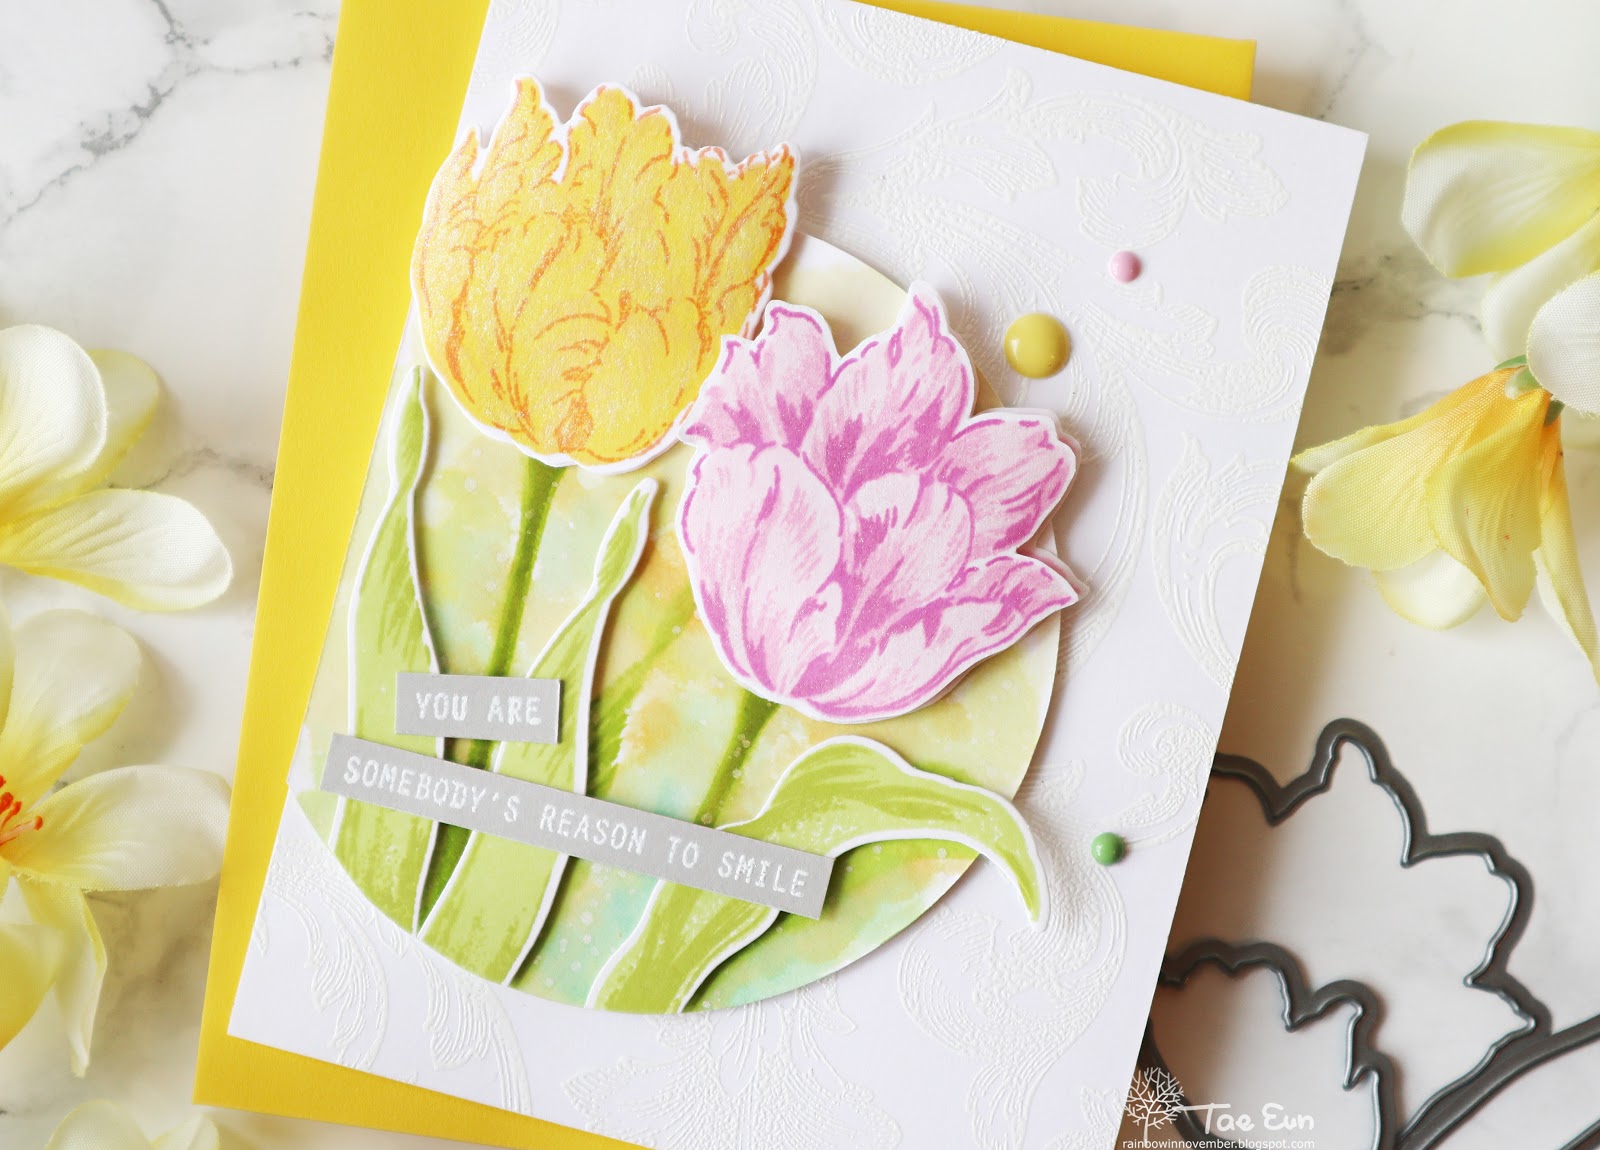
The sentiment is from Reason to Smile stamp set, a sentiment set from this release. I white heat embossed the sentiment on two strips of light gray cardstock and adhered them on the leaves. I finished off the card by adding three enamel dots from New Day Card Kit.
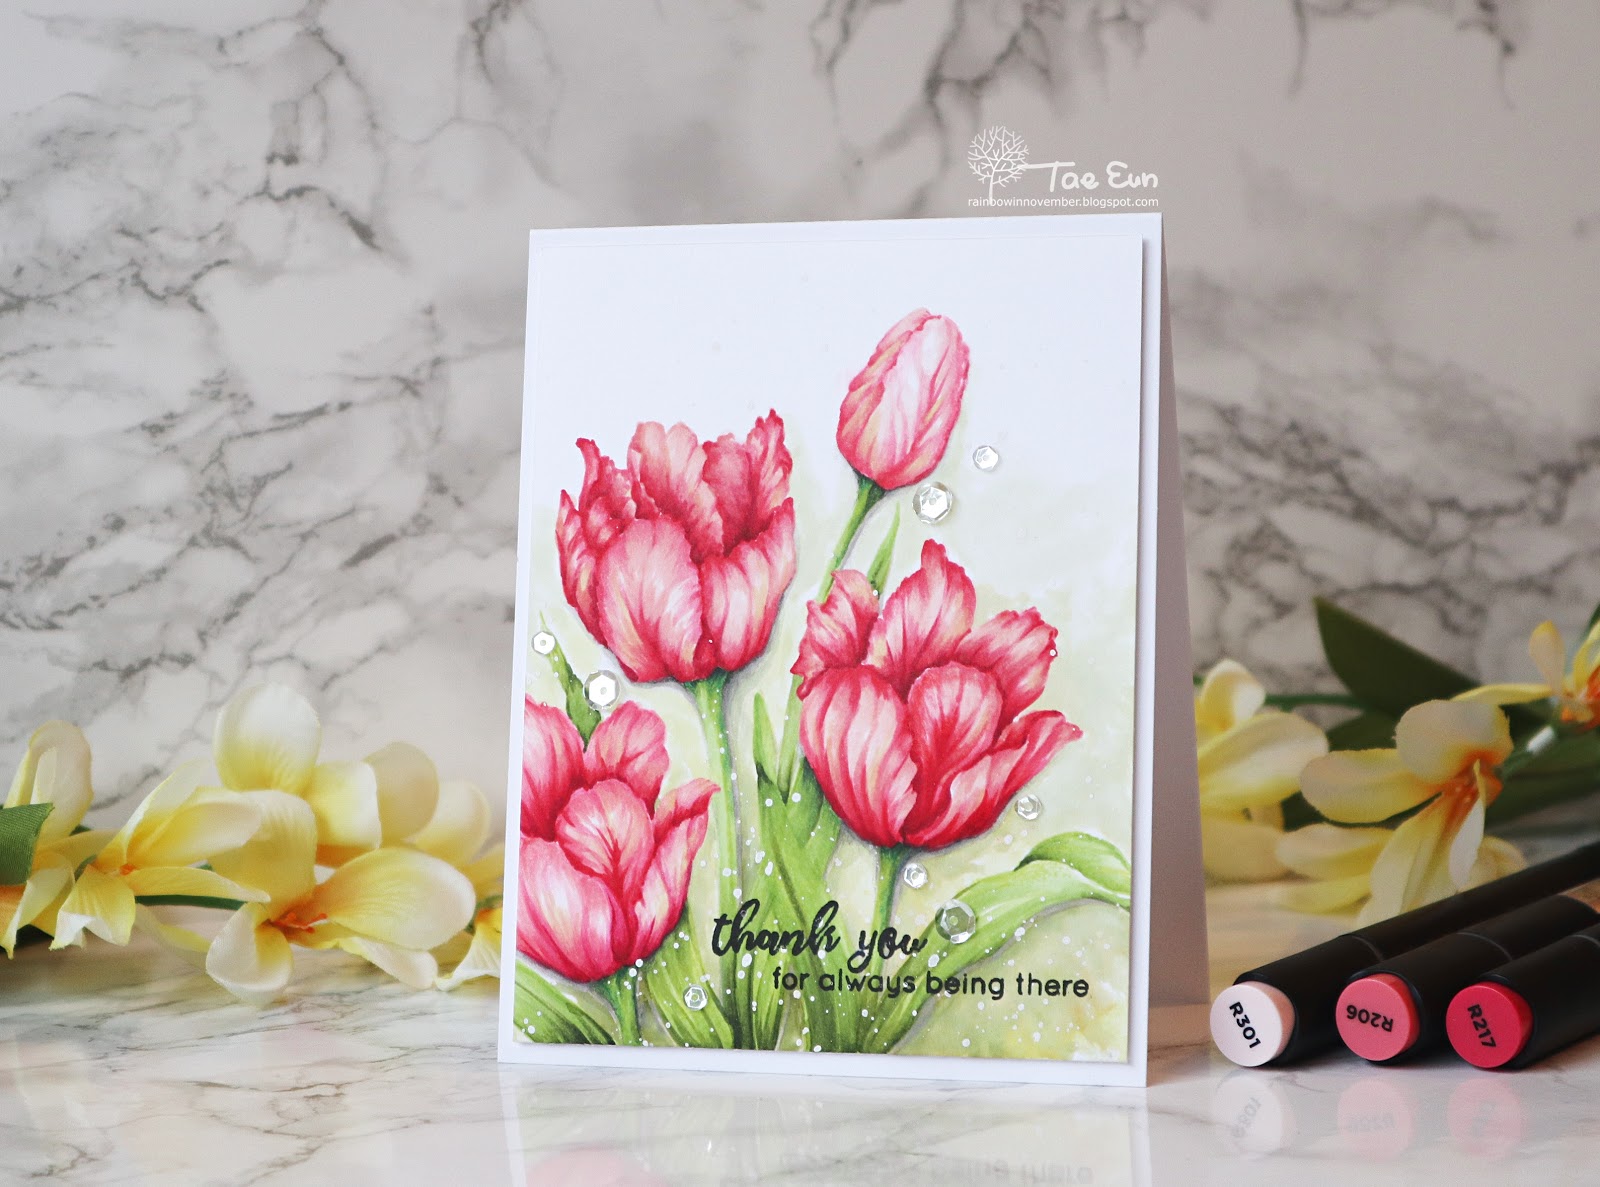
The tulips on the second card were colored using Altenew Artist Markers.
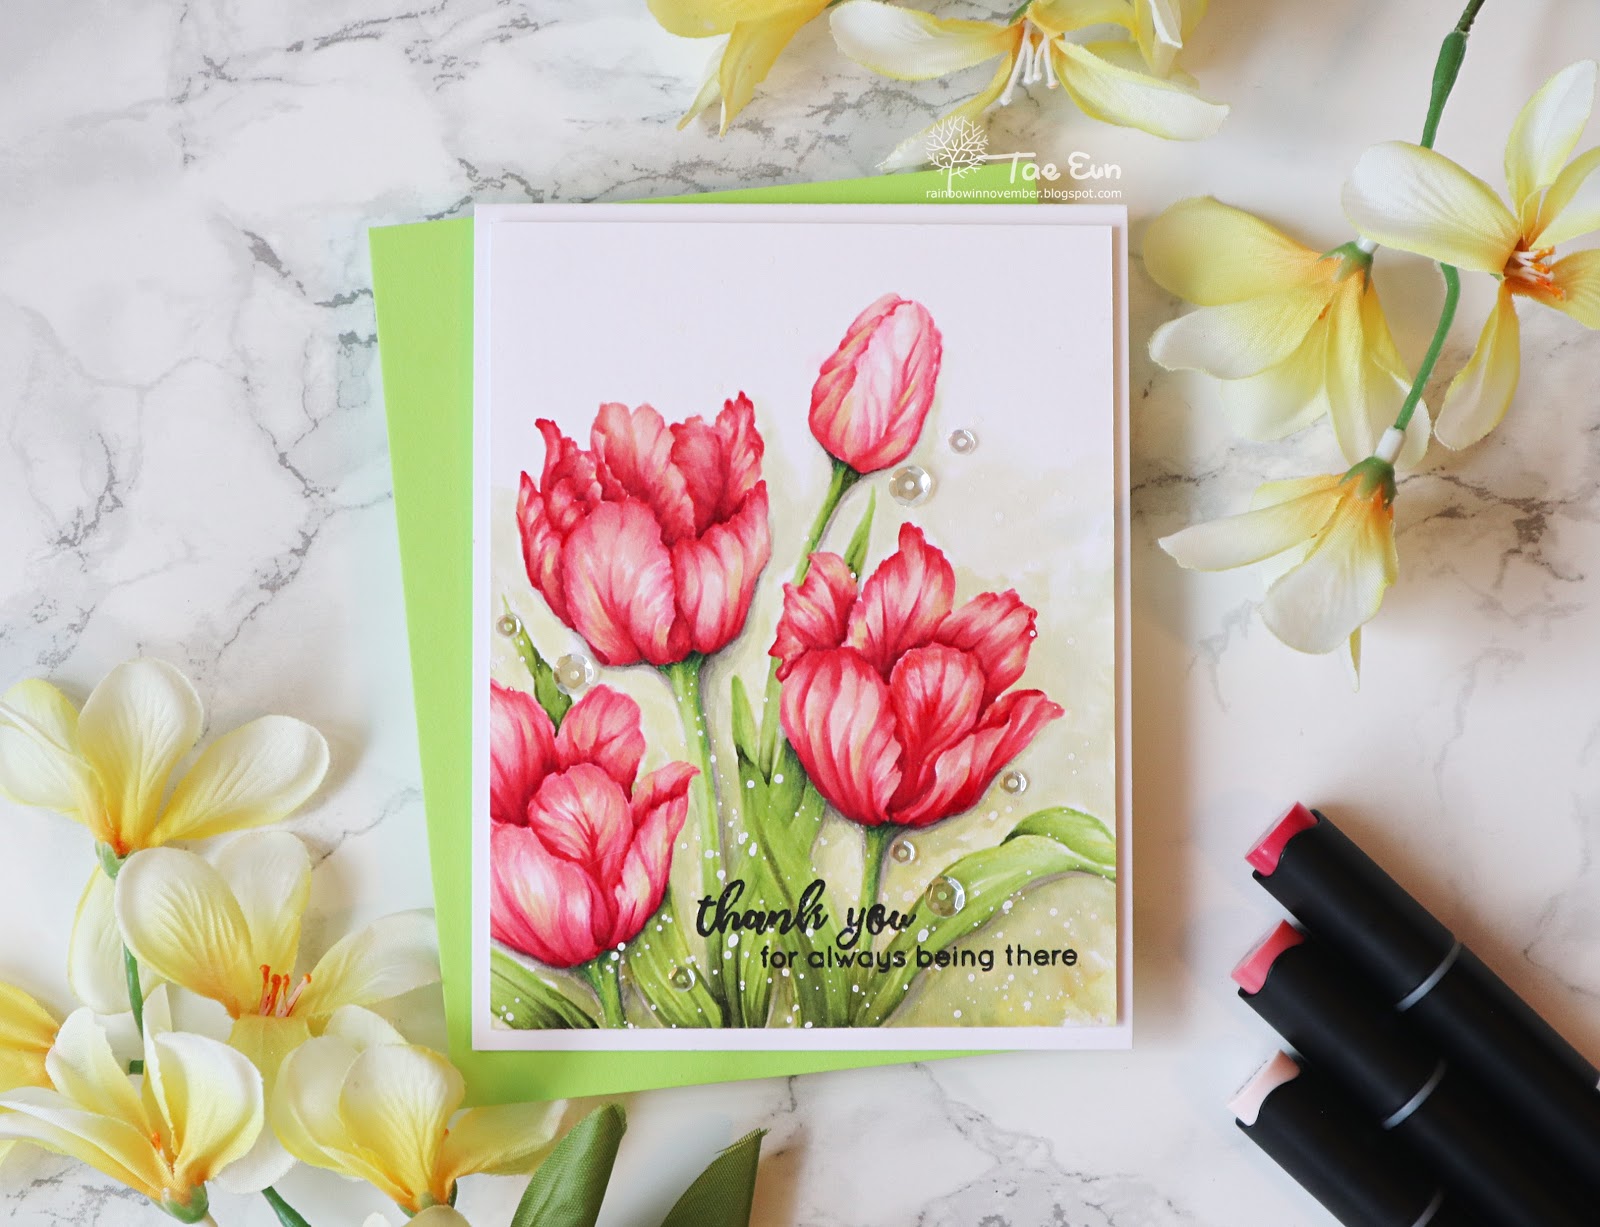
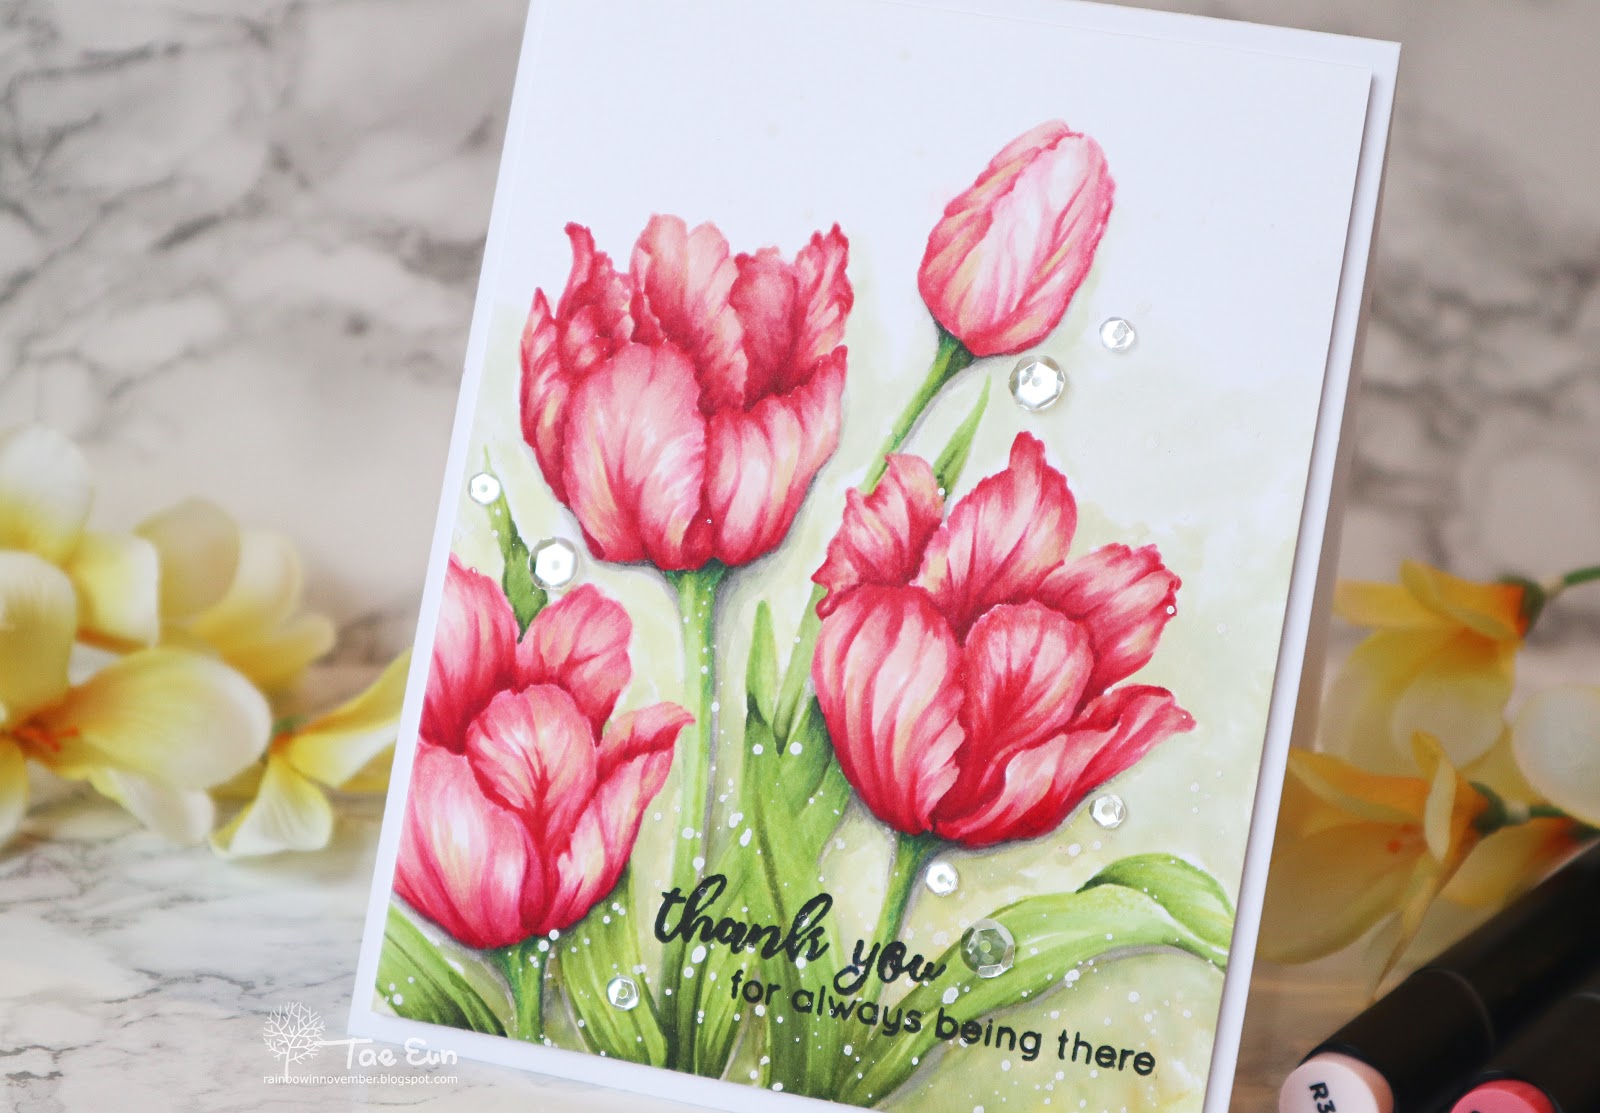
I then started coloring the image. I used R301, 206, 304 and 318 from Artist Markers set A and C for the two of the flowers. Two other flowers were colored using R400, 403, 304, 206 and 217 also from Artist Markers set A and C. I added subtle yellow tone on all the flowers using C001 from the set B.
The leaves and stems were colored the green colors from Artist Markers set E.
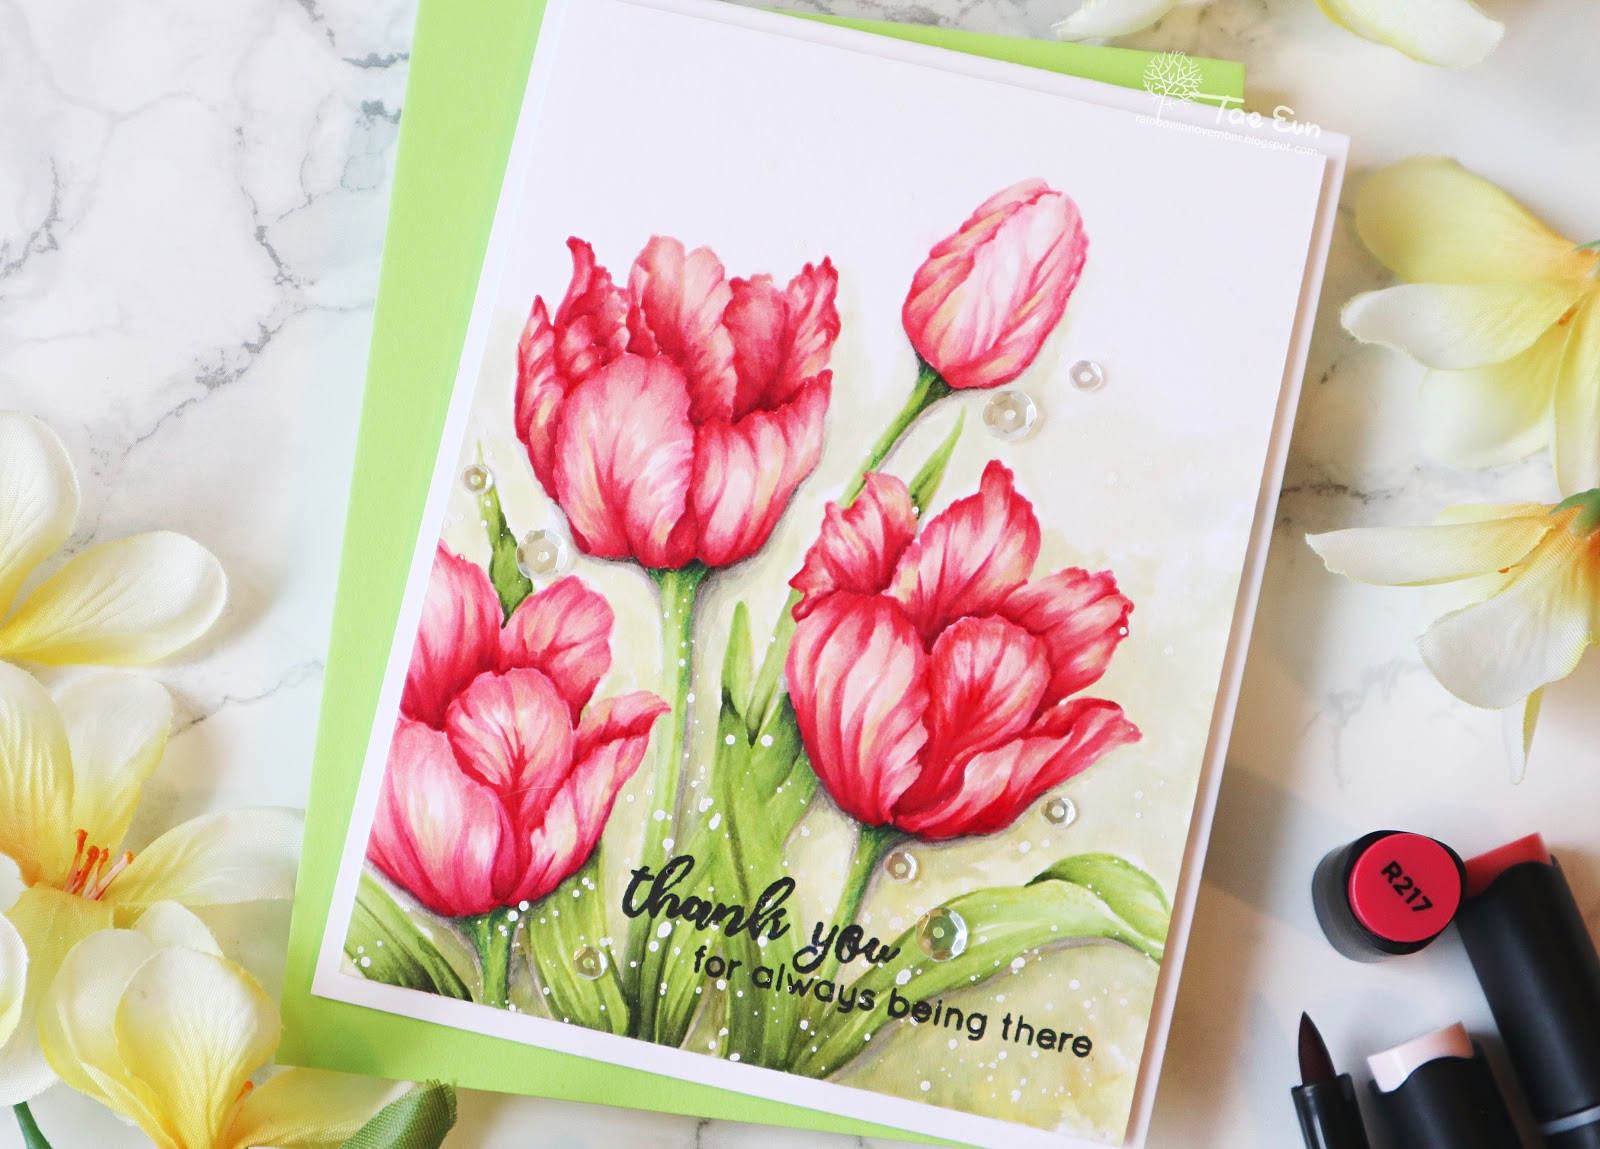
After coloring was done I colored the background using Limeade, Moss and Warm Sunshine from Altenew Watercolor Brush Markers Spring Garden Set and added gray shade around the image using the cool gray markers from Artist Markers set E.
The sentiment is from Dotted Blooms set. I stamped it directly on the colored panel in some black pigment ink. I narrowed down the panel a bit and foam mounted it on a white cardbase. some clear sequins were my finishing touch.
Next couple of cards are showcasing Dotted Blooms stamp set.
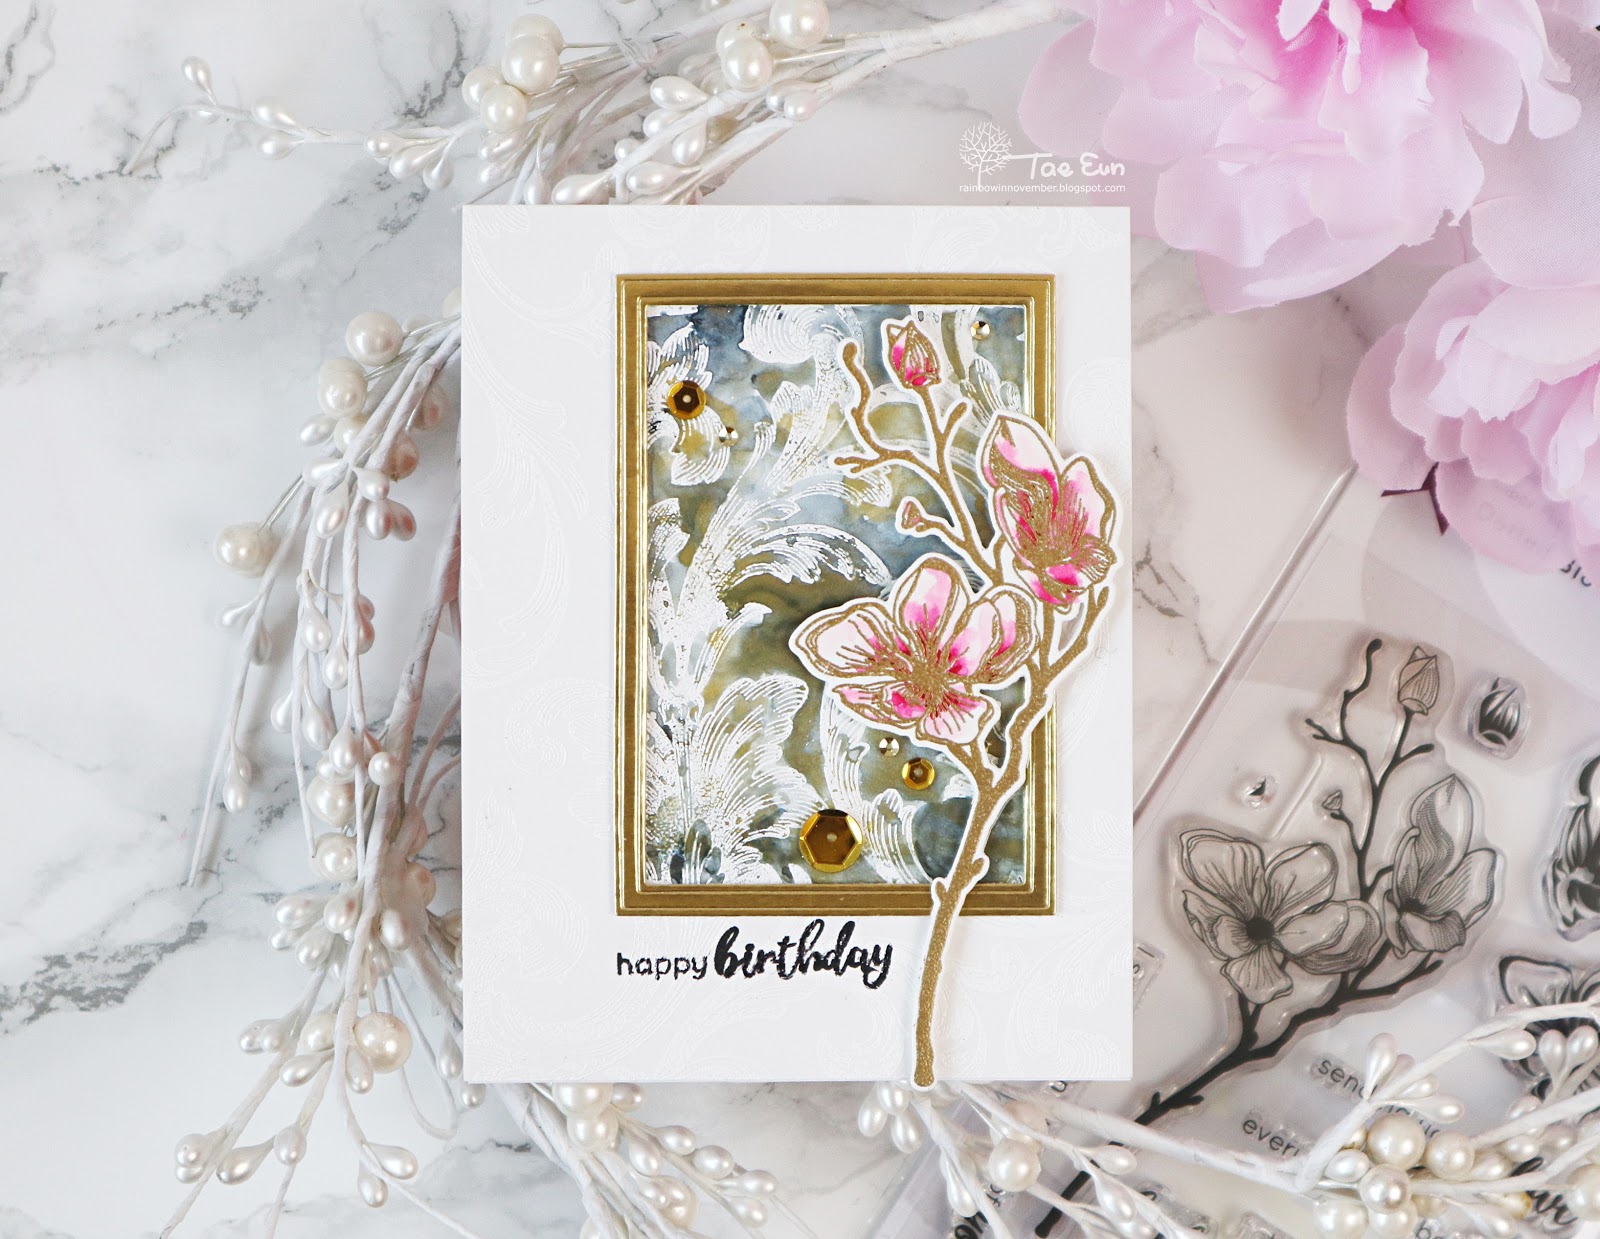
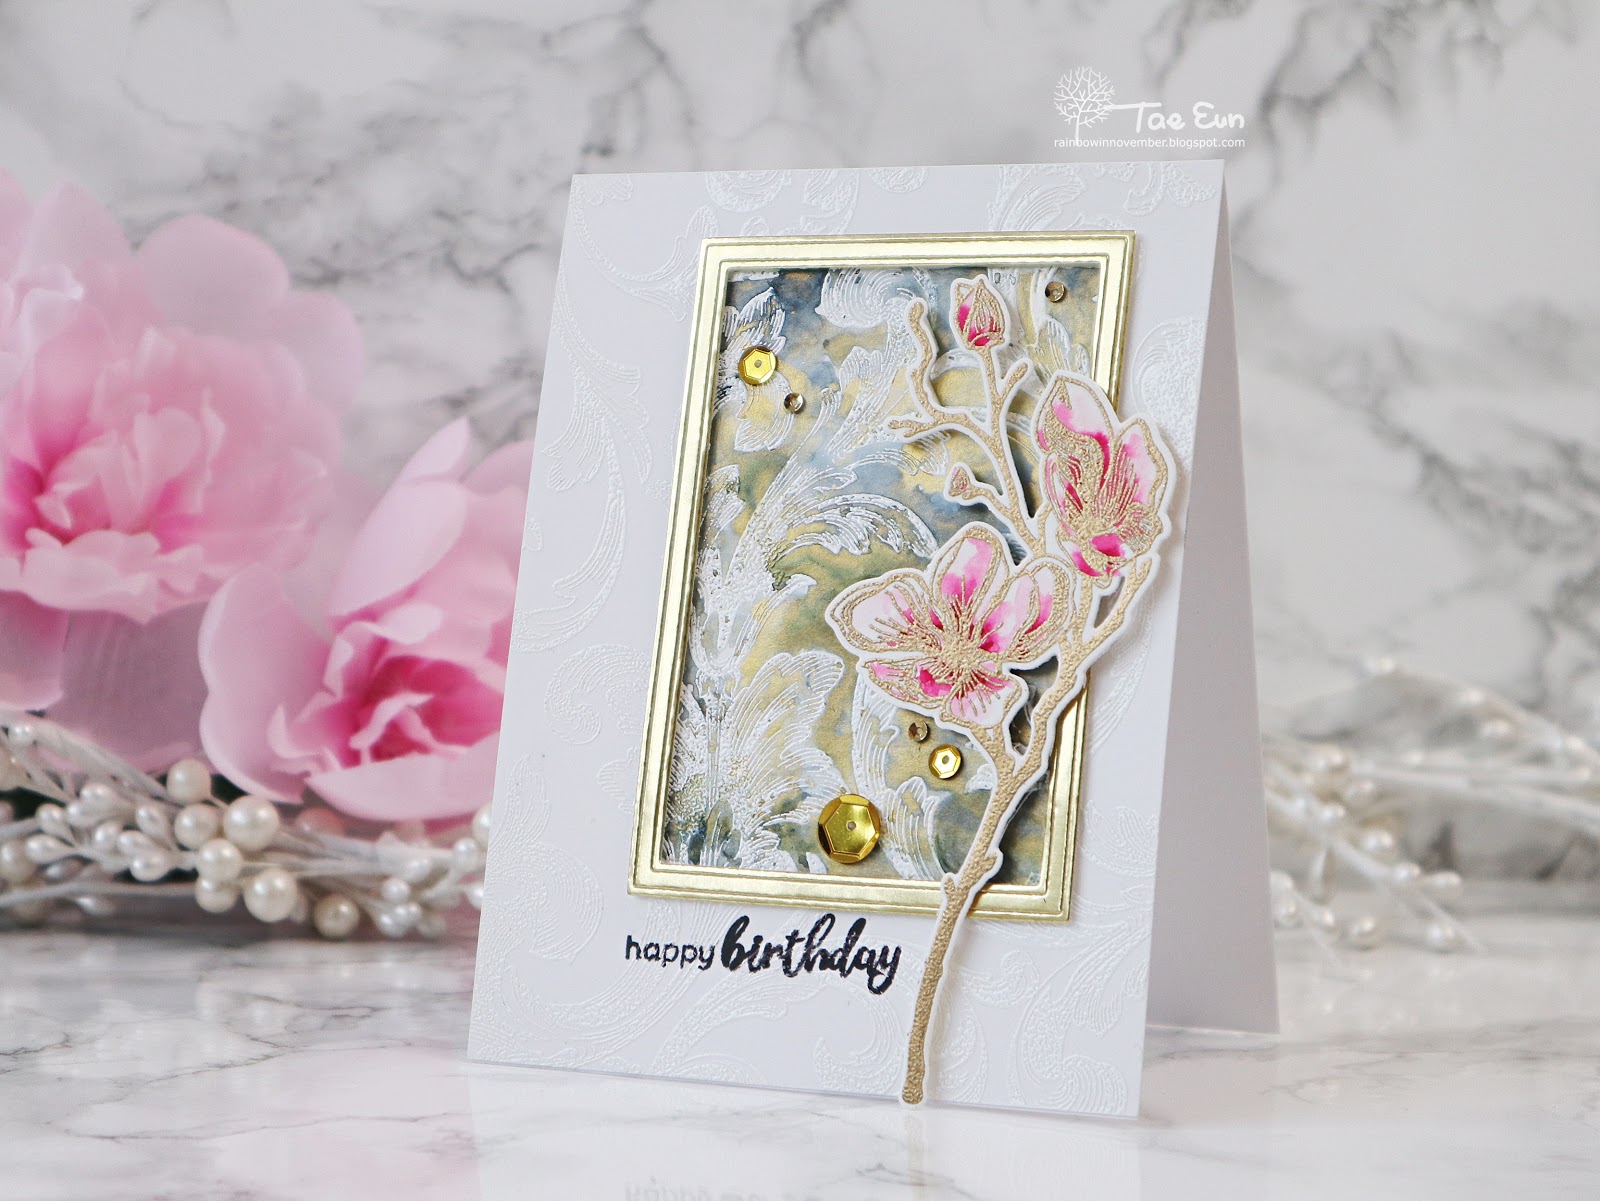
To start off I white heat embossed the patterns from Baroque Mitifs stamp set on a Bristol smooth paper panel. I then masked off a rectangle on the upper right corner and added payne’s gray and gold watercolor on it. The size of the rectangle was decided after the golden frame I cut using Fine Frames Cover die from the gold cardstock of New Day Card Kit.
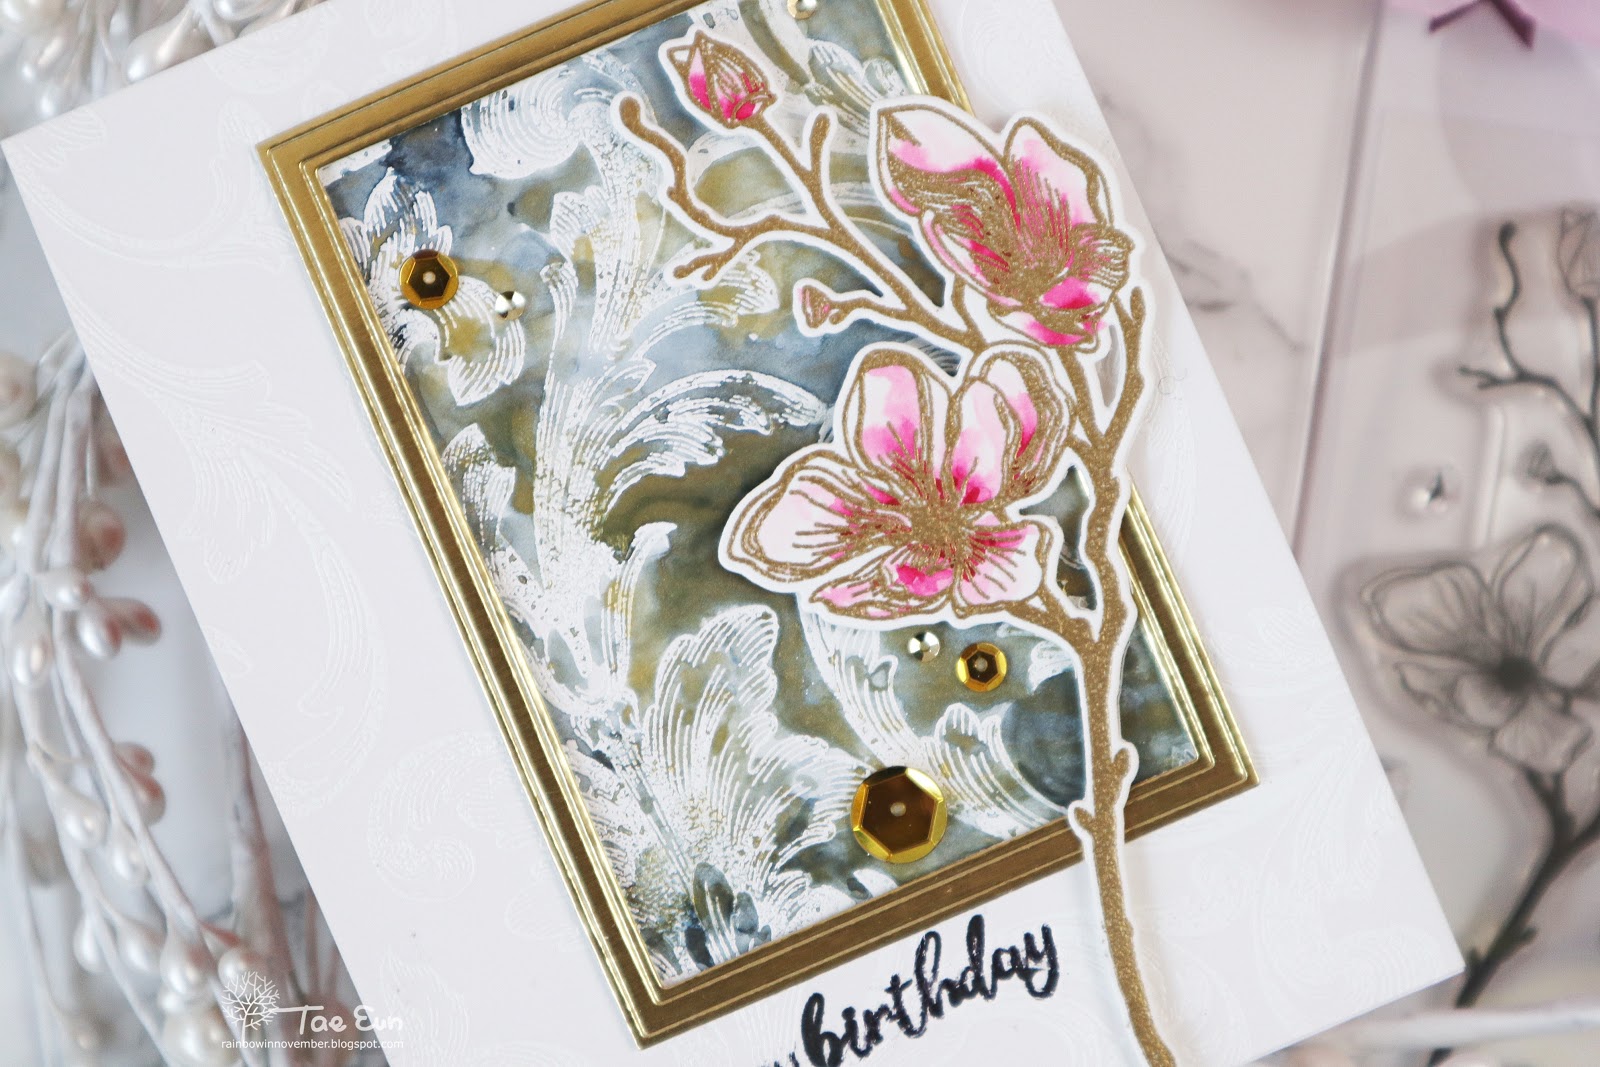
Next I gold heat embossed the outline image from Dotted Blooms set on some watercolor paper, colored the flowers in pink watercolor and cut it using the coordinating die.
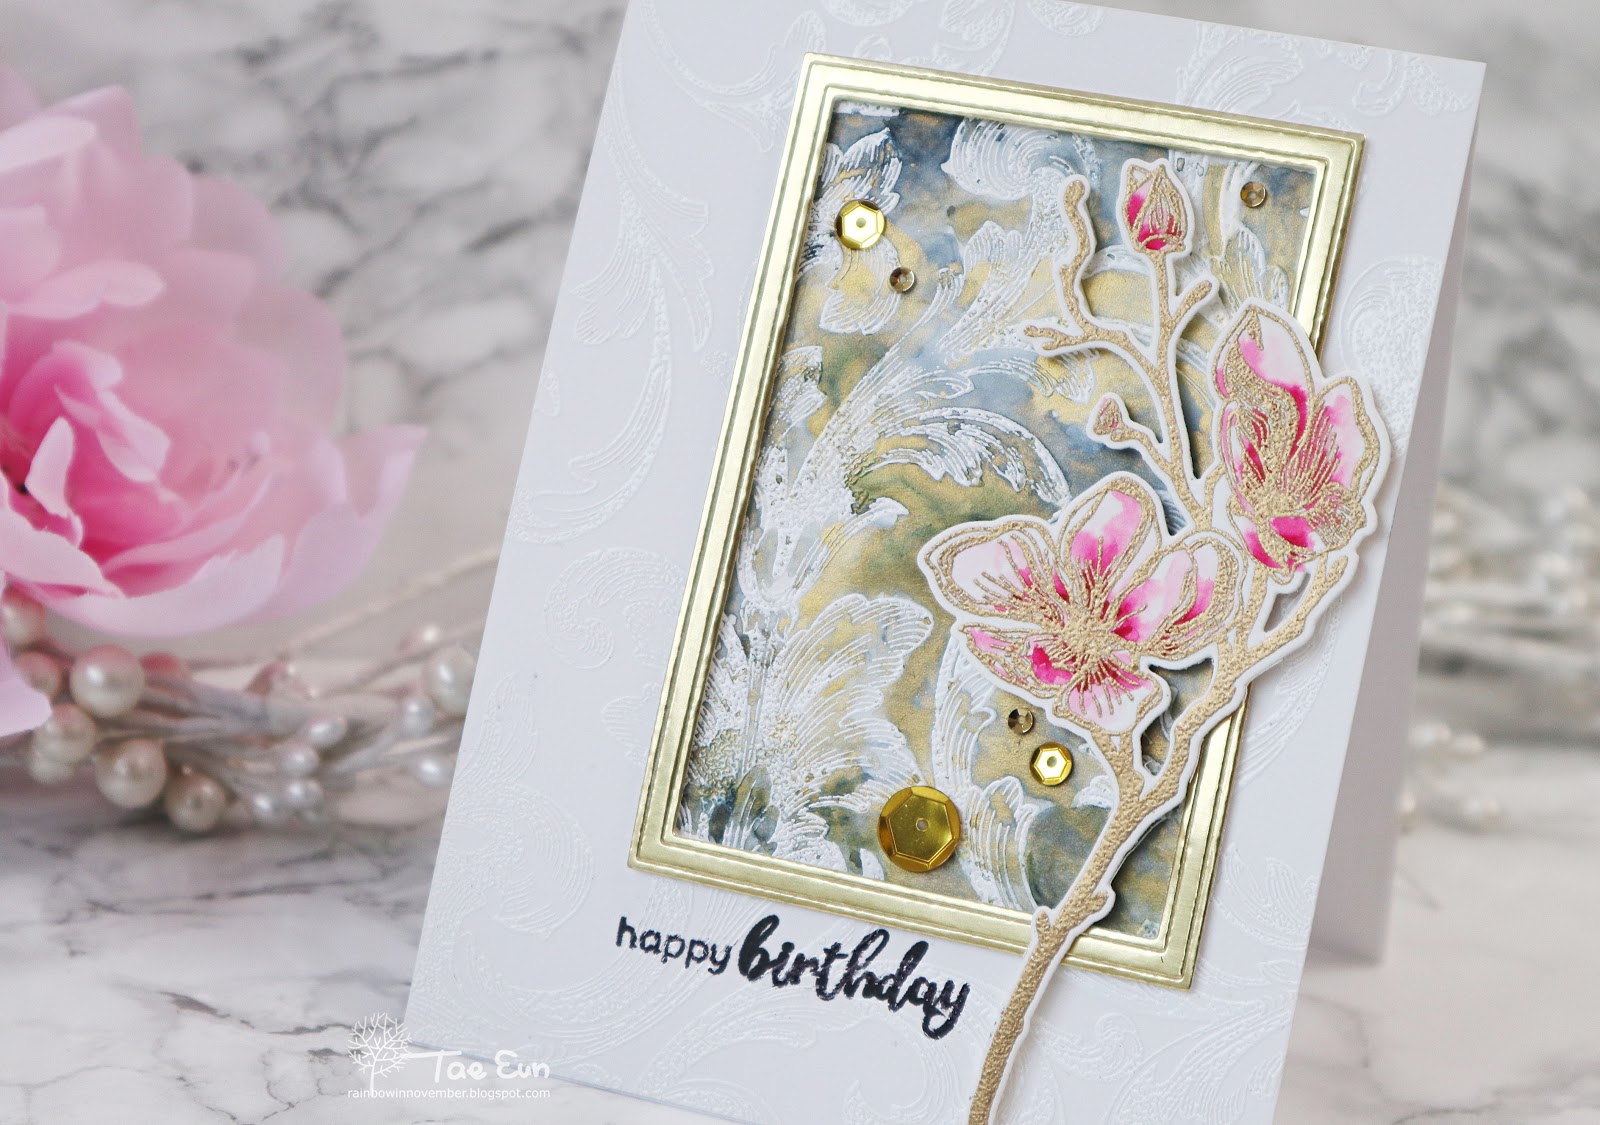
I then assembled my card. The white background panel with the colored rectangle was adhered flat on a white cardbase and the golden frame was foam mounted on the rectangle. I foam mounted the branch onto the card and added some golden sequins to finish off. The sentiment from Dotted Blooms set was stamped in Jet Black ink.
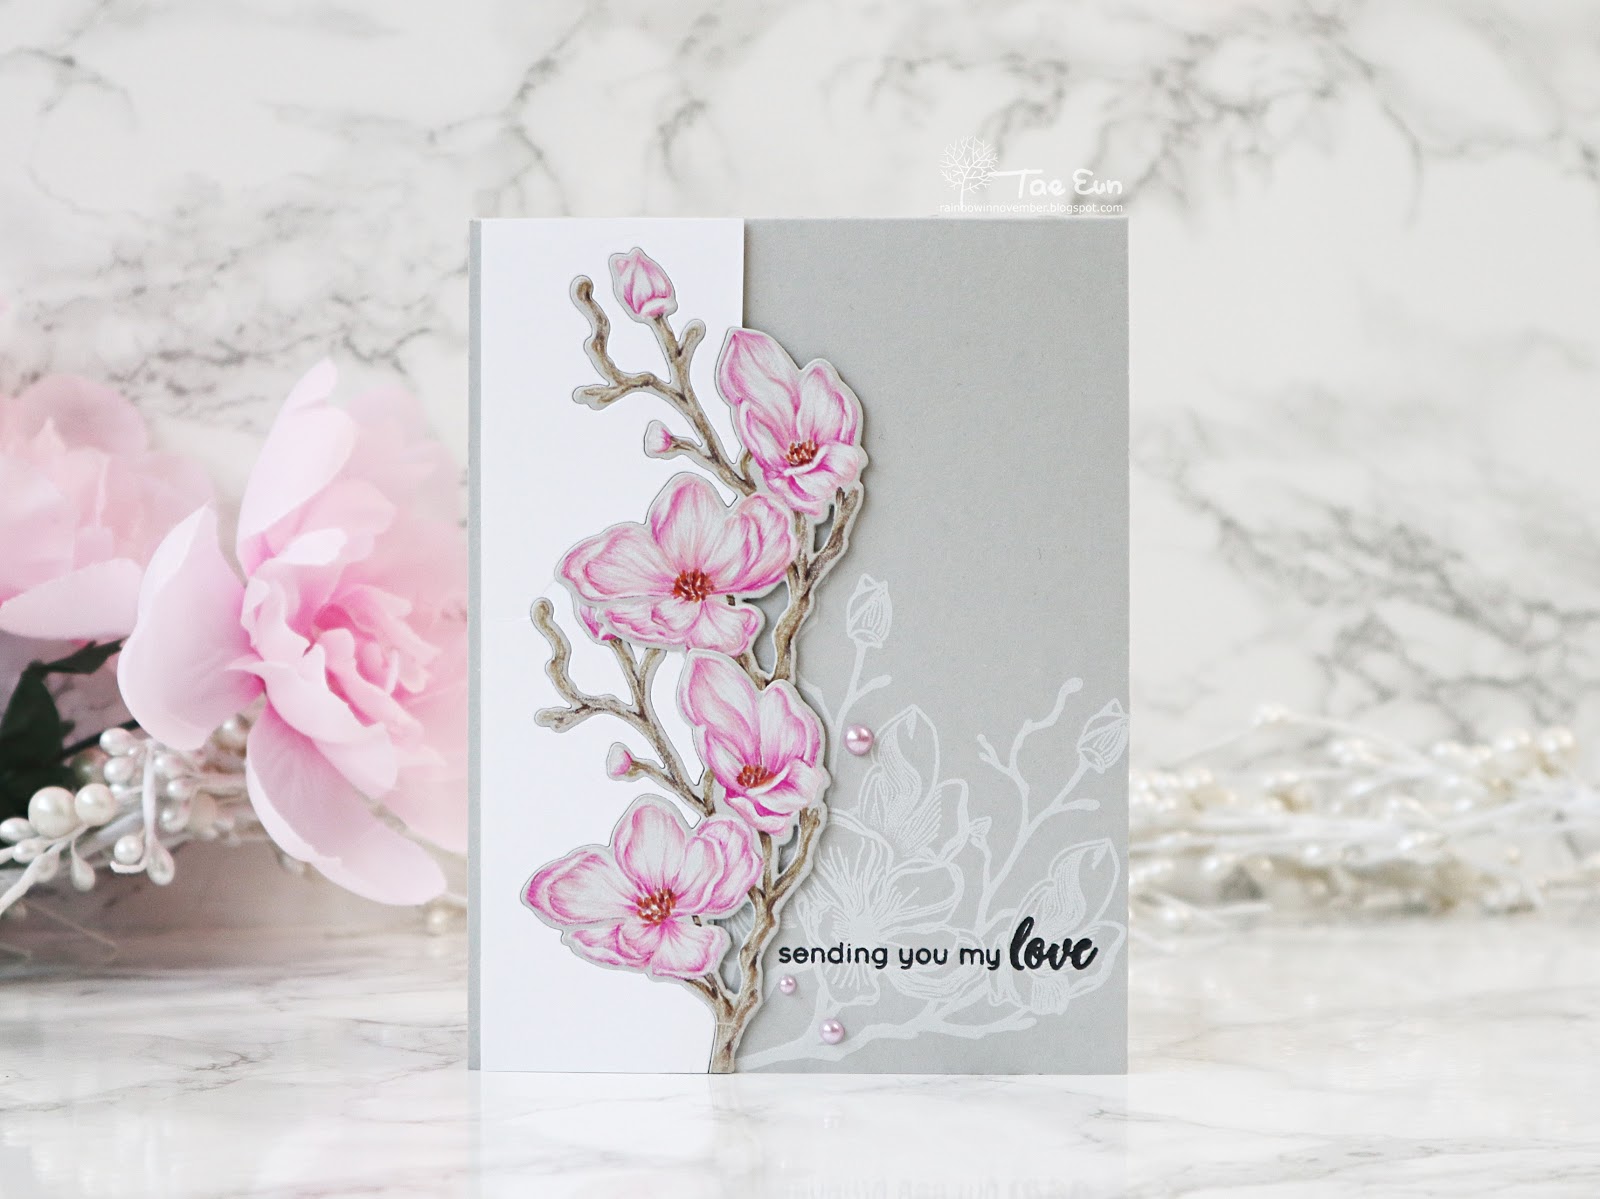
For the next card I colored the floral branch using Prismacolor colored pencils.
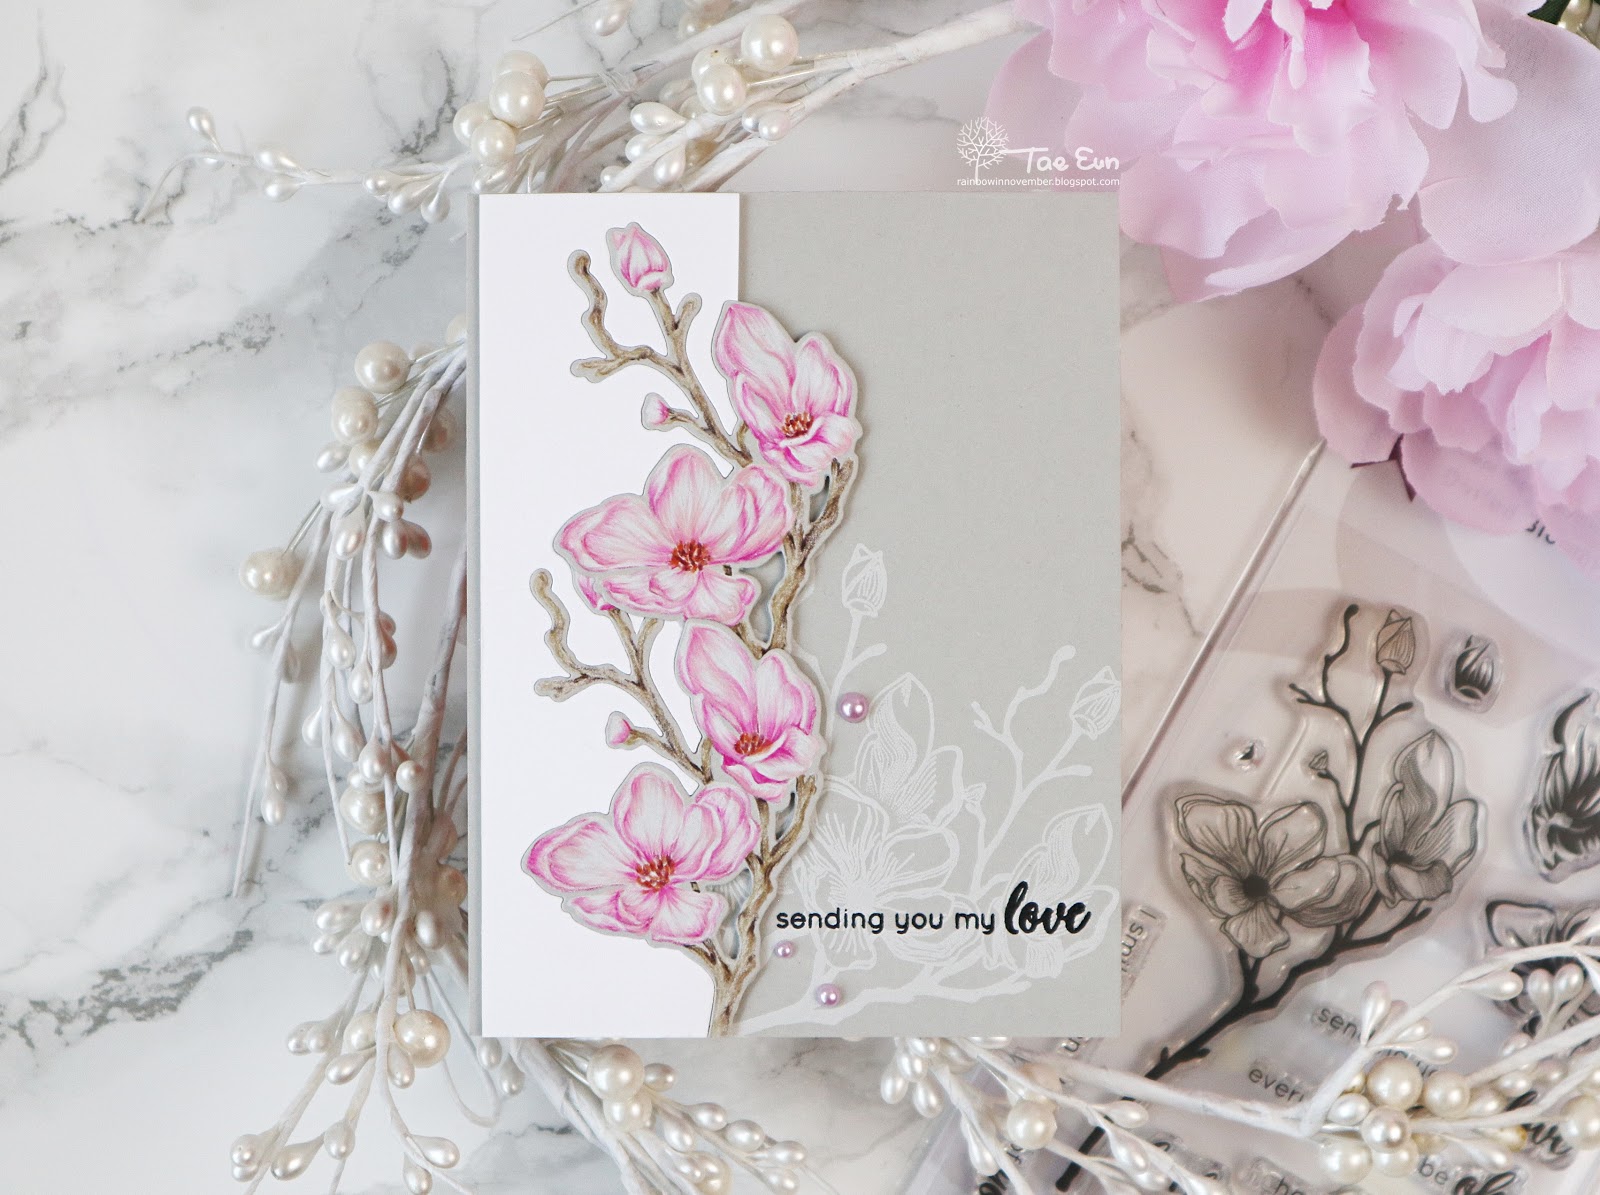
I chose a gray cardstock for my coloring. I stamped the image two times on a gray cardstock in a white pigment ink and colored them using Prismacolor colored pencils. I blended the colors using white pencil or a very light tone of pink and it worked great on the gray paper. After the coloring was done I cut them using the coordinating die.

I then prepared the cardbase. I stamped the image two times in white pigment ink on the gray cardbase as shown in the picture. I used the mask stencil to mask the previously stamped image. To add more white onto the card I decided to go with a white partial panel.
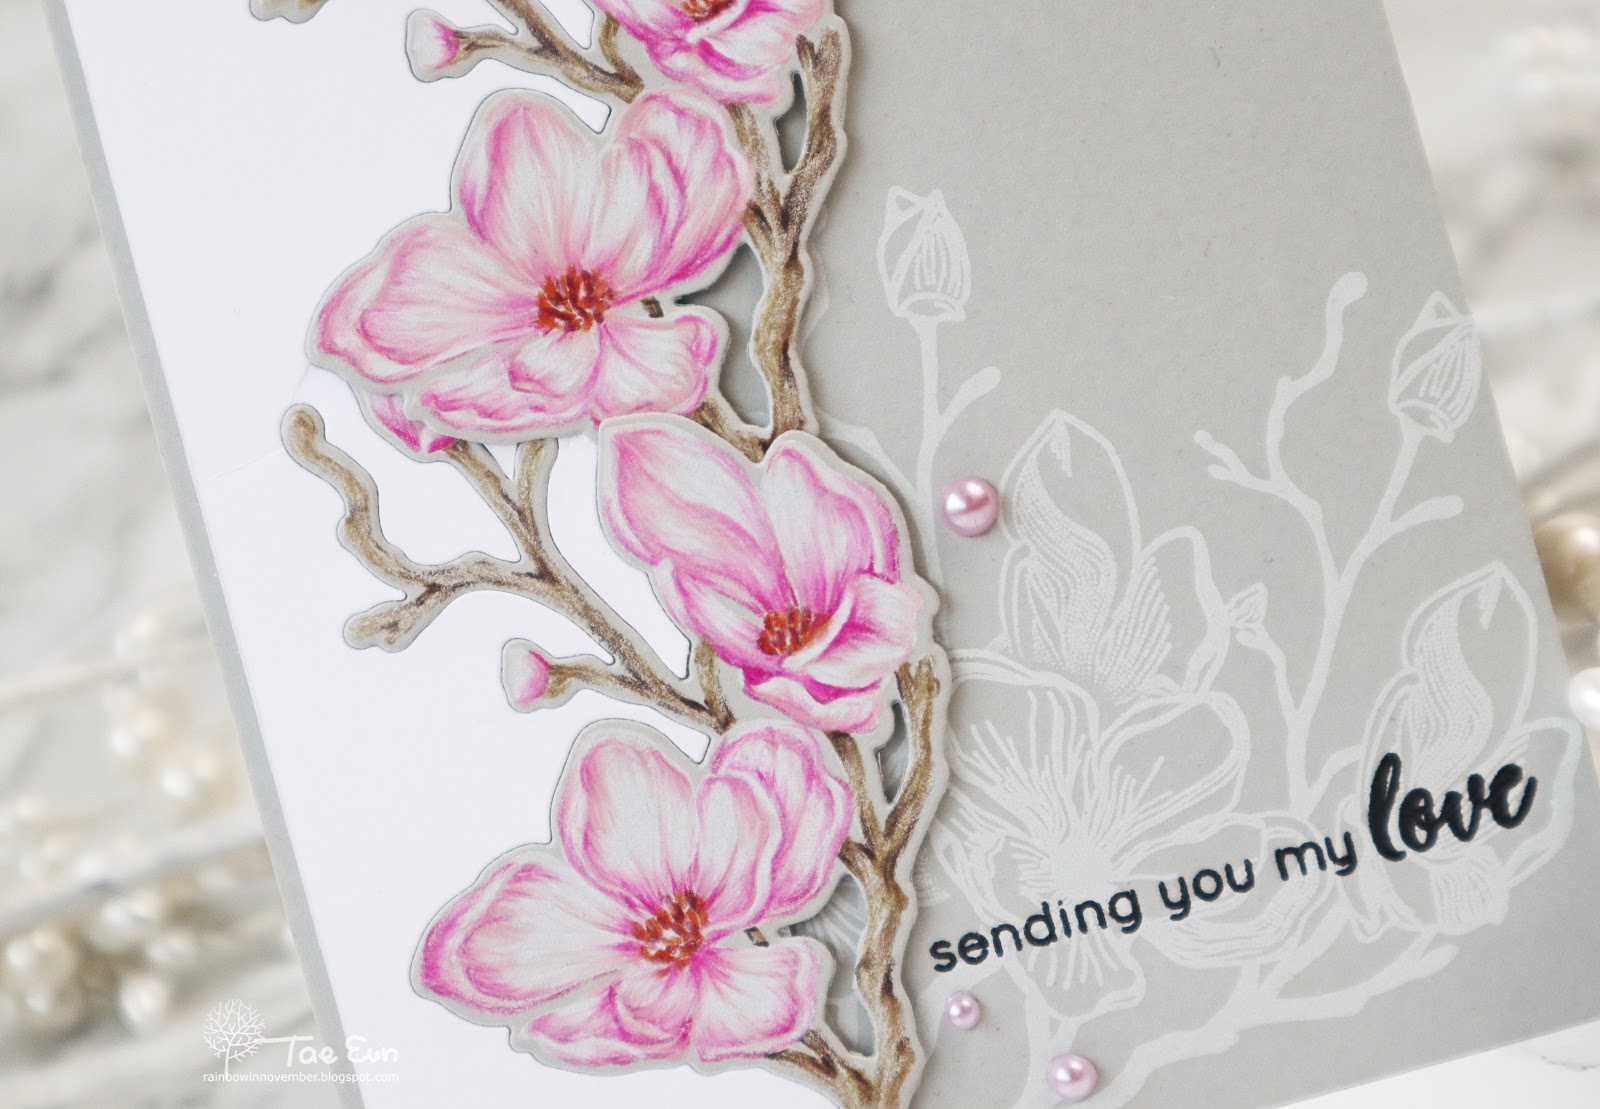
I cut a white panel using the coordinating die of the Dotted Blooms set two times like I wanted to place the colored images. I then inlayed the image into the negative die cut panel and foam mounted it together on the prepared gray cardbase. The sentiment from Dotted Blooms stamp set was stamped in black pigment ink and clear heat embossed. To finish off the card I added three pink flatback pearls.
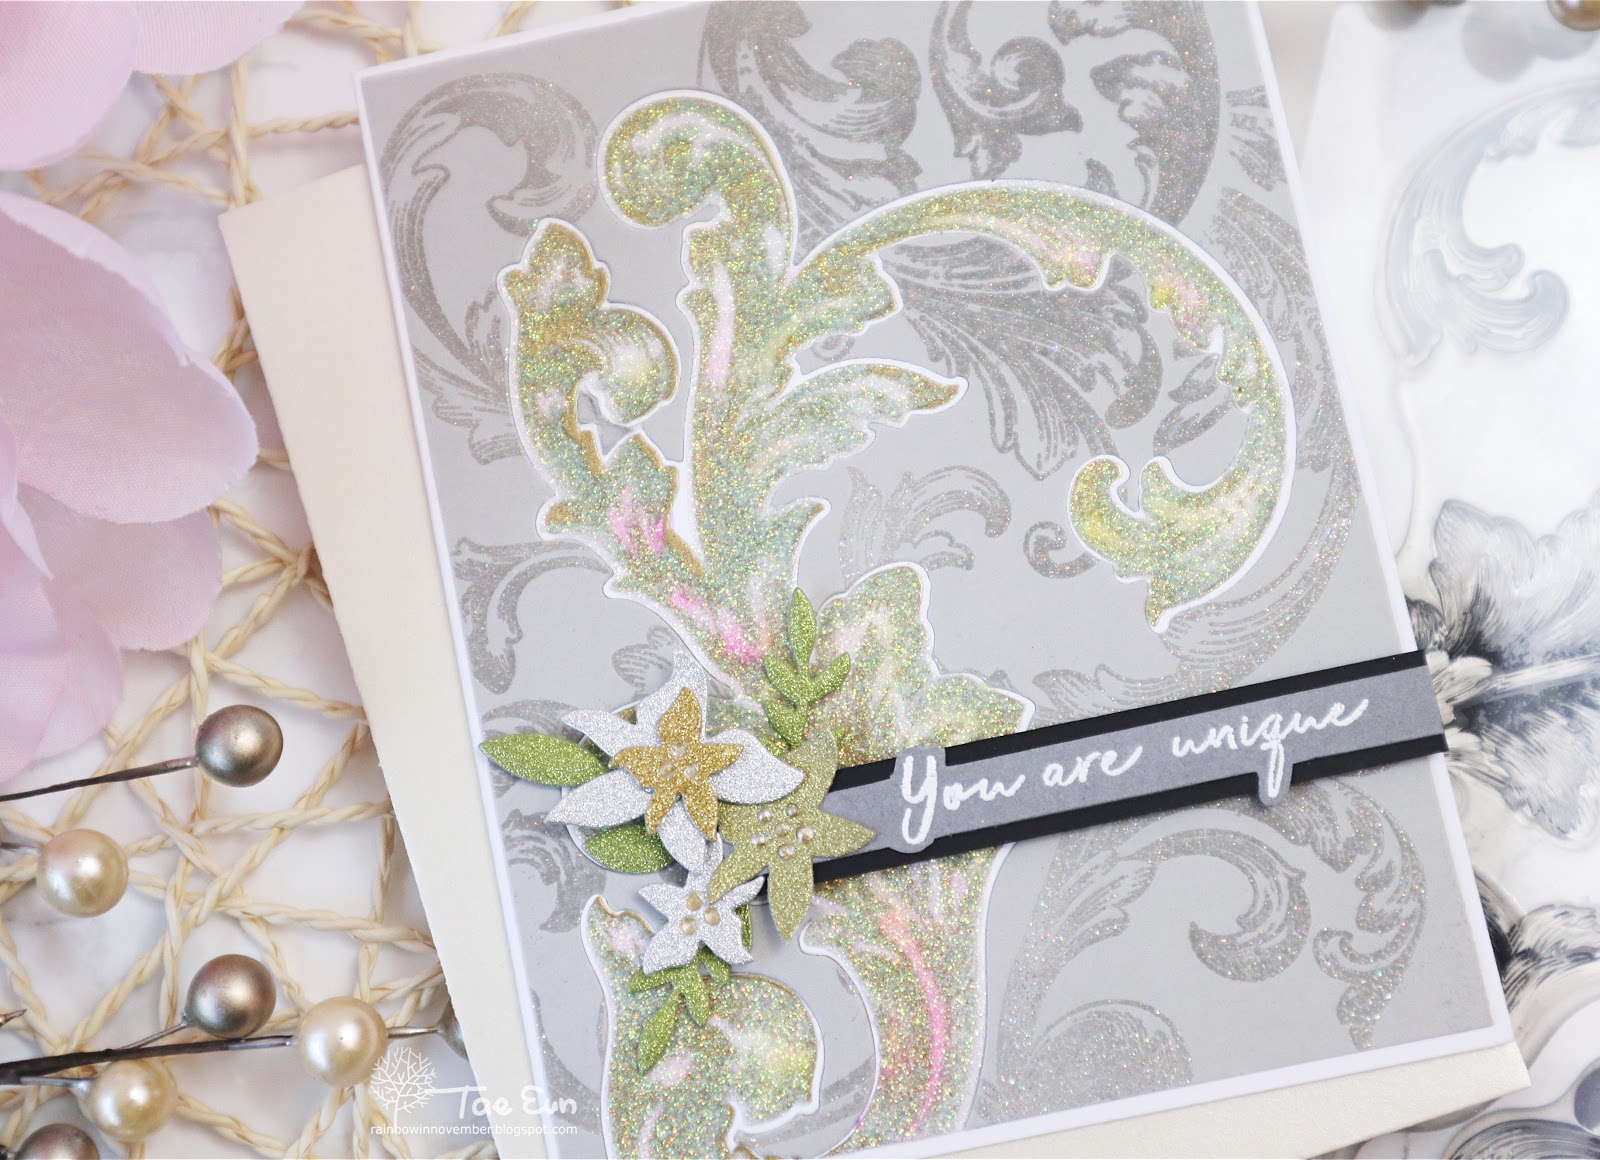
Next up is a couple of cards featuring Baroque Motifs set.
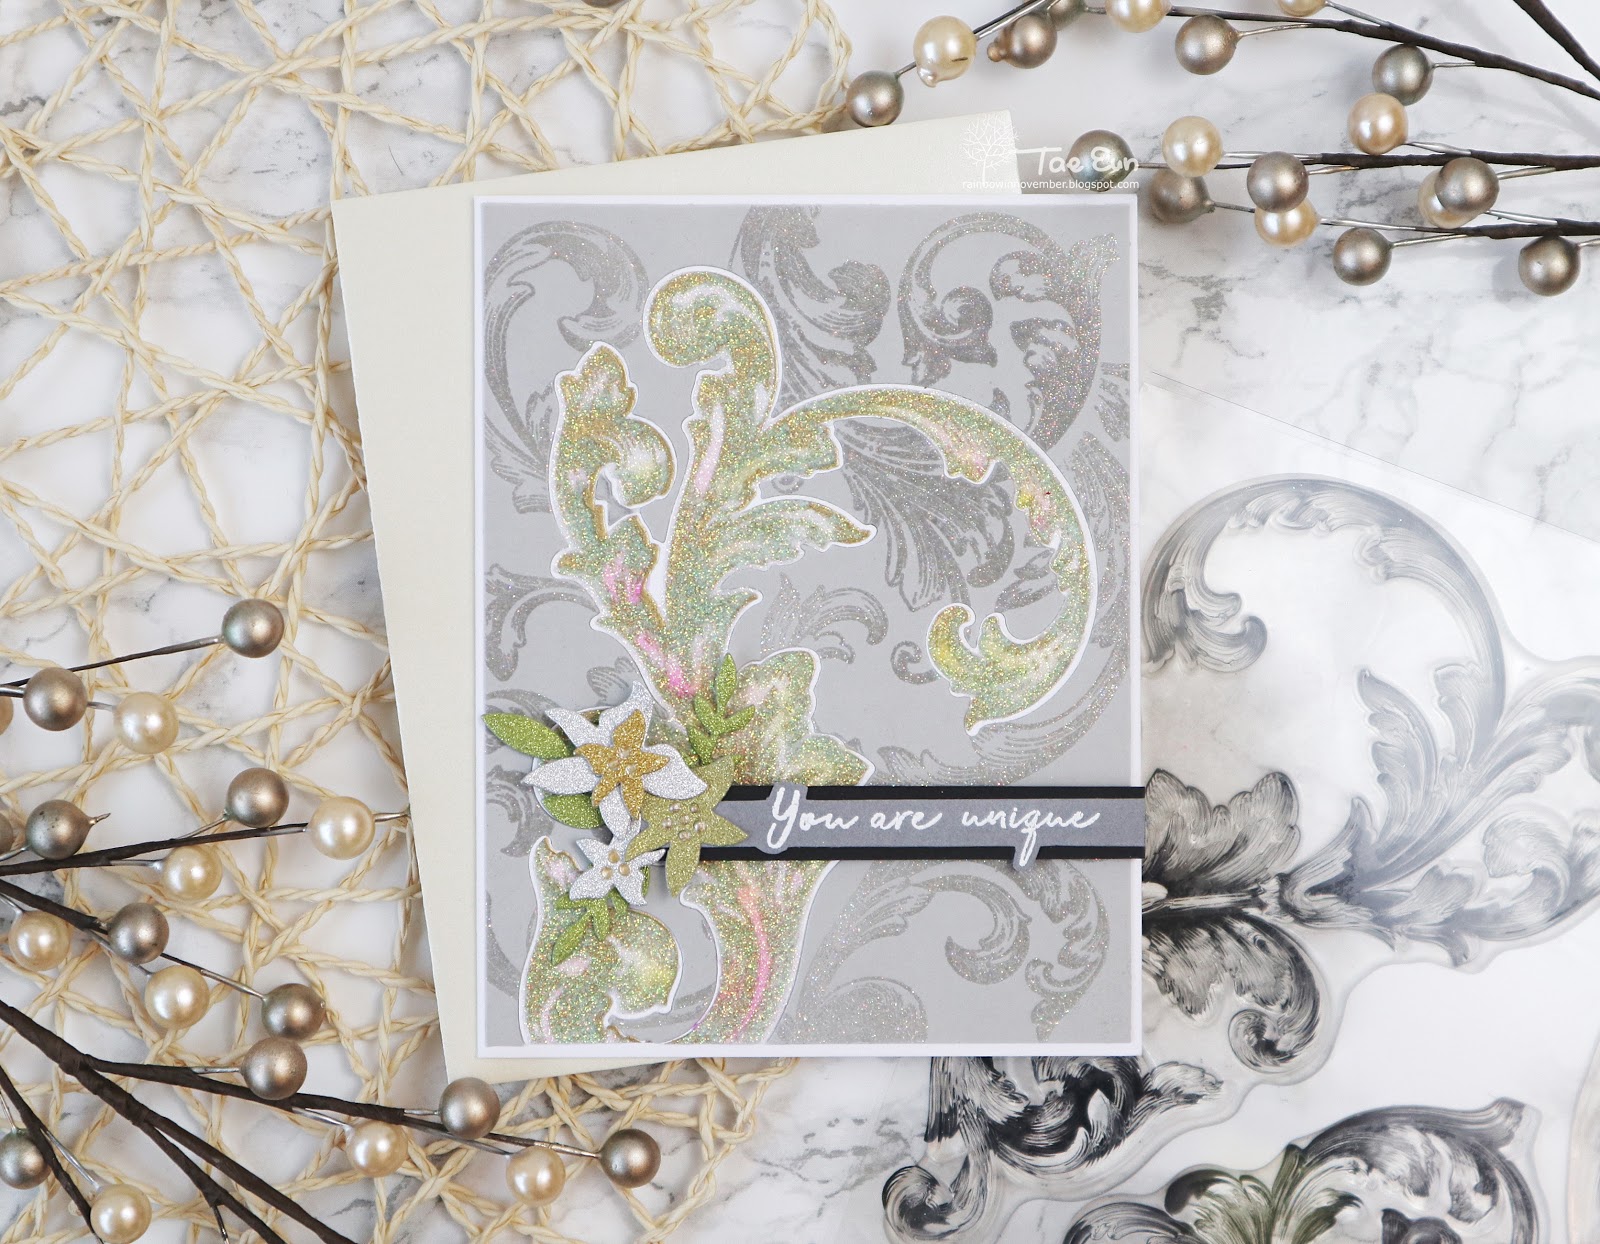
Here I wanted to use the mask stencil as a stencil. So I gold heat embossed the biggest image from the Baroque Motifs set on a white cardstock and colored the image partially in yellow and pink. After that I cut it using the coordinating die and applied clear glitter paste on it using the mask stencil.
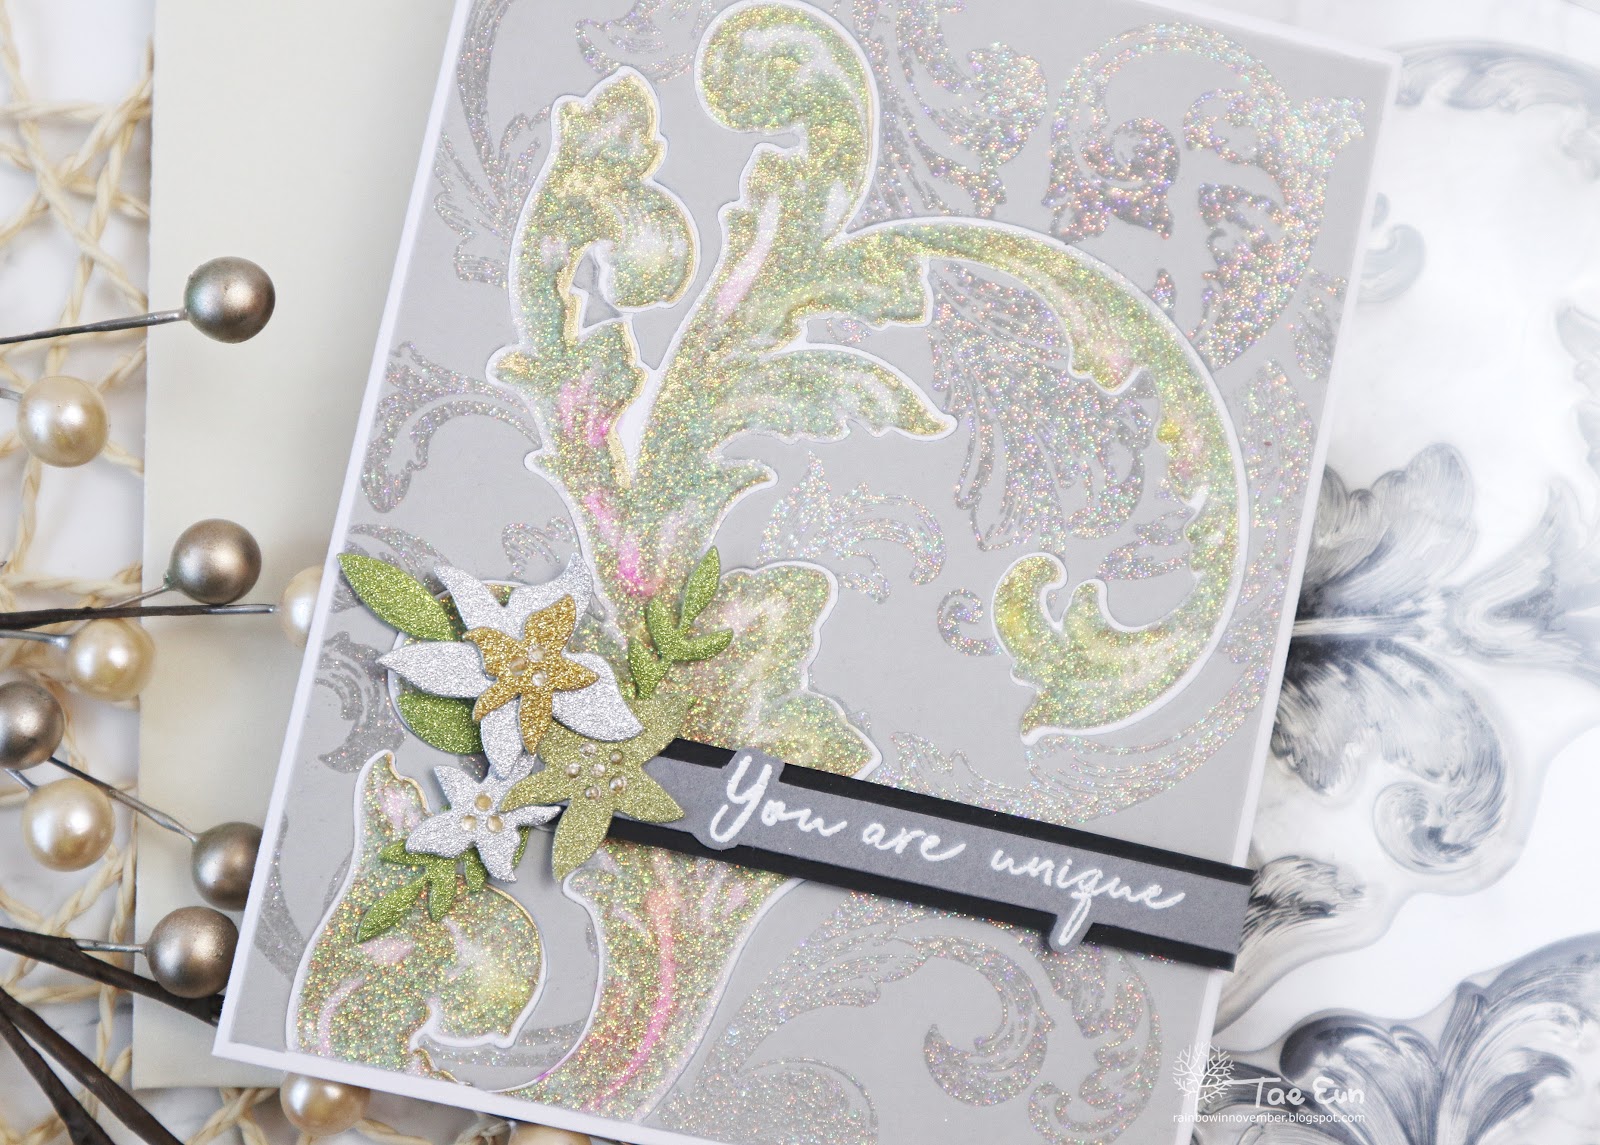
While the glitter paste was drying I prepared the gray background panel. I stamped a background pattern using various stamps from the Baroque Motifs set. I used an embossing ink to heat emboss the images in clear iridescent embossing powder. I then cut the biggest pattern using the coordinating die to inlay the paste embossed piece.
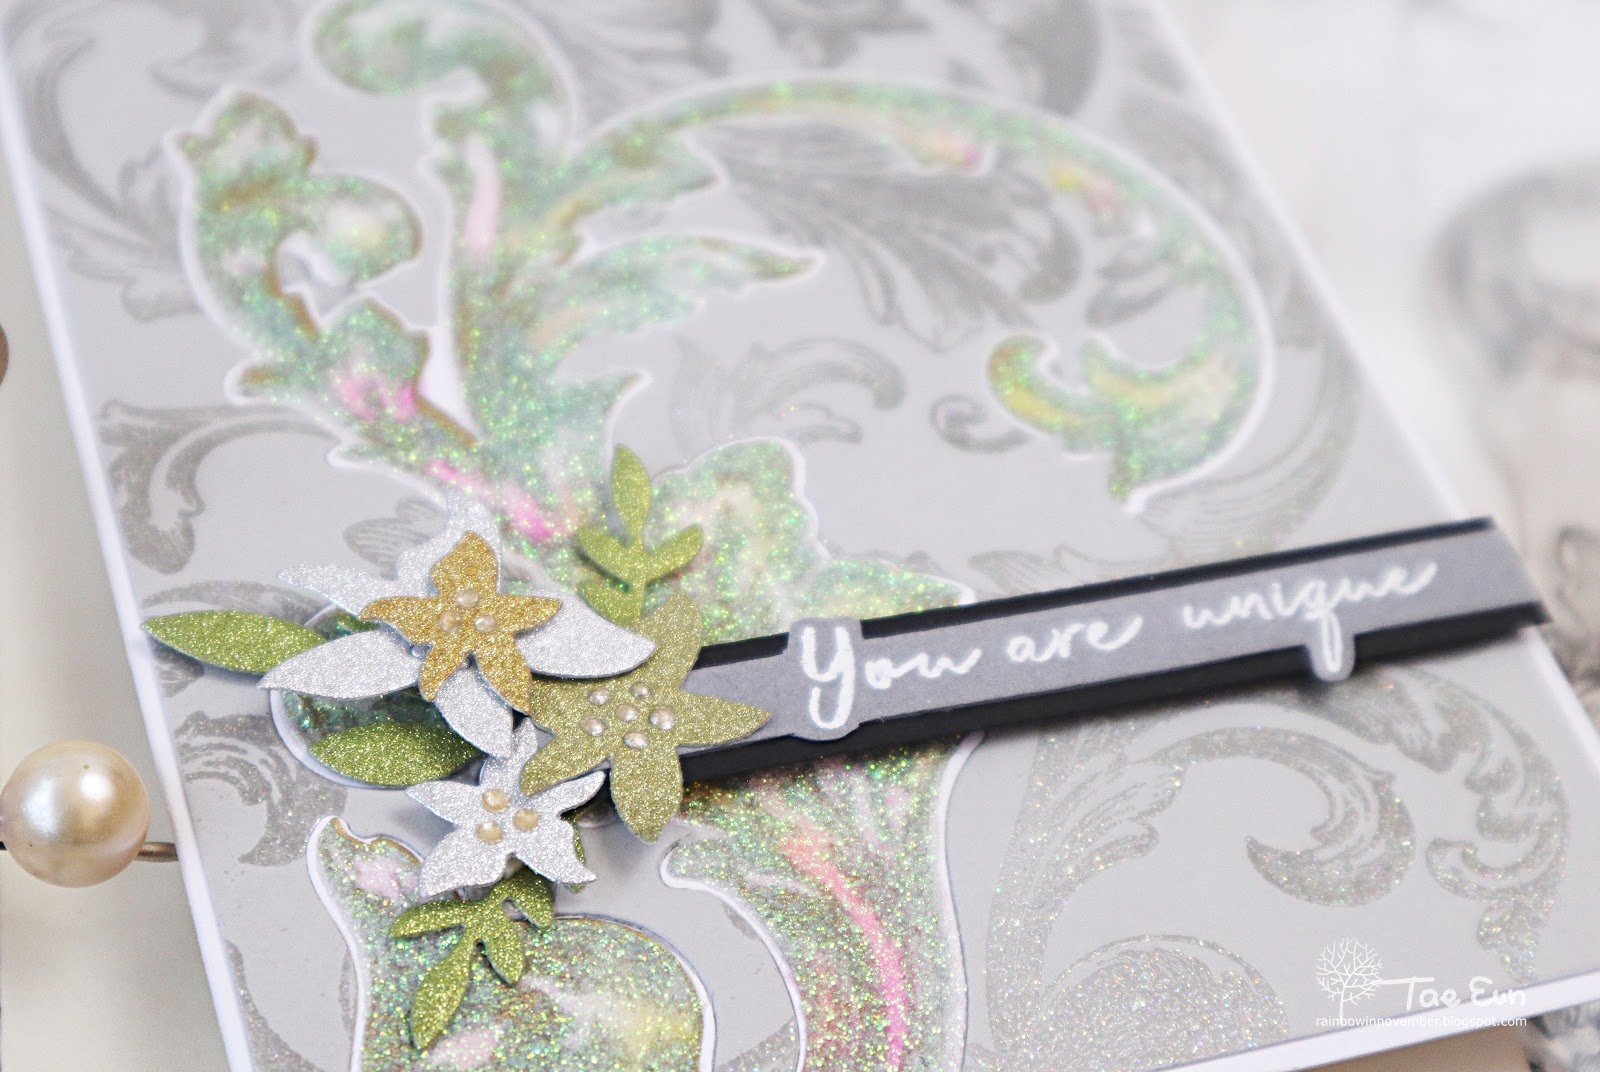
I adhered the background panel inclusive the inlayed shape on the white card base. To add more sparkle and a smaller focal point I added small die cut florals along with the sentiment. The little flowers were cut using Layered Floral Elements die from some glitter paper. I white heat embossed the sentiment from Reason to Smile set on a strip of gray cardstock, matted it with a strip of black cardstock and foam mounted it onto the card.
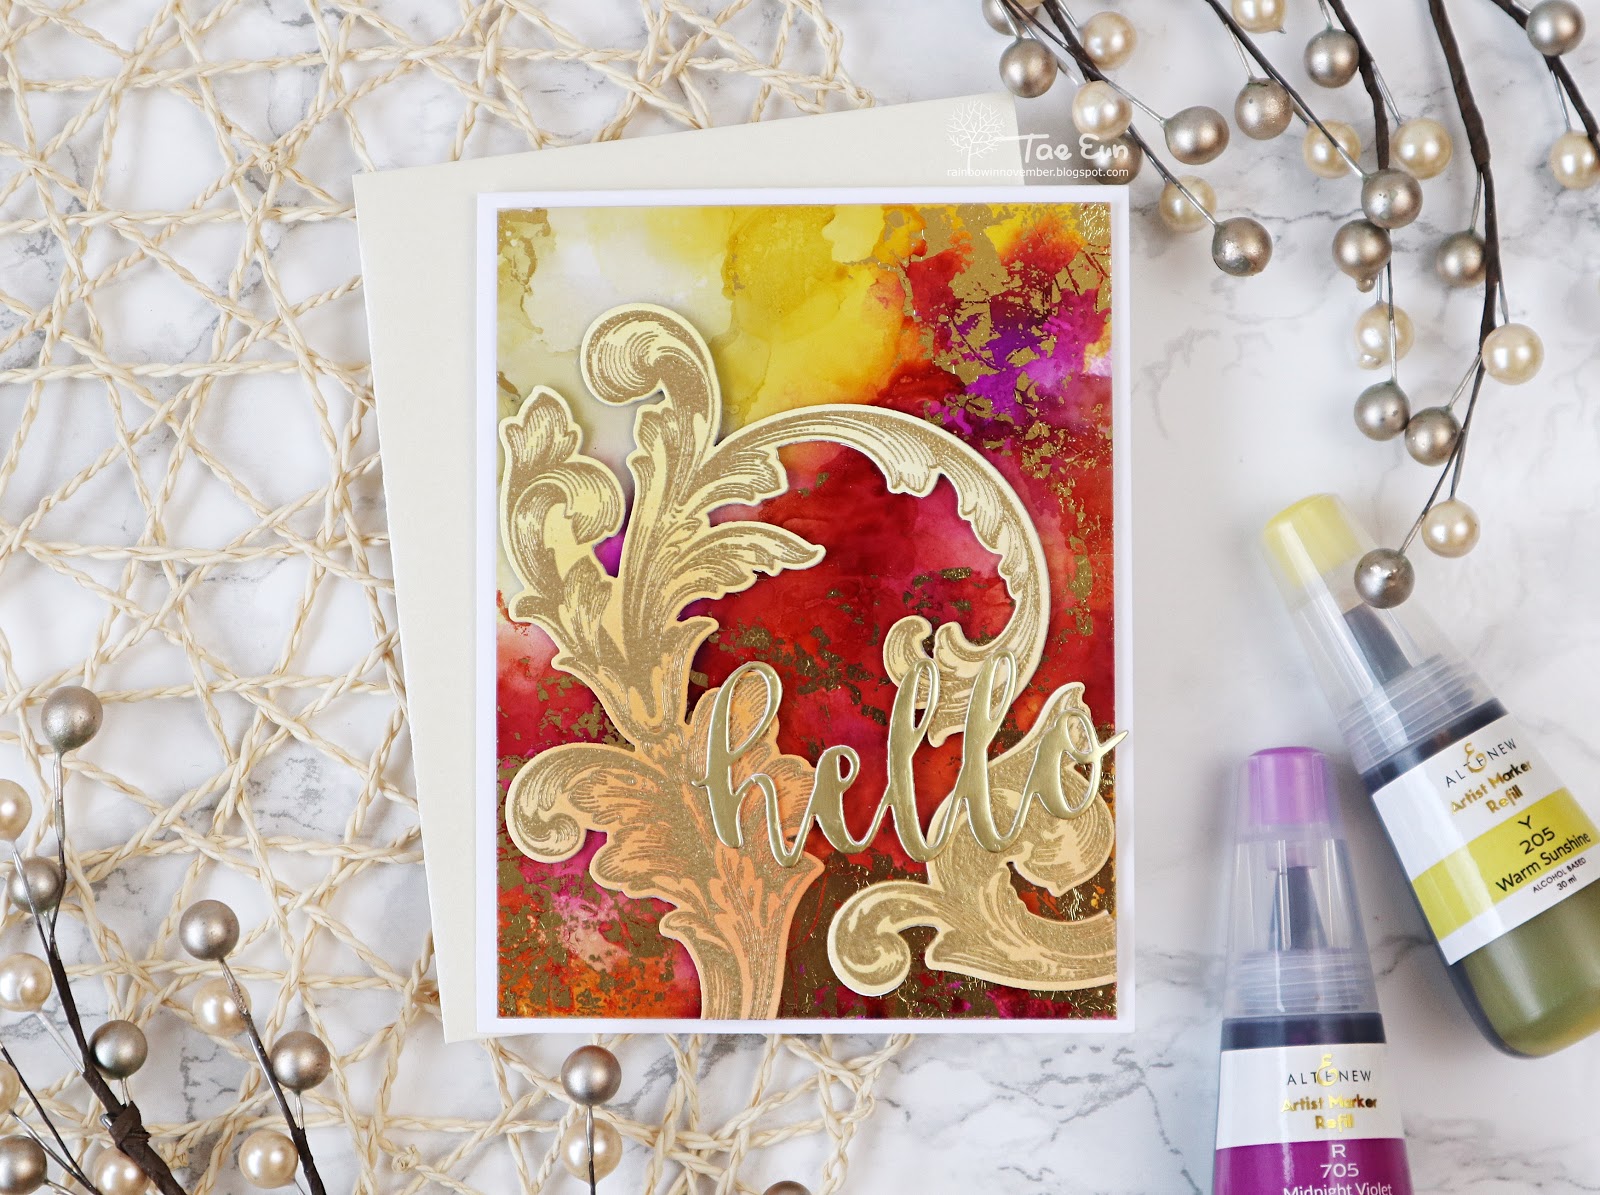
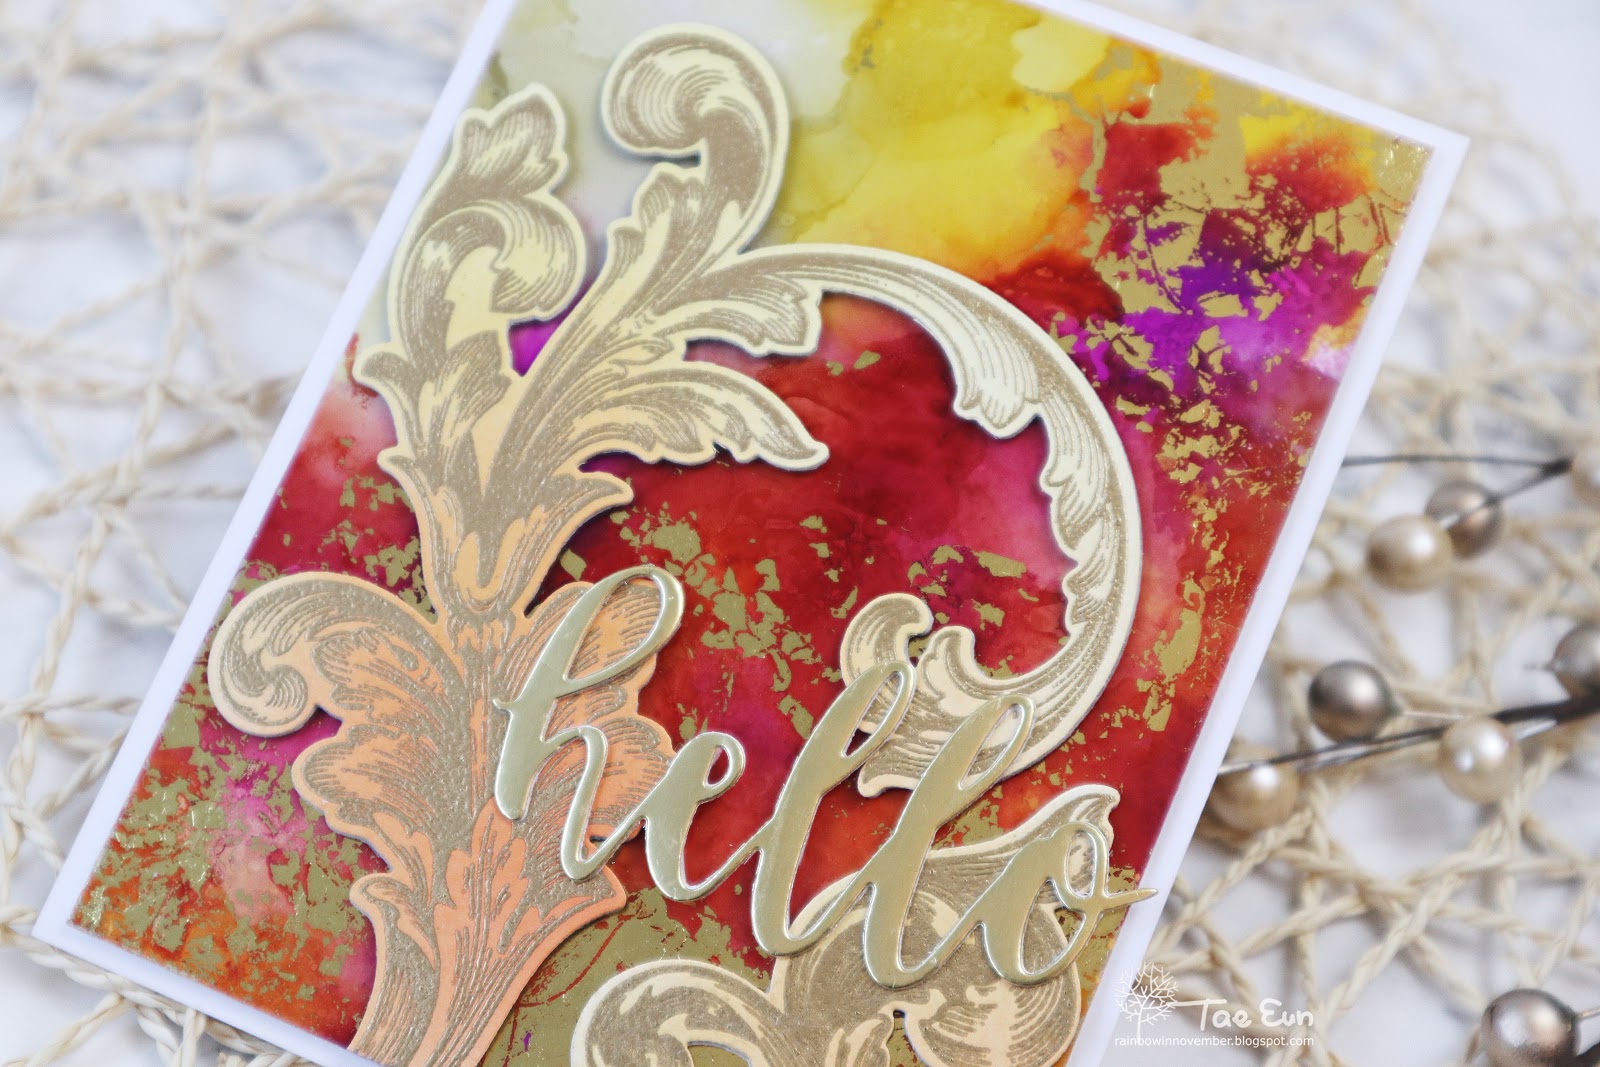
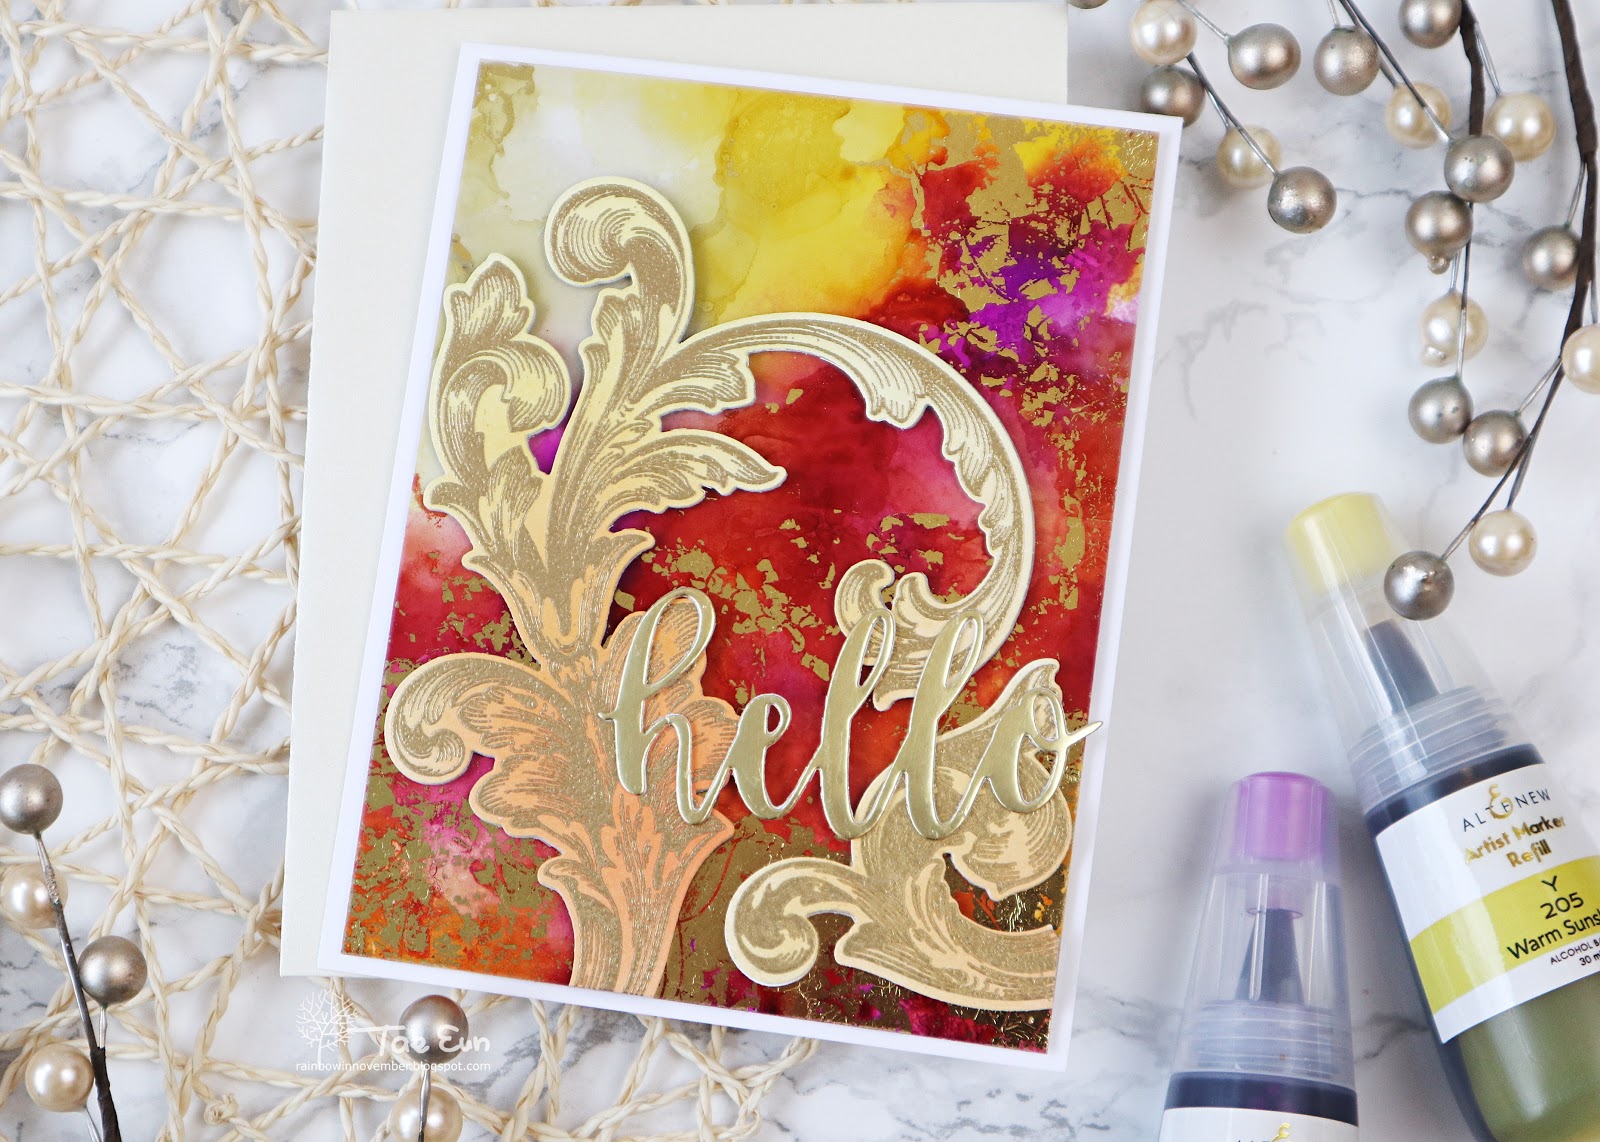
I started by applying R705, C002, Y205 and WG01 from Artist Marker refills set B on a glossy cardstock. I blew the inks with a straw and added rubbing alcohol on the panel to blend the colors. Even before the panel was completely dry I placed a gold foil on the panel and pressed it to the panel with a brayer to add golden accents.

The biggest image of the Baroque Motifs stamp set was gold heat embossed on some white cardstock on which I ink blended using Citrus Burst, Honey Drizzle, Sun Kissed and Orange Creme to create an yellow orange ombre color. The image was cut using the coordinating die.
That’s it from me today! I’m so glad you’re staying with me until the end of this long post :)! Hope you loved looking my cards!
PRIZES
To celebrate this release, Altenew is giving away a $50 gift certificate to 6 lucky winners! Please leave a comment on the Altenew Card Blog and/or Altenew Scrapbook Blog by 2/21/2019 for a chance to win. 6 winners will be announced on the Altenew blogs on 2/24/2019.
—–WINNER (Edited to add)—–
-via Random Number Generator-

Thank you so much for your lovely comments, everyone !!!
The winner of a $30 gift certificate to Altenew online store is
Congratulations, Cathy!!! Please contact Altenew at [email protected]
by 2/28/2019 with the subject line “Altenew February 2019 Stamp/Die/Stencil Release Blog Hop Winner from TaeEun’s Blog”.
HOP ALONG
Your next stop on the hop is Sandra Dietrich‘ s blog! Below is the complete list of this blog hop!
TaeEun Yoo –> You are here 🙂 !
Thank you so much for stopping by!
Wishing you a happy hopping!
Hugs,
TaeEun
I participate in the affiliate program of Altenew. It means I earn a small commission at no additional cost to you each time you click through and purchase the product(s) shared here. Thank you for your support :).