
Hi everyone!
I can’t believe it’s already October!!! Cool wind and the colorful leaves are out there and it’s definitely Autumn. As a card maker I would say it’s time for making those holiday cards 🙂 !!!
Penny Black has recently released gorgeous holiday stamp and die sets, called Merry and Joy!
I had the pleasure to play with the new items and made three holiday cards using some of the cuties from this release.

The first card is featuring Bauble Balance (30-621) with the cute elf.
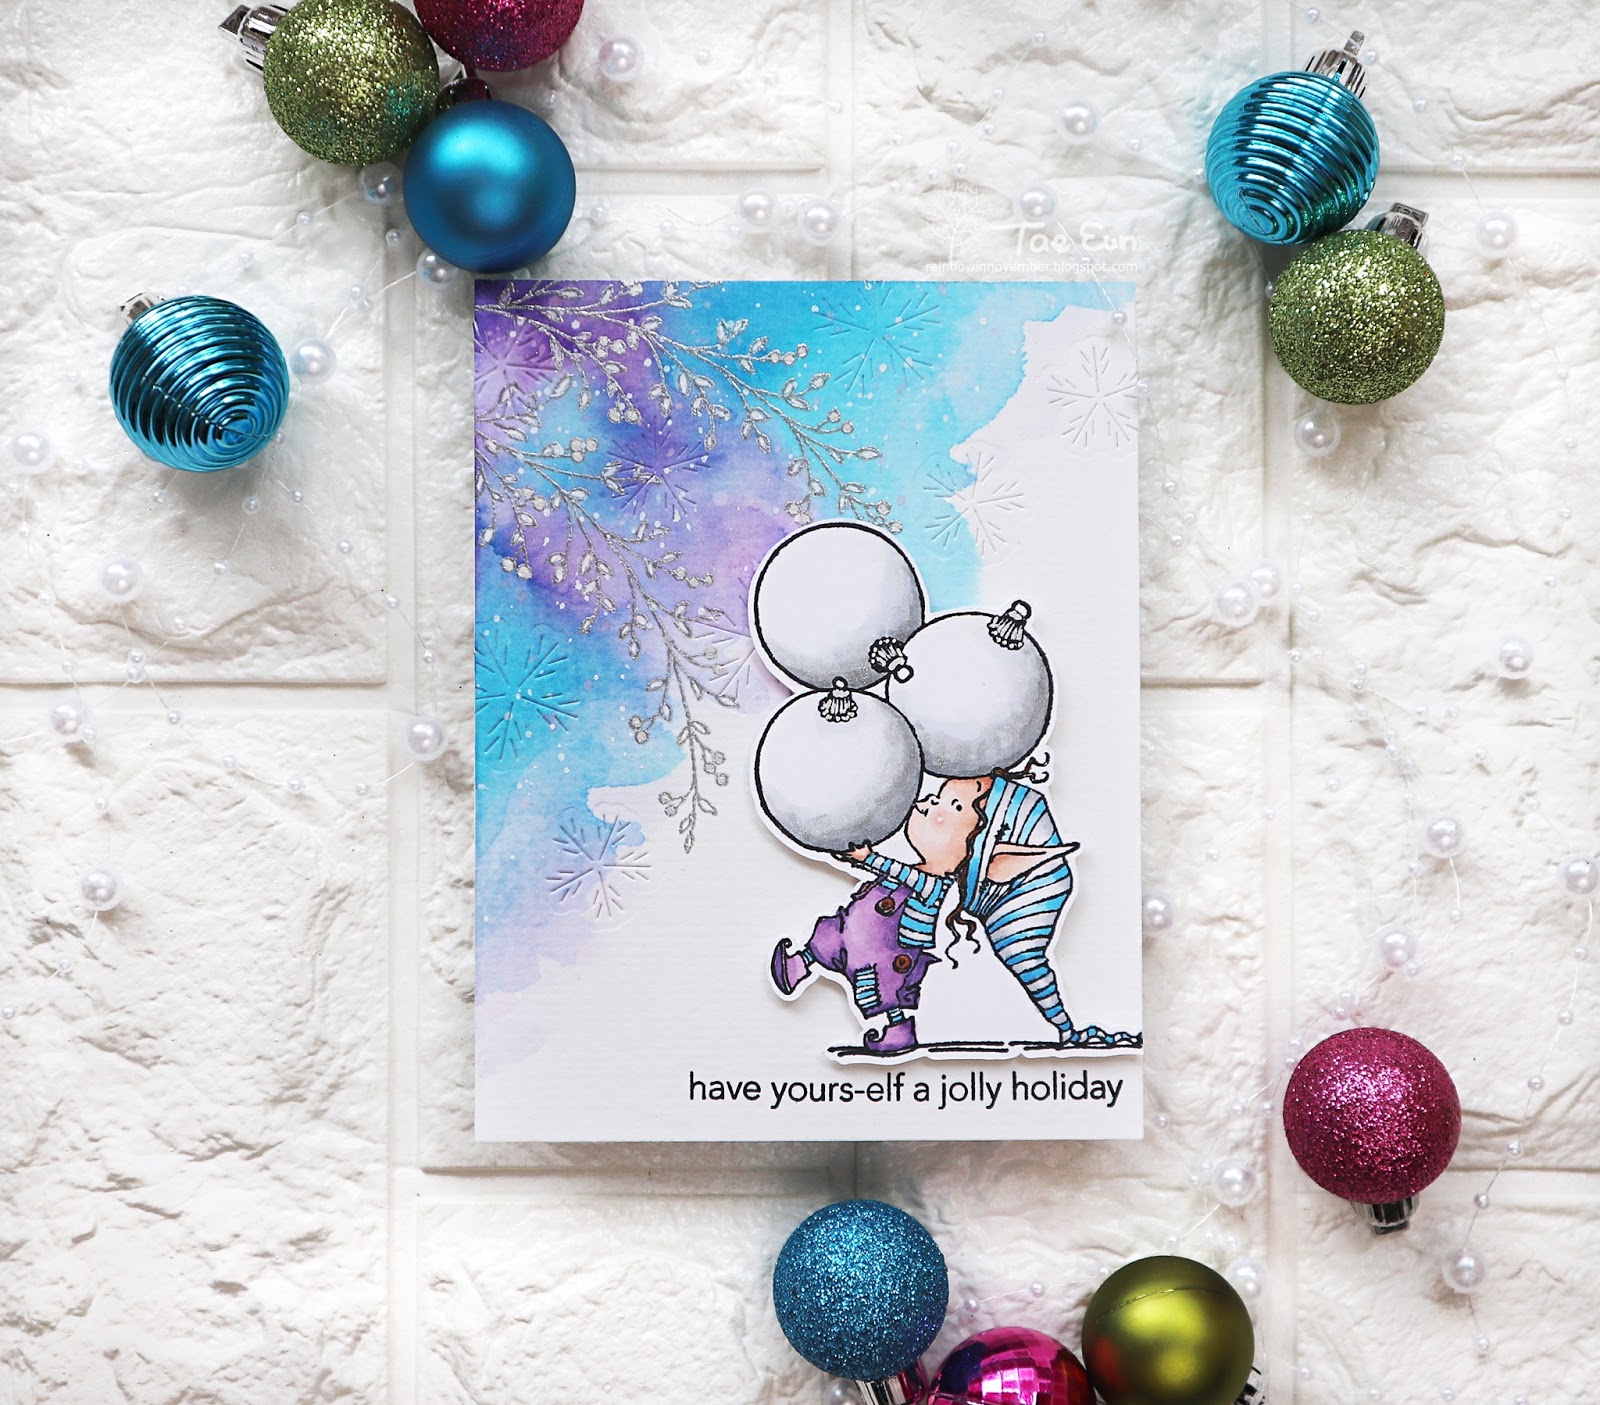
I wanted this card to be in purple and blue. So I stamped the elf balancing three huge baubles in Memento black ink and colored it with B and V Copic markers. I colored the baubles in C Copics and covered it with glitter using a silver Wink of Stella pen. I cut the image with my ScanNCut and set it aside.

To create the background I did some watercolor wash on a corner of a watercolor paper panel using Orchid and Cerulean Blue Color Burst. I splattered clear water and dabbed them off with a paper towel. I also added splatters of white opaque ink on it.

After the panel was dry I heat embossed a branch from All Wrapped Up (30-607) stamp set two times on the watercolor wash in silver. To add more texture in the background I also die cut the snowflakes using the dies included in Snowflake Frame die set (51-565). They cut the pattern of a snowflake in lines.

I stamped the sentiment from Bauble Balance (30-621) set on the bottom of the background panel and foam mounted the cute elf on it as shown in the picture. I colored the tiny berries of the branches in silver and the leaves in a white gel pen and the card was finished!

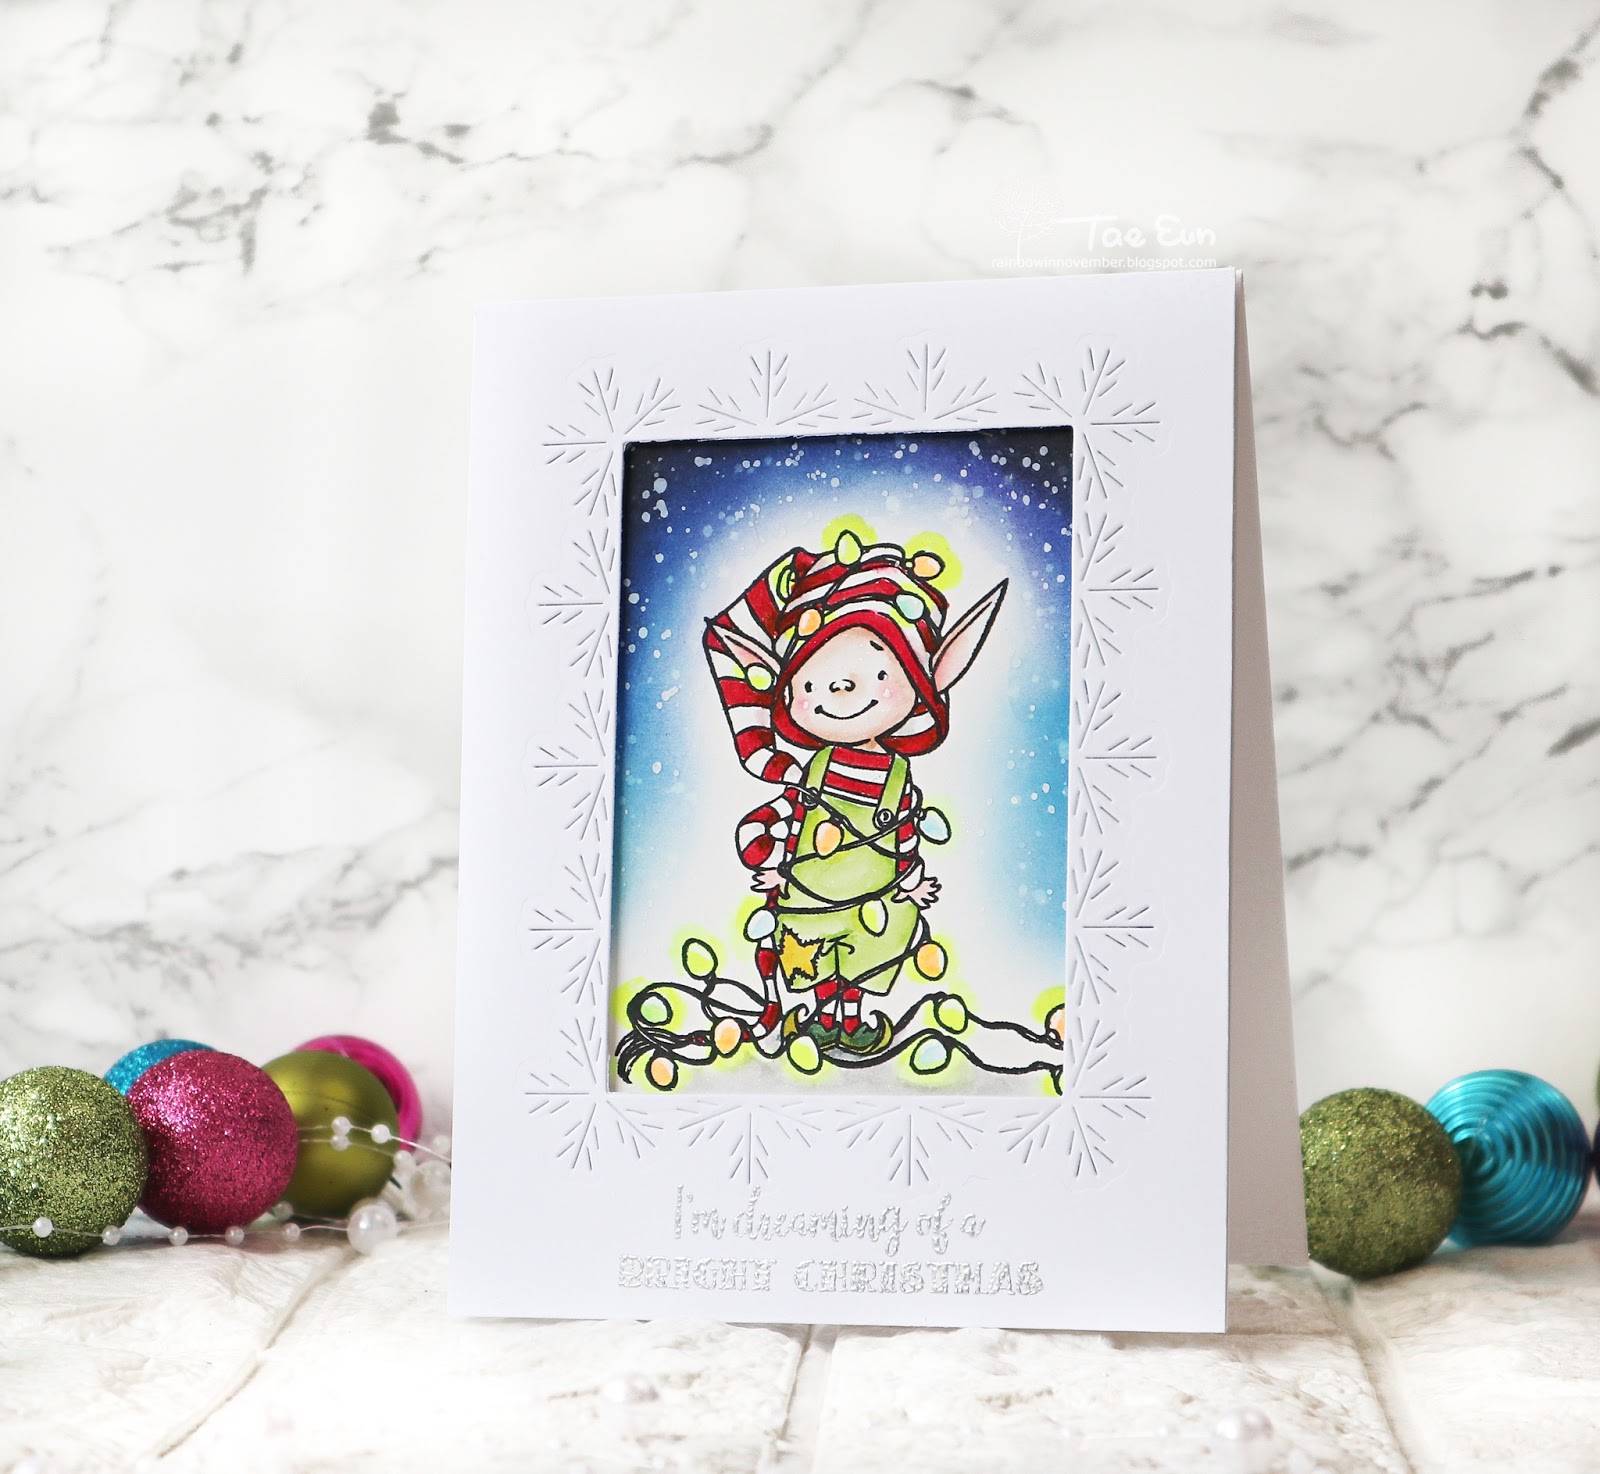
The next card is showing Beaming (30-623) set. Another cute image of the elf.

I started off by stamping the elf on a Bristol Smooth paper panel in a black pigment ink to color it using Zig brush markers. I added fluorescent yellow around the light bulbs for a lightning effect.
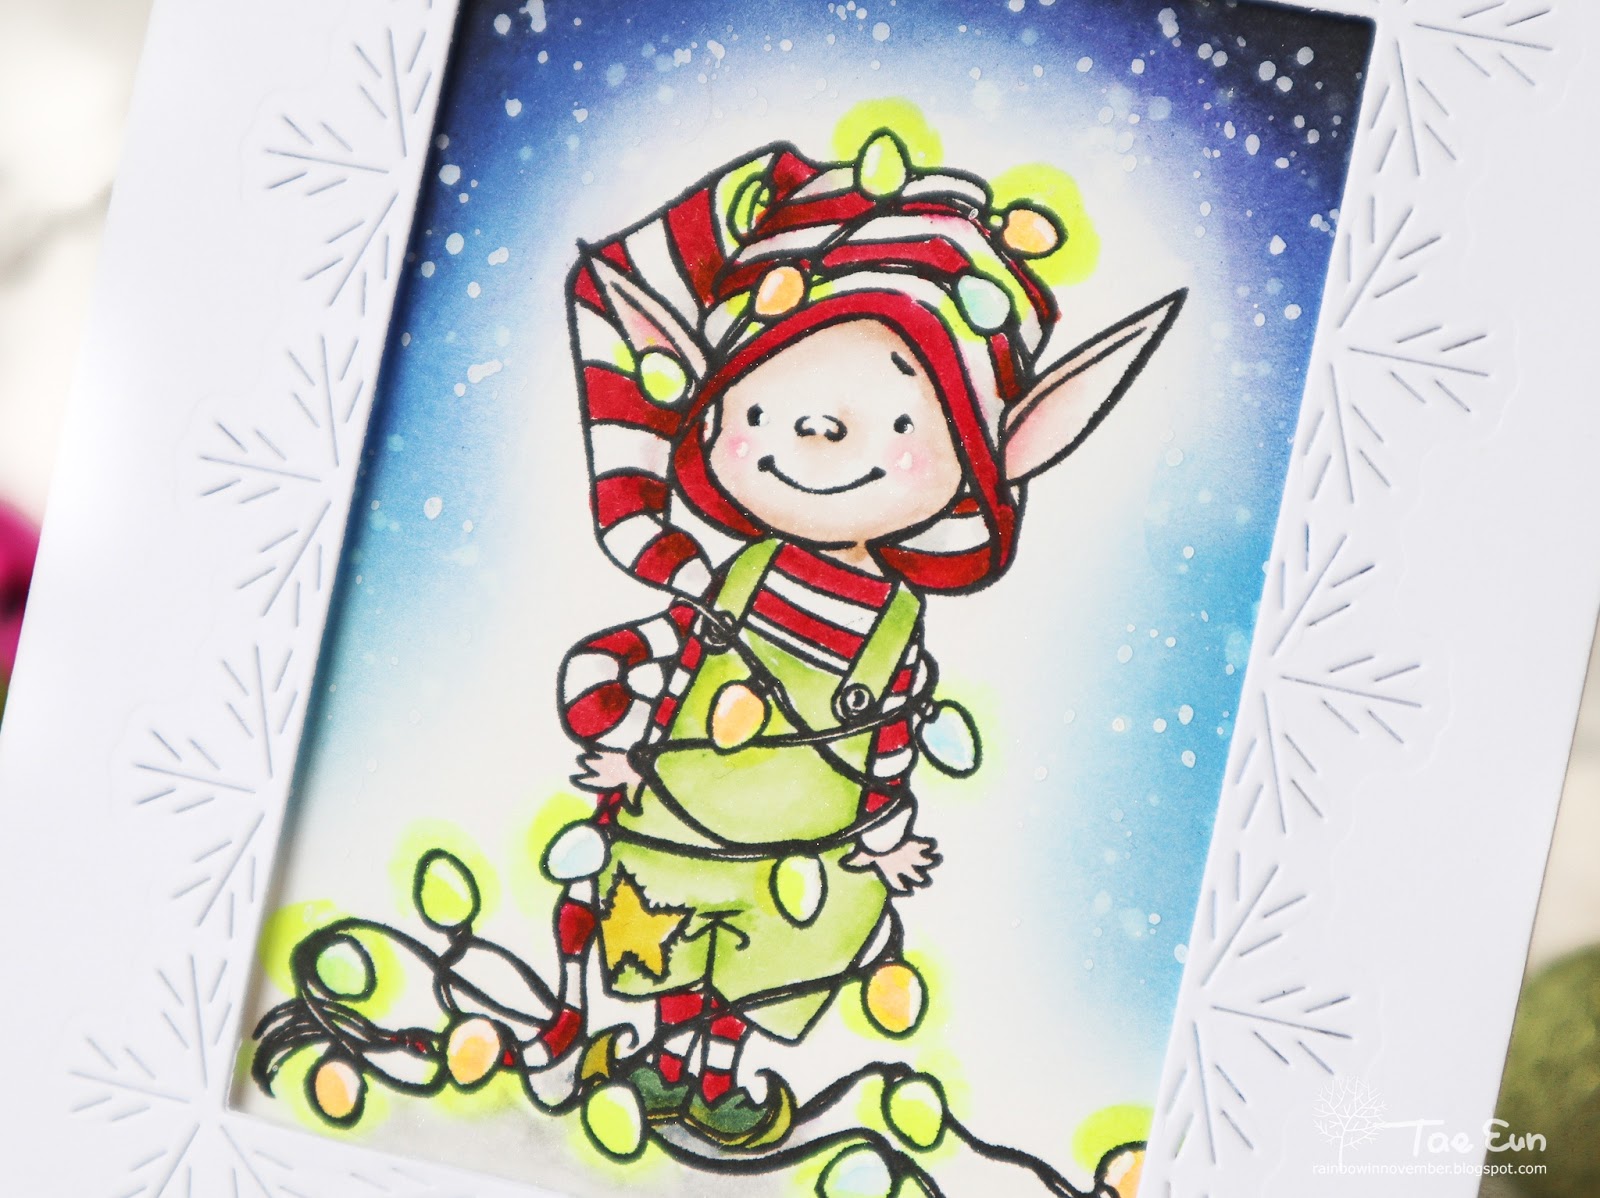
After done with coloring I ink blended around the elf in Salty Ocean, Blueprint Sketch, Faded Jeans, Wilted Violet and Black Soot Distress inks. On a Bristol Smooth paper it is so easy to blend the Distress inks.
I added splatters of clear water and white opaque ink to the background and let it dry.
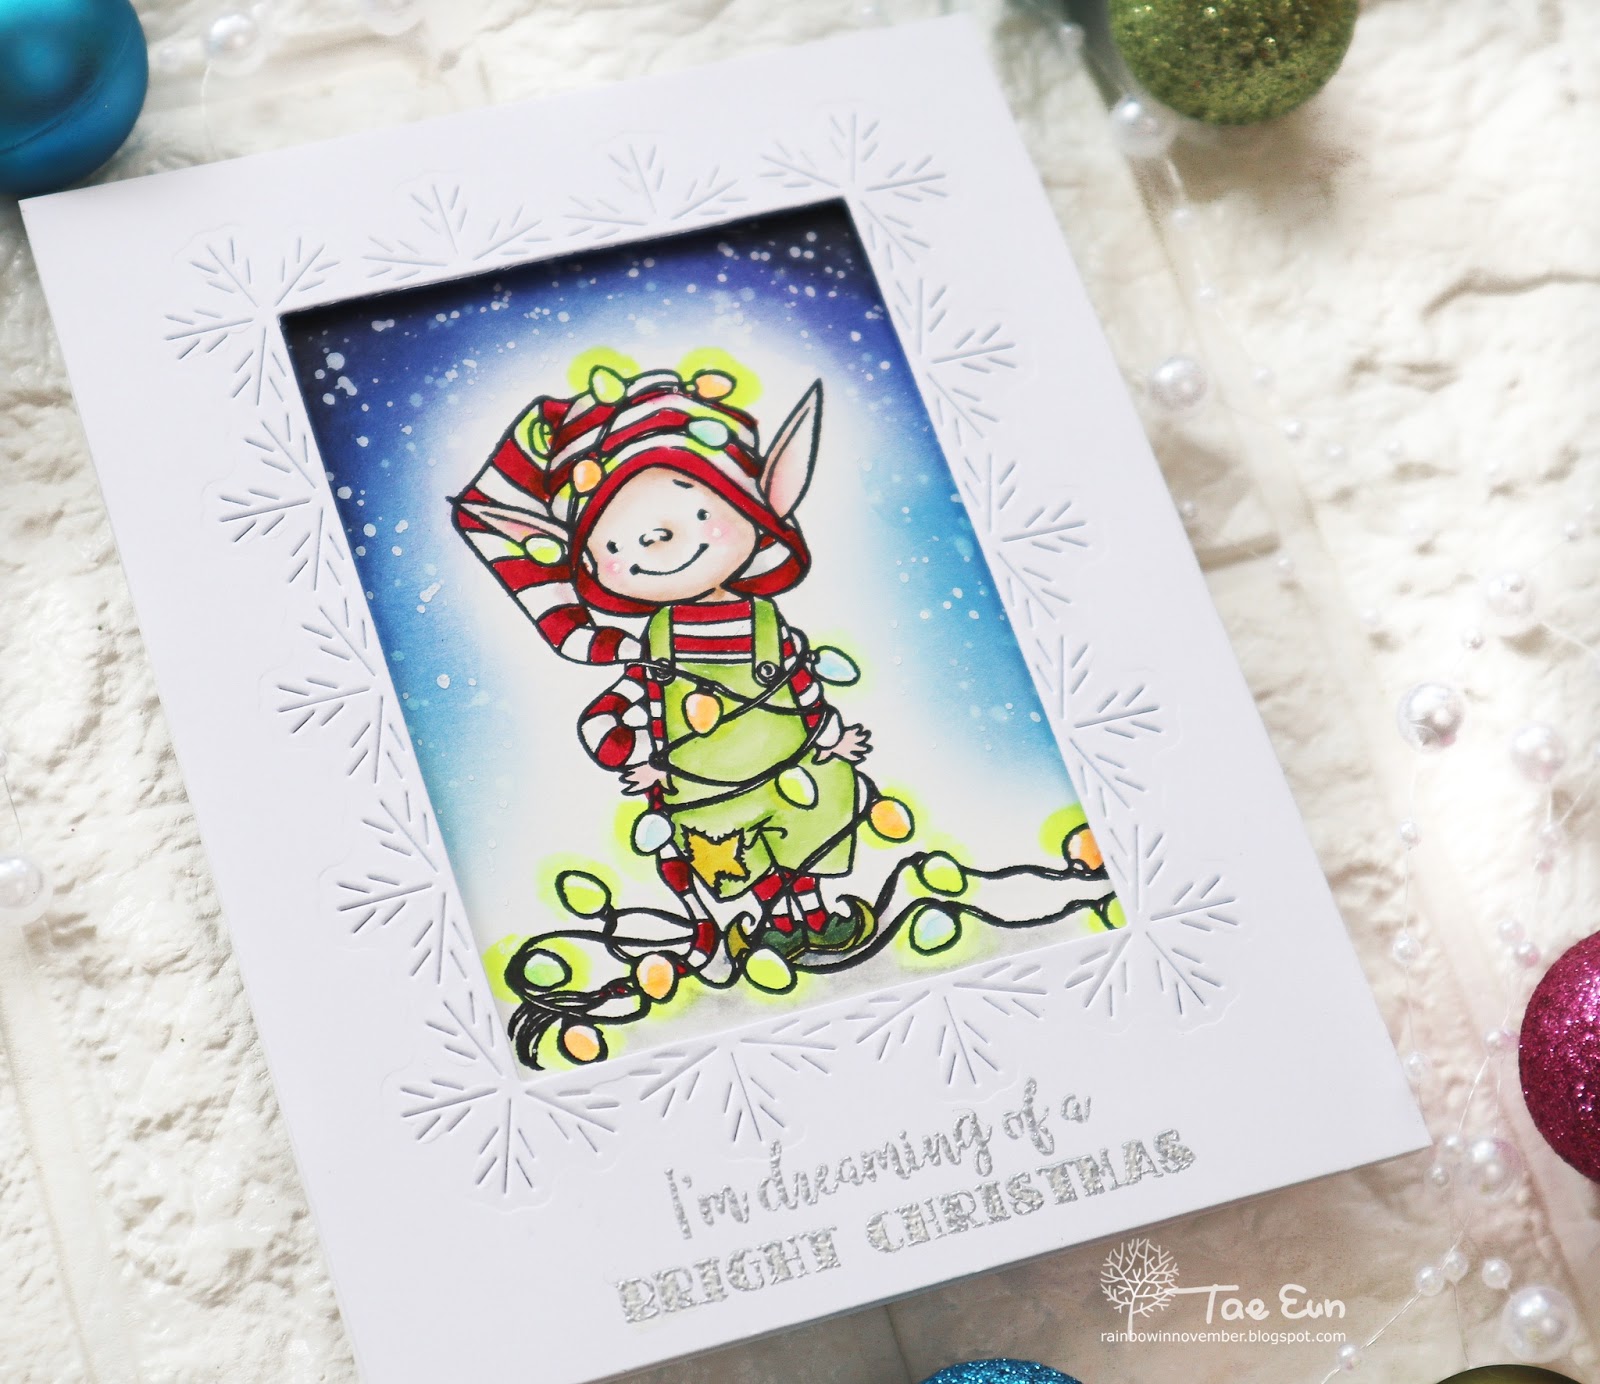
The front panel was cut using the Snowflake Frame die (51-565) from some white heavyweight cardstock. I silver heat embossed the sentiment from the Beaming (30-623) set on the bottom of the panel.

I adhered the panel with the elf on a white cardbase and foam mounted the front panel on it.
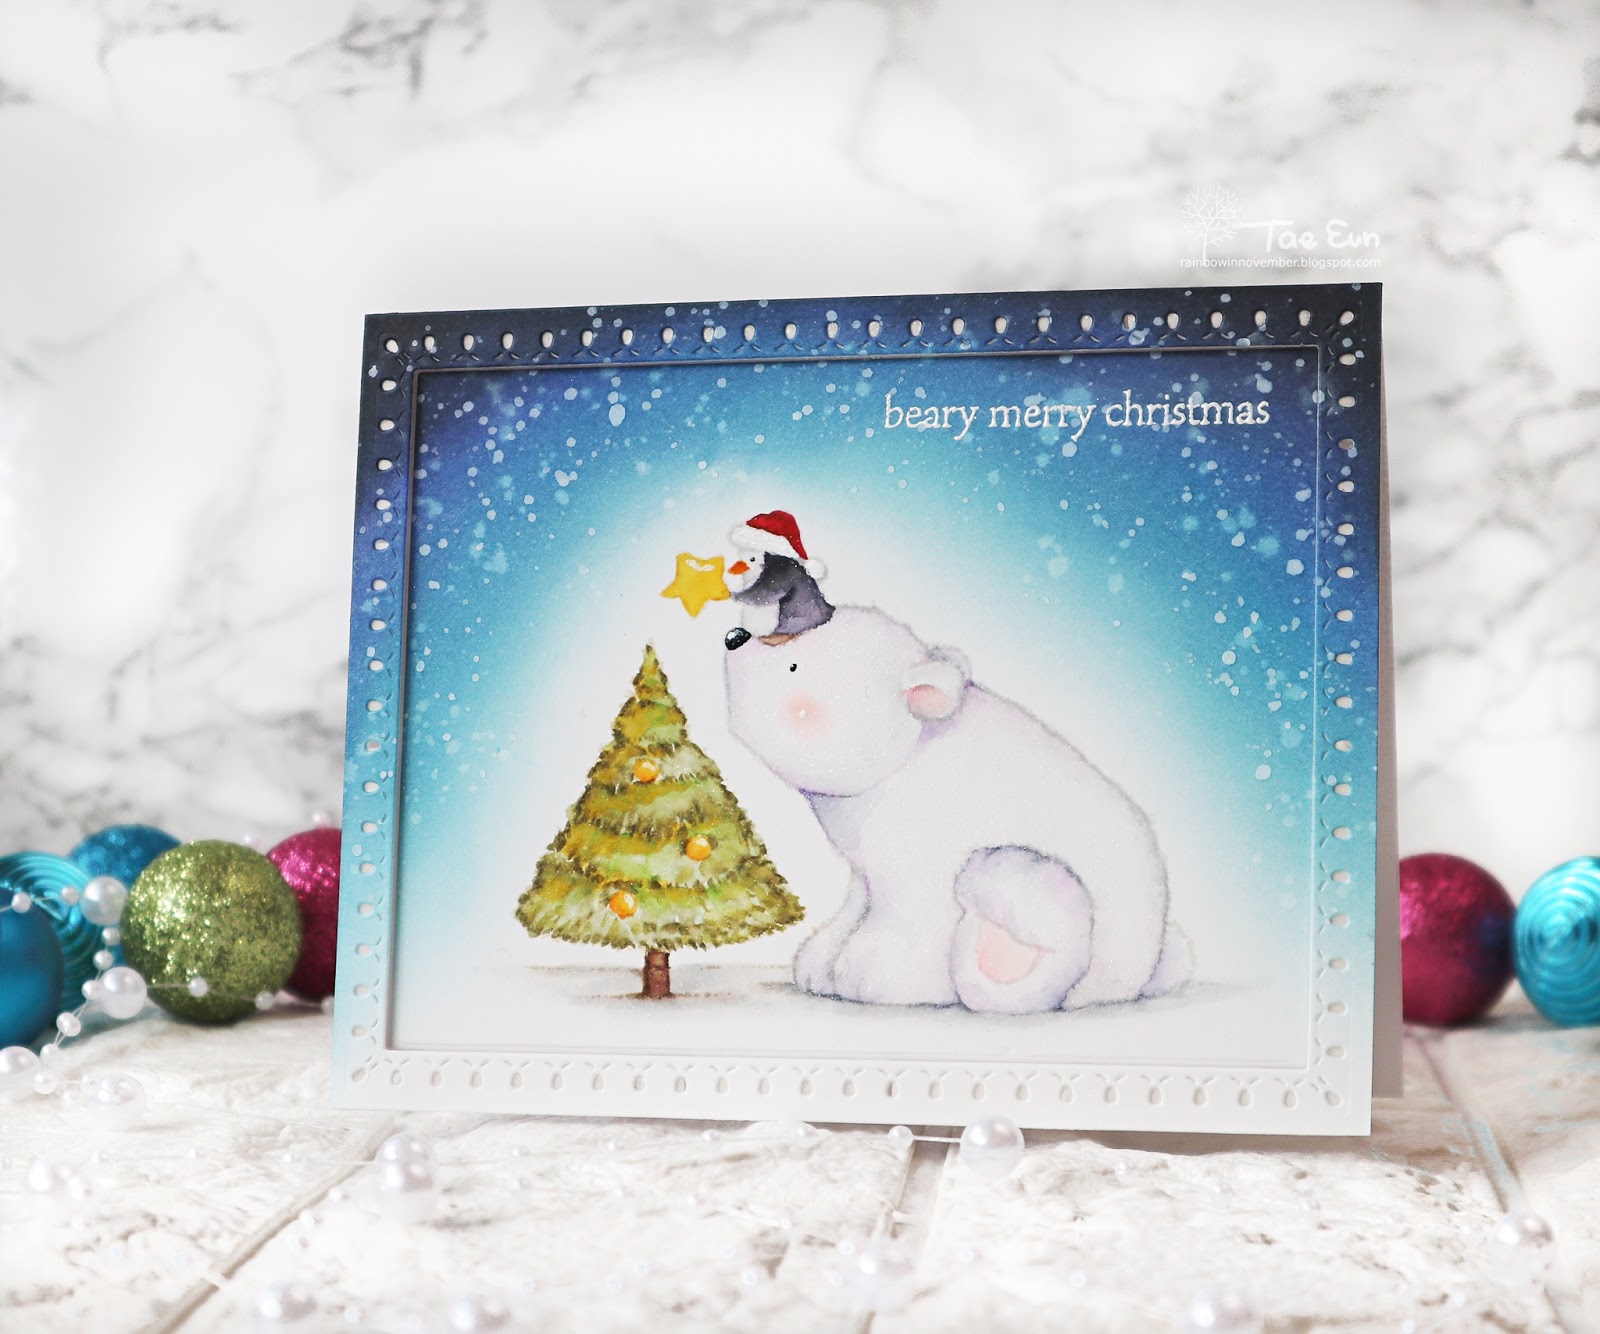
The last one is made using Team Work stamp set (30-612). One of my favorite stamp sets from this release. It is so cute!!!
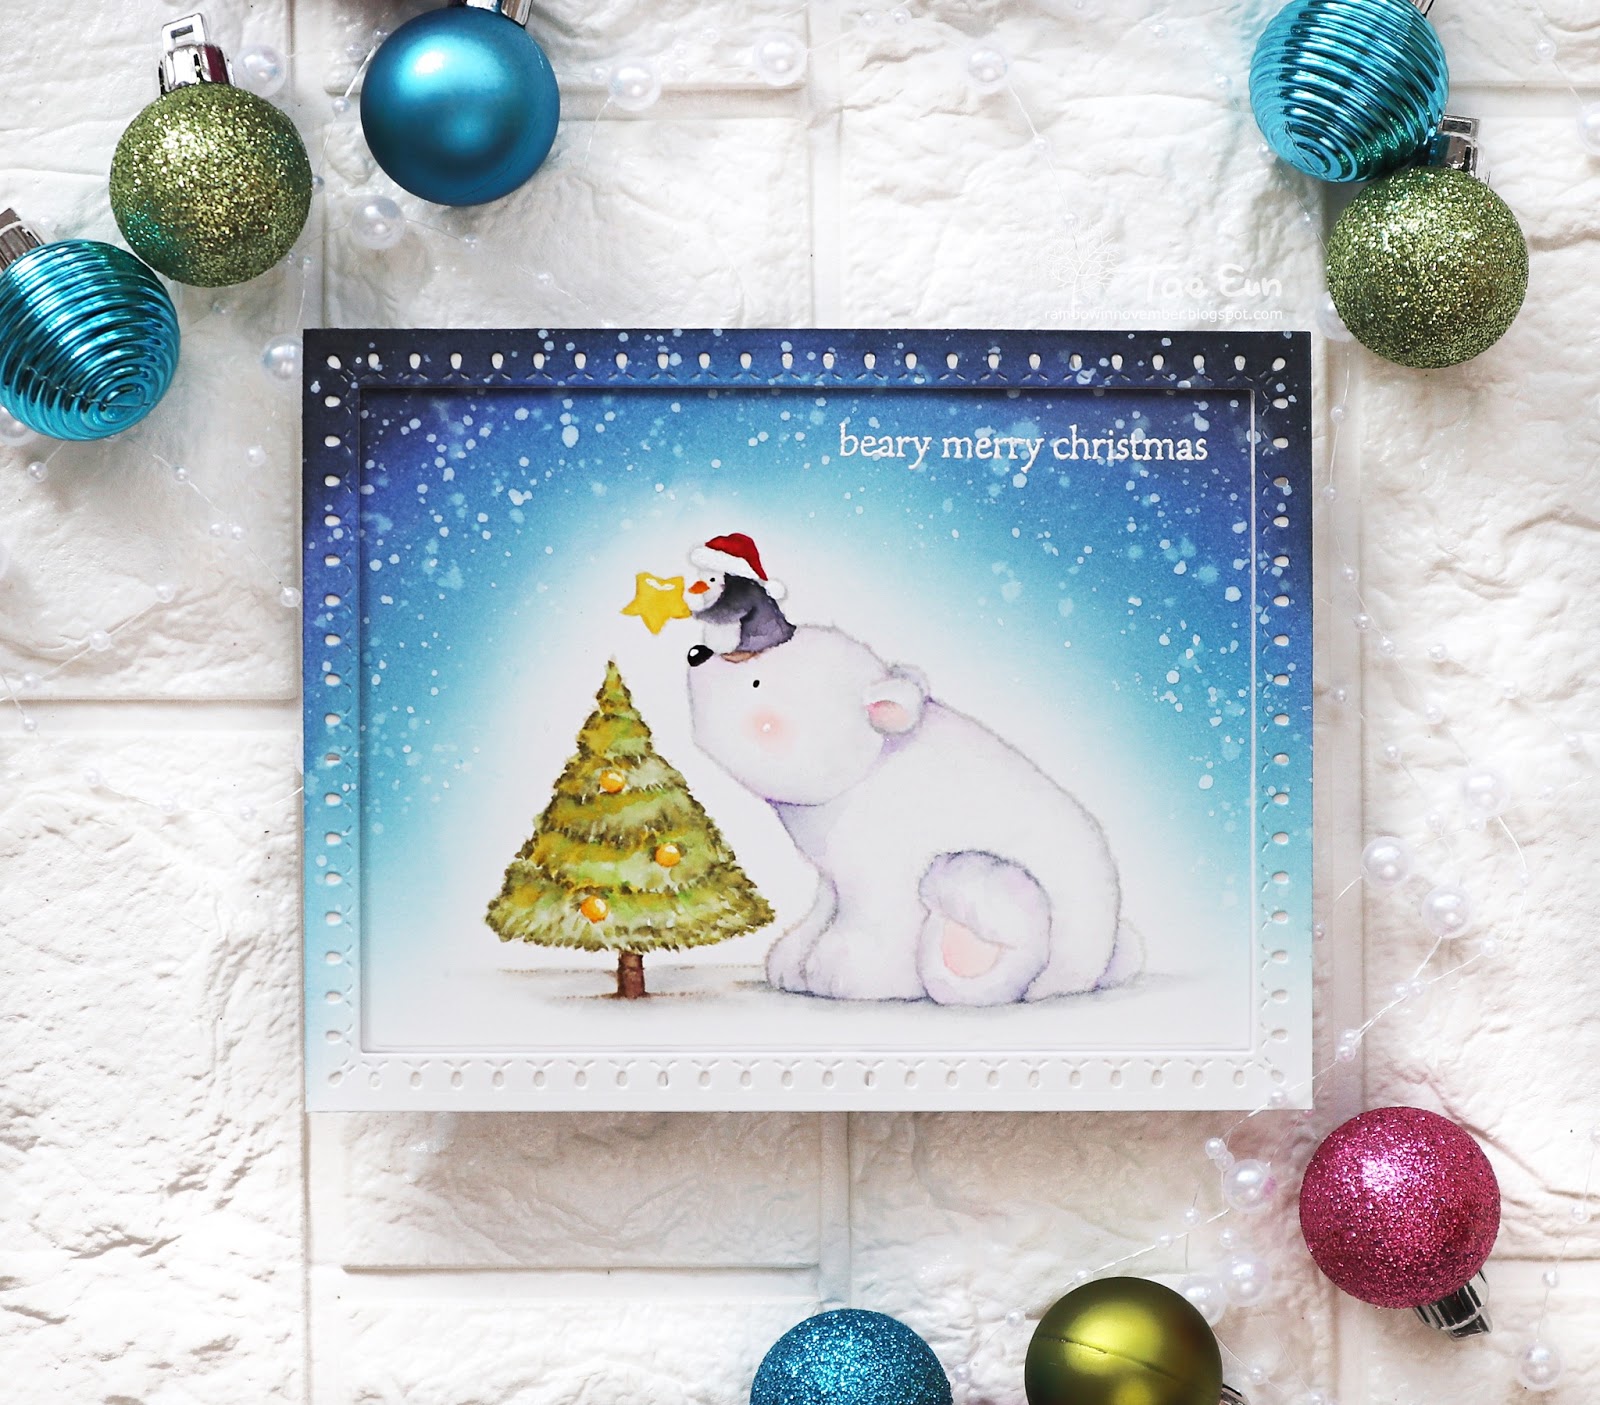
I wanted to do no-line coloring on this adorable image. I stamped the bear and penguin in light gray ink and the tree part in Antique Linen Distress ink on a Bristol Smooth paper panel. I had such a relaxing time coloring this! I used Zig brush markers here again.

I added a little bit of purple along with gray to color the bear and I really like how it turned out. I also covered the whole bear with clear glitter using a Wink of Stella pen. After the coloring was completed, I ink blended the background in the same colors which I used for the previous card.

I covered the image with a piece of scrap paper and added lots of white splatters to the background. It could have been an one layer card, if I stopped there, but I went further and made a frame out of the panel.
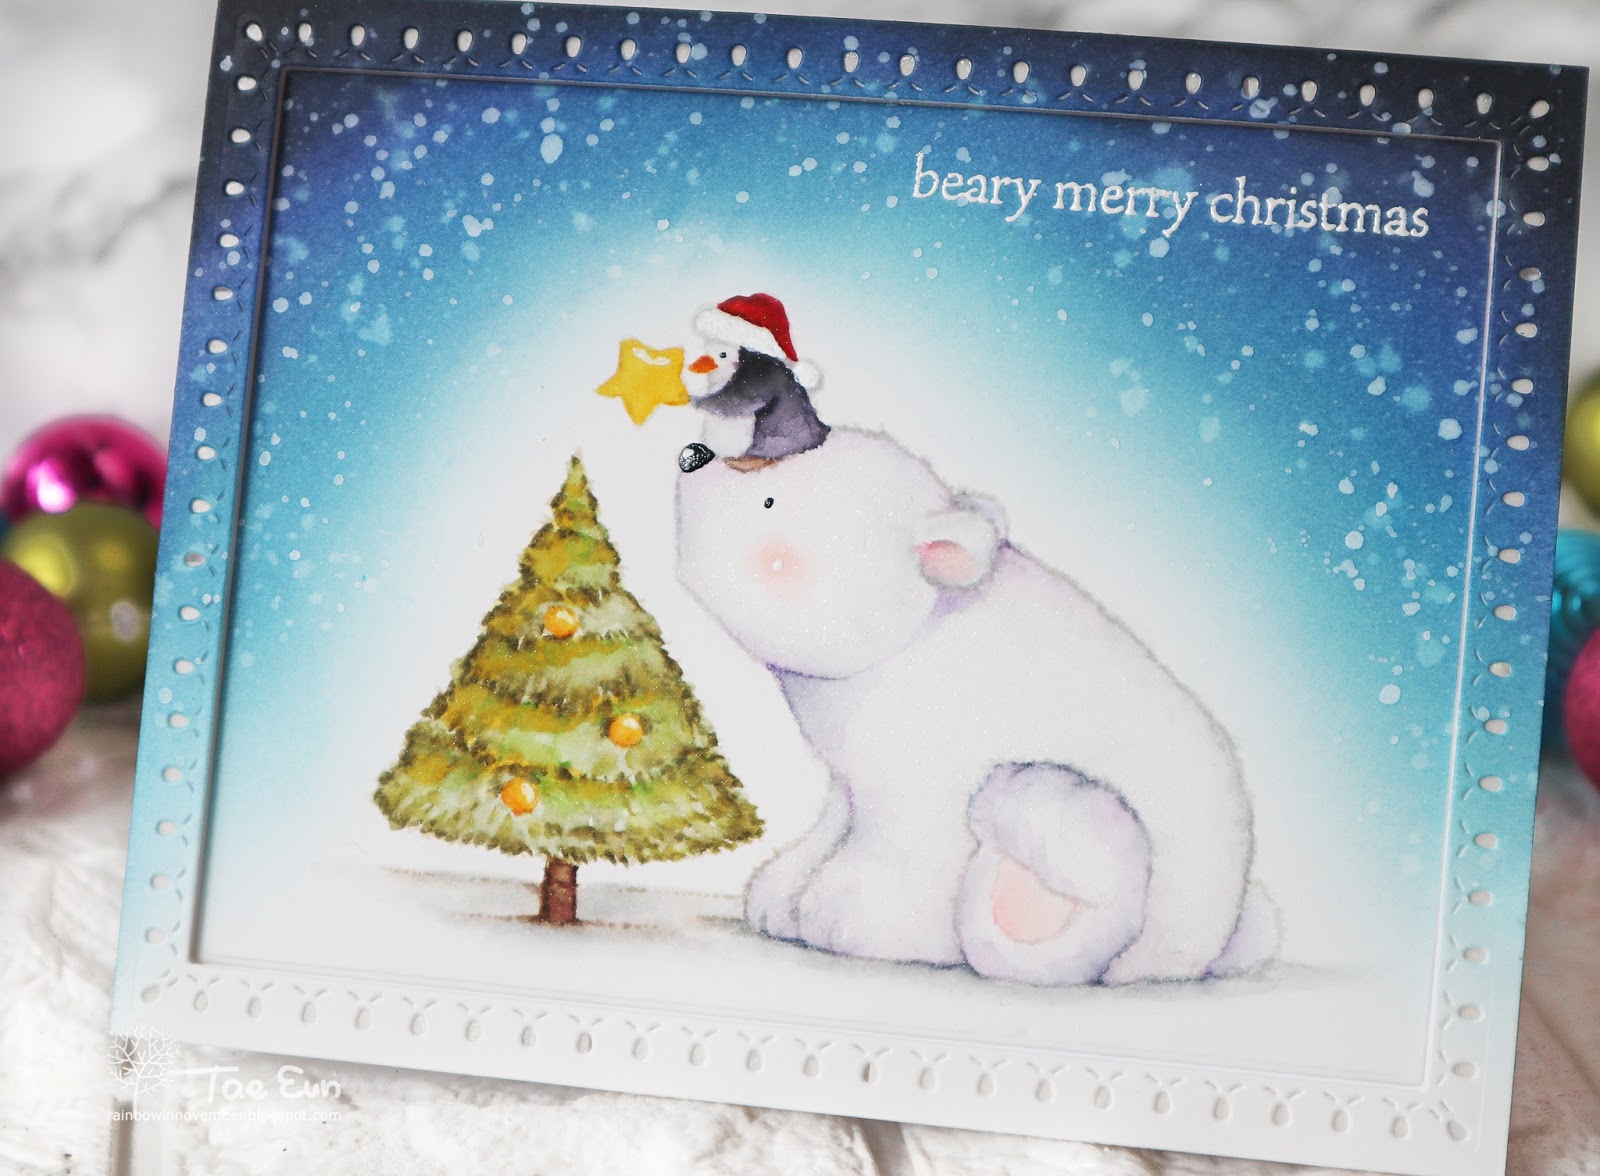
I used the largest die from Stitched Loops die set (51-573) to cut the panel. This die cut the loop pattern outside of the cut line so that I’ve got a frame with the pattern. I mounted the main part flat on a white cardbase and foam mounted the frame on it.
The sentiment from Team Work stamp set was white heat embossed directly on the colored panel. I added some white highlights here and there to finish off the card.
That’s it for today! I hope I could showcase the cute stamp sets from Merry and Joy release well!
Thank you so much for taking time to read my post!
Wishing you all a happy and crafty day!
Hugs,
TaeEun